background image


SPECIFICATIONS


8-3


1

2

3

4

5

6

7

8

9


Tail/brake light: 

LED

Front turn signal/position light: 

12 V, 27 W/8.0 W 


×


 2

Rear turn signal light: 

12 V, 21.0 W 


×


 2

License plate light: 

12 V, 5.0 W 


×


 1

Meter lighting: 

LED

High beam indicator light: 

LED

Turn signal indicator light: 

LED

Coolant temperature warning light: 

LED

Engine trouble warning light: 

LED


Fuses:


Main fuse: 

30.0 A

Headlight fuse: 

15.0 A

Taillight fuse: 

10.0 A

Signaling system fuse: 

10.0 A

Ignition fuse: 

10.0 A

Radiator fan fuse: 

10.0 A

Fuel injection system fuse: 

10.0 A

Auxiliary DC connector fuse: 

10.0 A

Backup fuse: 

10.0 A

Содержание MORPHOUS CP250V

Страница 1: ...1B7 28199 10 CP250V OWNER S MANUAL ...

Страница 2: ...EAU10041 ...

Страница 3: ...n inspection and basic maintenance of this scooter If you have nance of your scooter please consult a Yamaha dealer ter fully comply with the emissions standards for clean air applicable at the ndards without reducing the performance or economy of operation of the mportant that you and your Yamaha dealer pay close attention to the rec g instructions contained within this manual ...

Страница 4: ...CYCLE RIDING TIPS BOOKLET CAREFULLY S SCOOTER DO NOT ATTEMPT TO OPERATE THIS SCOOTER UN LEDGE OF ITS CONTROLS AND OPERATING FEATURES AND UNTIL OPER RIDING TECHNIQUES REGULAR INSPECTIONS AND CARE ING SKILLS WILL ENSURE THAT YOU SAFELY ENJOY THE CAPA OTER without notice Symbol means ATTENTION BECOME ALERT YOUR SAFETY IS WARNING instructions could result in severe injury or death to the a bystander o...

Страница 5: ...R LABEL HERE CP250V OWNER S MANUAL amaha Motor Corporation U S A 1st edition June 2005 All rights reserved printing or unauthorized use ut the written permission of ha Motor Corporation U S A s expressly prohibited Printed in Japan P N LIT 11626 19 48 ...

Страница 6: ...nd replacement parts 6 27 Front and rear brake lever free play 6 27 Adjusting the rear brake lock lever cable 6 28 Checking the front and rear brake pads 6 29 Checking the brake fluid level 6 29 Changing the brake fluid 6 30 Checking and lubricating the cables 6 31 Checking and lubricating the throttle grip and cable 6 31 Lubricating the front and rear brake levers 6 31 Checking and lubricating th...

Страница 7: ...TABLE OF CONTENTS ...

Страница 8: ...id riding in another motorist s blind spot Many accidents involve inexperi enced operators In fact many op erators who have been involved in accidents do not even have a cur rent driver s license Make sure that you are qualified and that you only lend your scooter to other qualified opera tors Know your skills and limits Staying within your limits may help you to avoid an accident We recommend tha...

Страница 9: ...d feet ssengers should also observe e above precautions cations ations made to this scooter not approved by Yamaha or the removal of original equipment may render the scooter unsafe for use and may cause severe personal injury Modifications may also make your scooter illegal to use Loading and accessories Adding accessories or cargo to your scooter can adversely affect stability and handling if th...

Страница 10: ...ight as possible and hould be kept to a minimum Bulky or large accessories may eriously affect the stability of he scooter due to aerodynamic effects Wind may attempt to lift the scooter or the scooter may become unstable in cross winds These accessories may also cause instability when passing or being passed by large vehicles Certain accessories can dis place the operator from his or her normal r...

Страница 11: ...cause the scooter could slide Apply the brakes slowly when stopping on a wet surface Slow down as you approach a cor ner or turn Once you have com pleted a turn accelerate slowly Be careful when passing parked cars A driver might not see you and open a door in your path Railroad crossings streetcar rails iron plates on road construction sites and manhole covers be come extremely slippery when wet ...

Страница 12: ...1 5 ...

Страница 13: ...SAFETY INFORMATION 1 6 1 EAU10381 ly before operating this vehicle 2 4 7 9 5 3 6 8 10 ...

Страница 14: ...1 7 4 3TB 24877 A0 LOAD LIMIT 3 kg 7 lbs 5 5FB 21668 01 WARNING Improper loading can cause loss of control Read owner s manual for proper loading 3JJ 28446 A1 6 ...

Страница 15: ...SAFETY INFORMATION 1 8 1 10 WARNING Improper loading can cause loss of control Read owner s manual for proper loading 3JJ 28446 A1 ...

Страница 16: ...2 1 EAU10410 11 7 8 9 10 5 6 4 9 V belt case air filter element page 6 21 10 Centerstand page 6 32 11 Sidestand page 3 15 6 32 ...

Страница 17: ...DESCRIPTION 2 2 2 3 4 5 6 7 8 9 EAU10420 4 5 7 6 ...

Страница 18: ...2 3 EAU10430 4 5 6 7 8 9 9 Storage compartment A page 3 12 ...

Страница 19: ...l the way to e left sh the key in from the OFF po on and then turn it to LOCK ile still pushing it move the key ock the steering he key in and then turn it to while still pushing it ARNING EWA10060 turn the key to OFF or K while the vehicle is moving ise the electrical systems will be switched off which may result in loss of control or an accident Make sure that the vehicle is stopped be fore turn...

Страница 20: ...n w seconds then go off have a a dealer check the electrical cir ON ECA10020 operate the engine if it is ated EAU11480 trouble warning light rning light comes on when an al circuit monitoring the engine tive When this occurs have a a dealer check the self diagno em ctrical circuit of the warning light checked by turning the key to the warning light does not come on for a few seconds then go off ha...

Страница 21: ... device a clock an oil change indicator a V belt replacement indicator NOTE Be sure to turn the key to ON be fore using the SELECT and RE SET buttons When the key is turned to ON all of the display segments of the multi function display will appear one after the other and then disap pear in order to test the electrical circuit To switch the speedometer and odometer tripmeter displays be tween mile...

Страница 22: ...anged back to F TRIP after pushing the RESET button Clock mode To set the clock 1 Push the SELECT button and RESET button together for at least two seconds 2 When the hour digits start flashing push the RESET button to set the hours 3 Push the SELECT button and the minute digits will start flashing 4 Push the RESET button to set the minutes 5 Push the SELECT button and then release it to start the...

Страница 23: ...make re that the engine stop switch is t to he indicator does not come on ve a Yamaha dealer check the ectrical circuit agnosis device odel is equipped with a self diag device for various electrical cir f those circuits are defective the multi function display will indicate a two digit error code e g 12 13 14 If the multi function display indicates such an error code note the code num ber and then...

Страница 24: ...00 Horn switch Press this switch to sound the horn EAU12660 Engine stop switch Set this switch to before starting the engine Set this switch to to stop the engine in case of an emergen cy such as when the vehicle overturns or when the throttle cable is stuck EAU12720 Start switch With the sidestand up push this switch while applying the front or rear brake to crank the engine with the starter CAUT...

Страница 25: ... is equipped with a rear brake lock lever to prevent the rear wheel from moving while stopped at traffic signals railroad crossings etc To lock the rear wheel Push the rear brake lock lever to the left until it snaps into place To unlock the rear wheel Push the rear brake lock lever back to the original position NOTE Be sure to check that the rear wheel does not move when the brake lever 1 1 Rear ...

Страница 26: ...to the lock and turn lockwise The lock will be re sed and the fuel tank cap can removed To install the fuel tank cap 1 Align the match marks insert the fuel tank cap into the tank opening and then push down on the cap 2 Turn the key counterclockwise to the original position and then re ng lever 2 1 1 Fuel tank cap 1 Match marks 1 1 ...

Страница 27: ...ON ECA11400 Use only unleaded gasoline The use of leaded gasoline will cause severe damage to internal engine parts such as the valves and piston rings as well as to the exhaust system Your Yamaha engine has been de signed to use regular unleaded gaso line with a pump octane number R M 2 of 86 or higher or a research octane number of 91 or higher If knocking or pinging occurs use a gasoline of a d...

Страница 28: ...fire hazard or amages e only unleaded gasoline e use of leaded gasoline will use unrepairable damage to catalytic converter ver park the vehicle near pos le fire hazards such as grass other materials that easily rn not allow the engine to idle long EAU13932 Seat To open the seat 1 Place the scooter on the center stand 2 Insert the key into the main switch and then turn it counterclockwise to OPEN ...

Страница 29: ...est can be adjusted to different positions shown the backrest as follows pen the seat See page 3 10 move the backrest bolts 3 Slide the backrest forward or back ward to the desired position 4 Install and securely tighten the backrest bolts 5 Close the seat backrest 1 1 Rider backrest 2 Bolt 1 2 2 ...

Страница 30: ...e the EAU38131 Storage compartments Storage compartment A To open the storage compartment when it is locked insert the key in the lock turn it counterclockwise and then slide the opening lever up To open the storage compartment when it is unlocked simply slide the opening lever up To lock the storage compartment push the lid into the original position insert the key in the lock turn it clockwise a...

Страница 31: ... turn on the storage rtment light Set the switch to off the storage compartment NOTE The storage compartment light will automatically turn off when the seat is closed even if the light switch is set to the position Do not leave your scooter unat tended with the seat open CAUTION ECA15280 Do not leave the seat open for an ex tended period of time with the stor age compartment light on otherwise the...

Страница 32: ...g can cause loss of control and possibly an accident or personal injury See page 6 24 for important loading and tire pressure information Always securely close the trunk before riding Do not exceed the load limit of 3 kg 7 lb for the trunk Do not exceed the maximum load of 190 kg 419 lb for the ve hicle To open the trunk 1 Insert the key into the lock and turn it clockwise ...

Страница 33: ...anation of tion circuit cut off system ARNING EWA10240 hicle must not be ridden with destand down or if the side cannot be properly moved up es not stay up otherwise the and could contact the ground stract the operator resulting possible loss of control a s ignition circuit cut off m has been designed to assist erator in fulfilling the respon of raising the sidestand be tarting off Therefore check...

Страница 34: ...L FUNCTIONS 3 16 ...

Страница 35: ...engine The sidestand switch may be defective The scooter should not be ridden until checked by a Yamaha dealer The brake switch may be defective The scooter should not be ridden until checked by a Yamaha dealer The sidestand switch may be defective The scooter should not be ridden until checked by a Yamaha dealer NOTE ...

Страница 36: ...osure to the elements Any damage fluid leakage or loss ces Therefore it is very important in addition to a thorough visual inspec e he vehicle is used Such an inspection can be accomplished in a very short worth the time involved EWA11150 ot working properly have it inspected and repaired before operating ...

Страница 37: ...to specified level em for leakage 6 20 ve Yamaha dealer bleed hydraulic system or wear ry reservoir ecommended brake fluid to specified level stem for leakage 6 27 6 29 ve Yamaha dealer bleed hydraulic system or wear ry reservoir ecommended brake fluid to specified level stem for leakage 6 27 6 29 ration is smooth ay Yamaha dealer adjust cable free play and lubricate cable 6 24 6 31 ...

Страница 38: ...epth 6 24 6 26 ation is smooth ing points if necessary 6 31 ation is smooth ecessary 6 32 uts bolts and screws are properly tightened gnition circuit cut off system e have Yamaha dealer check vehicle 3 15 CHECKS PAGE ...

Страница 39: ... the procedure scribed on page 3 16 ver ride with the sidestand wn rn the key to ON and make re that the engine stop switch is t to ose the throttle completely art the engine by pushing the art switch while applying the front rear brake ngine does not start release the start switch wait a few seconds and then try again Each starting attempt should be as short as possible to pre serve the battery D...

Страница 40: ... by opening sing the throttle To increase the urn the throttle grip in direction educe the speed turn the throt n direction b EAU16791 Braking 1 Close the throttle completely 2 Apply both front and rear brakes simultaneously while gradually in creasing the pressure Front a b ...

Страница 41: ...and new do not put an excessive load on it for the first 1600 km 1000 mi The various parts in the engine wear and polish themselves to the correct operating clearances During this period prolonged full throt tle operation or any condition that might result in engine overheating must be avoided EAU38320 0 1000 km 0 600 mi Avoid prolonged operation above 4000 r min 1000 1600 km 600 1000 mi Avoid pro...

Страница 42: ...n ARNING EWA10310 ce the engine and exhaust stem can become very hot k in a place where pedestri s or children are not likely to ch them not park on a slope or on soft ound otherwise the vehicle y overturn ON ECA10380 park in an area where there hazards such as grass or ammable materials ...

Страница 43: ...ECIALLY IMPORTANT ARE THE MAINTE NANCE SERVICES RELATED TO EMISSIONS CONTROL THESE CONTROLS NOT ONLY FUNCTION TO ENSURE CLEANER AIR BUT ARE ALSO VITAL TO PROPER EN GINE OPERATION AND MAXIMUM PERFORMANCE IN THE FOLLOW ING PERIODIC MAINTENANCE CHARTS THE SERVICES RELATED TO EMISSIONS CONTROL ARE GROUPED SEPARATELY THESE SERVICES REQUIRE SPECIALIZED DATA KNOWLEDGE AND EQUIP MENT YAMAHA DEALERS ARE TR...

Страница 44: ...ND MINOR REPAIR 6 2 ARNING EWA10340 ations not approved by a may cause loss of perfor excessive emissions and the vehicle unsafe for use t a Yamaha dealer before at ng any changes ...

Страница 45: ...ealer perform the service INITIAL ODOMETER READINGS 600 mi 1000 km or 1 month 4000 mi 6000 km or 6 months 7000 mi 11000 km or 12 months 10000 mi 16000 km or 18 months 13000 mi 21000 km or 24 months 16000 mi 26000 km or 30 months acks or mi hs Replace clear ld Every 26600 mi 42000 km r d or dam ve r dam parts ...

Страница 46: ... ODOMETER READINGS 600 mi 1000 km or 1 month 4000 mi 6000 km or 6 months 7000 mi 11000 km or 12 months 10000 mi 16000 km or 18 months 13000 mi 21000 km or 24 months 16000 mi 26000 km or 30 months mage vel eces vel eces age Every 4 years mage or ...

Страница 47: ...th e Every 12000 mi 19000 km and ed ase ed ase place if r oil r oil INITIAL ODOMETER READINGS 600 mi 1000 km or 1 month 4000 mi 6000 km or 6 months 7000 mi 11000 km or 12 months 10000 mi 16000 km or 18 months 13000 mi 21000 km or 24 months 16000 mi 26000 km or 30 months ...

Страница 48: ...ry 3125 mi 5000 km cle for Every 3125 mi 5000 km Every 12500 mi 20000 km vehi Every 3 years kage When the V belt replacement indicator flashes every 12500 mi 20000 km e play free p INITIAL ODOMETER READINGS 600 mi 1000 km or 1 month 4000 mi 6000 km or 6 months 7000 mi 11000 km or 12 months 10000 mi 16000 km or 18 months 13000 mi 21000 km or 24 months 16000 mi 26000 km or 30 months ...

Страница 49: ...7 8 9 EAU38260 uent service if you are riding in unusually wet or dusty areas ders and calipers always change the fluid Regularly check the brake fluid ponents of the brake master cylinders and calipers and change the brake and if cracked or damaged ...

Страница 50: ...D MINOR REPAIR 6 8 EAU38191 Cowling A To remove the cowling 1 Remove the bolts 2 Slide the cowling slightly forward and then pull it upward as shown ng C ng D ng E ng F ng G ng H ng I 3 2 4 2 3 1 Bolt 1 ...

Страница 51: ...the cowling slightly ward as shown and then pull it To install the cowling 1 Place the cowling in the original position and then push the front of the cowling downward 2 Install the windshield by installing the screws Cowlings F and H To remove one of the cowlings 1 Remove the corresponding floor board mat w shield 1 2 1 Cowling B 1 ...

Страница 52: ... REPAIR 6 10 l the cowling down slightly and n pull it outward as shown To install the cowling 1 Insert the tabs on the cowling into the slots as shown fastener fastener 1 2 1 2 3 2 1 Cowling F 1 Cowling H 1 1 ...

Страница 53: ...and bolts ll the cowling outward and then de it forward as shown To install the cowling 1 Place the cowling in the original position and then install the screws and bolts 2 Install cowling F Cowling E To remove the cowling Remove the screws and the quick fas teners and then pull the cowling off w ng C 3 2 3 ...

Страница 54: ...lightly forward d then pull it outward as shown To install the cowling 1 Place the cowling in the original position and then install the screws and the quick fasteners fastener fastener 1 2 2 2 1 3 1 Cowling D 2 Tab 1 Cowling G 2 Tab 1 2 2 1 2 2 ...

Страница 55: ... the periodic mainte and lubrication chart In addition ndition of the spark plug can re e condition of the engine move the spark plug move storage compartment B ee page 6 21 ll back the storage compart ent mat as shown 3 Remove the bolts and then pull storage compartment C out 4 Remove the spark plug cap 5 Remove the spark plug as shown with the spark plug wrench includ ge compartment mat 1 1 Bolt...

Страница 56: ...e spark plug wrench and then tight en it to the specified torque NOTE If a torque wrench is not available when installing a spark plug a good estimate of the correct torque is 1 4 1 2 turn past finger tight However the spark plug should be tightened to the speci fied torque as soon as possible 4 Install the spark plug cap NOTE Make sure the spark plug wire is fas tened in the clamp as shown fied s...

Страница 57: ...fore each ride In addition the oil must be changed and the oil filter ele ment replaced at the intervals specified in the periodic maintenance and lubri cation chart and when the oil change in dicator comes on To check the engine oil level 1 Place the vehicle on the center stand NOTE Make sure that the vehicle is positioned straight up when checking the oil level A slight tilt to the side can resu...

Страница 58: ... oil filler cap with the spark plug wrench 8 Install the engine oil filler cap cover by placing it in its original position 9 Place the floorboard mat in the original position To change the engine oil with or without oil filter element replace ment 1 Start the engine warm it up for several minutes and then turn it off 2 Place an oil pan under the engine to collect the used oil 3 Remove the engine ...

Страница 59: ...l filter element cover the compression spring will fall out Take care not to lose the compression spring 7 Install the compression spring and oil filter element cover by installing the bolts then tightening them to the specified torque er element cover 2 1 3 1 Oil filter element cover 2 O ring 3 Compression spring 4 Oil filter element 1 2 3 4 ...

Страница 60: ... at least three seconds 3 Release the OIL CHANGE but ton and the oil change indicator will go off NOTE If the engine oil is changed before the oil change indicator comes on i e be fore the periodic oil change interval has been reached the indicator must be reset after the oil change for the next periodic oil change to be indicated at the correct time To reset the oil change indicator before the pe...

Страница 61: ...he scooter on the center and ace an oil pan under the final nsmission case to collect the ed oil move the oil filler cap and drain lt to drain the oil from the final nsmission case 5 Install the final transmission oil drain bolt and then tighten it to the specified torque 6 Add the specified amount of the recommended final transmission oil and then install and tighten the oil filler cap 1 Final tr...

Страница 62: ...ce the level ies with engine temperature ke sure that the vehicle is posi ned straight up when checking coolant level A slight tilt to the e can result in a false reading eck the coolant level in the cool reservoir olant should be between the m and maximum level marks 3 If the coolant is at or below the minimum level mark remove cowl ing A See page 6 8 remove the reservoir cap add coolant to the m...

Страница 63: ...erature in the radia he engine overheats see page 42 for further instructions EAU38111 Air filter element and check hoses and V belt case air filter element The air filter element and the V belt case air filter element should be ser viced at the intervals specified in the periodic maintenance and lubrication chart Service all air filter elements more frequently if you are riding in un usually wet ...

Страница 64: ...e nt is properly seated in the filter case e engine should never be op ted without the air filter ele ment installed otherwise the piston s and or cylinder s may become excessively worn To clean the air filter check hoses 1 Remove cowling D See page 6 8 2 Check the hoses at the bottom of the air filter case for accumulated dirt or water 3 If dirt or water is visible remove the hose clean it and th...

Страница 65: ...air as shown eck the V belt case air filter ele ent for damage and replace it if necessary 6 Install the V belt case air filter ele ment by installing the screws 7 Install the V belt air filter case cov er by installing the screws CAUTION ECA12940 Make sure that the V belt filter ele ment is properly seated in its case 8 Install the cowling w t case air filter element 2 1 ...

Страница 66: ...d safe operation of your vehicle note the following points regarding the specified tires Tire air pressure The tire air pressure should be checked and if necessary adjusted before each ride WARNING EWA10500 The tire air pressure must be checked and adjusted on cold tires i e when the temperature of the tires equals the ambient temperature The tire air pressure must be ad justed in accordance with ...

Страница 67: ...have a Yamaha dealer replace the tire immediately NOTE The tire tread depth limits may differ from country to country Always comply with the local regulations Tire information This model is equipped with tubeless tires WARNING EWA10590 Operating the scooter with exces sively worn tires decrease riding stability and can lead to loss of con trol Have excessively worn tires re placed by a Yamaha deal...

Страница 68: ...ed e wheel should be balanced enever either the tire or wheel s been changed or replaced An balanced wheel can result in or performance adverse han g characteristics and a short ed tire life e at moderate speeds after anging a tire since the tire sur e must first be broken in for it develop its optimal characteris er repairing or replacing the rear tighten the valve stem nut and knut to the specif...

Страница 69: ...ND MINOR REPAIR 6 27 2 3 4 5 6 7 8 9 pproved by Yamaha EAU33453 Front and rear brake lever free play Front Rear There should be no free play at the brake lever ends If there is free play have a Yamaha dealer inspect the ...

Страница 70: ...ically check brake lock lever cable length necessary adjust it as follows move cowling G See ge 6 8 increase the rear brake lock le ver cable length turn the adjusting nut at the rear brake caliper in di rection a To decrease the rear brake lock lever cable length turn the adjusting nut in direction b WARNING EWA10650 If proper adjustment cannot be ob tained as described have a Yamaha dealer make ...

Страница 71: ...er replace ke pads as a set EAU34210 rake pads a Yamaha dealer check each ake pad for damage and mea e lining thickness and if neces eplace them as a set EAU22580 Checking the brake fluid level Front brake Rear brake Insufficient brake fluid may allow air to 1 Minimum level mark 1 Minimum level mark 1 1 ...

Страница 72: ...r if the ke fluid level goes down sud nly have a Yamaha dealer eck the cause EAU22730 Changing the brake fluid Have a Yamaha dealer change the brake fluid at the intervals specified in the NOTE after the periodic mainte nance and lubrication chart In addition have the oil seals of the master cylin ders and calipers as well as the brake hoses replaced at the intervals listed below or whenever they ...

Страница 73: ...ride In addi e cable should be lubricated at ervals specified in the periodic nance chart EAU23170 Lubricating the front and rear brake levers The pivoting points of the front and rear brake levers must be lubricated at the intervals specified in the periodic main tenance and lubrication chart Recommended lubricant Lithium soap based grease all pur pose grease ...

Страница 74: ...ion chart To check the condition WARNING EWA10750 Securely support the vehicle so that there is no danger of it falling over Check the inner tubes for scratches damage and excessive oil leakage To check the operation 1 Place the vehicle on a level sur face and hold it in an upright posi tion 2 While applying the front brake push down hard on the handlebars several times to check if the front fork ...

Страница 75: ...d as fol the intervals specified in the pe maintenance and lubrication ace a stand under the engine to se the front wheel off the ound ARNING EWA10750 ely support the vehicle so that s no danger of it falling over ld the lower ends of the front k legs and try to move them for rd and backward If any free ay can be felt have a Yamaha aler check or repair the steering ...

Страница 76: ...D EXTERNAL Flush with plenty of water INTERNAL Drink large quan tities of water or milk and im mediately call a physician EYES Flush with water for 15 minutes and seek prompt medical attention Batteries produce explosive hy drogen gas Therefore keep sparks flames cigarettes etc away from the battery and pro vide sufficient ventilation when charging it in an enclosed space KEEP THIS AND ALL BATTER ...

Страница 77: ...he fuse box which contains the fuses for the individual cir cuits are located behind cowling A See page 6 8 If a fuse is blown replace it as follows 1 Turn the key to OFF and turn off the electrical circuit in question 2 Remove the blown fuse and then install a new fuse of the specified amperage 1 Fuse box 2 Main fuse 1 2 ...

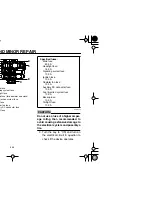
Страница 78: ...circuit in question to check if the device operates n fuse ing system fuse ght fuse p fuse for odometer and clock njection system fuse fuse tor fan fuse ary DC connector fuse ht fuse 4 5 8 9 Specified fuses Main fuse 30 0 A Headlight fuse 15 0 A Signaling system fuse 10 0 A Ignition fuse 10 0 A Radiator fan fuse 10 0 A Auxiliary DC connector fuse 10 0 A Fuel injection system fuse 10 0 A Backup fus...

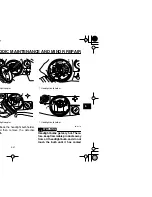
Страница 79: ... holder d then remove the defective lb WARNING EWA10790 Headlight bulbs get very hot There fore keep flammable products away from a lit headlight bulb and do not touch the bulb until it has cooled light coupler light coupler 1 1 1 Headlight bulb holder 1 Headlight bulb holder 1 1 ...

Страница 80: ...eadlight tall the headlight bulb cover by ning it clockwise tall the cowling ve a Yamaha dealer adjust the adlight beam if necessary EAU24180 Tail brake light This model is equipped with an LED type of tail brake light If the tail brake light does not come on have a Yamaha dealer check it ...

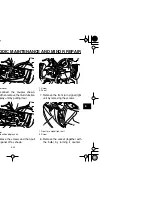
Страница 81: ... play unit by pulling it out move the screws and then pull e panel off as shown 7 Remove the front turn signal light unit by removing the screws 8 Remove the socket together with the bulb by turning it counter er cover ler function display unit 1 2 1 Screw 2 Panel 1 Front turn signal light unit 2 Screw 1 1 2 1 2 2 ...

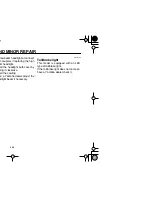
Страница 82: ...ooter on the center stand 2 Remove cowling D for replacing the left turn signal light bulb or cowling G for replacing the right turn signal light bulb See page 6 8 3 Remove the socket together with the turn signal light bulb by turning it counterclockwise 4 Remove the defective bulb by pushing it in and turning it counter clockwise 5 Insert a new bulb into the socket 1 Turn signal light bulb socke...

Страница 83: ...n or ignition systems for example can cause poor starting and loss of power The following troubleshooting charts represent quick and easy procedures for checking these vital systems your self However should your scooter re quire any repair take it to a Yamaha dealer whose skilled technicians have the necessary tools experience and know how to service the scooter prop erly Use only genuine Yamaha r...

Страница 84: ...ition Have a Yamaha dealer check the vehicle ry cloth and correct the or replace the spark plug dealer check the vehicle The engine does not start Have a Yamaha dealer check the vehicle The engine does not start Check the battery The battery is good Check the battery lead connections and charge the battery if necessary Open the throttle halfway and operate the electric starter ...

Страница 85: ... residual pressure to escape When the hissing ap while turning it counterclockwise and then remove the cap arily used instead provided that it is changed to the recommended coolant The coolant level is OK The coolant level is low Check the cooling system for leakage Have a Yamaha dealer check and repair the cooling system Add coolant See NOTE Start the engine If the engine overheats again have a Y...

Страница 86: ...have been in ntact with strong or abrasive aning products solvent or thinner fuel gasoline rust re movers or inhibitors brake flu id antifreeze or electrolyte Do not use high pressure wash ers or steam jet cleaners since they cause water seepage and deterioration in the following ar eas seals of wheel and swing arm bearings fork and brakes electric components couplers connectors instruments switch...

Страница 87: ...e any remaining dirt uch up minor paint damage used by stones etc ax all painted surfaces t the scooter dry completely be e storing or covering it WARNING EWA10940 Make sure that there is no oil or wax on the brakes or tires If necessary clean the brake discs and brake linings with a regular brake disc cleaner or ac etone and wash the tires with warm water and a mild deter gent Before operating th...

Страница 88: ...fuel from deteriorating 3 Perform the following steps to pro tect the cylinder piston rings etc from corrosion a Remove the spark plug cap and spark plug b Pour a teaspoonful of engine oil into the spark plug bore c Install the spark plug cap onto the spark plug and then place the spark plug on the cylinder head so that the electrodes are grounded This will limit spark ing during the next step d T...

Страница 89: ...SCOOTER CARE AND STORAGE 7 4 2 3 4 5 6 7 8 9 ...

Страница 90: ...ated paper element Fuel Recommended fuel Unleaded gasoline only Fuel tank capacity 14 0 L 3 70 US gal 3 08 Imp gal Fuel injection Manufacturer AISAN Model quantity 1100 87C70 A 1 Spark plug s Manufacturer model NGK CPR7EA 9 Spark plug gap 0 8 0 9 mm 0 031 0 035 in Clutch Clutch type Dry centrifugal automatic Transmission Primary reduction system Helical gear Primary reduction ratio 36 14 2 571 Sec...

Страница 91: ...ended fluid T 4 Front suspension Type Telescopic fork Spring shock absorber type Coil spring oil damper Wheel travel 100 0 mm 3 94 in Rear suspension Type Unit swing Spring shock absorber type Coil spring oil damper Wheel travel 75 0 mm 2 95 in Electrical system Ignition system Transistorized coil ignition digital Charging system AC magneto Battery Model YTZ10S Voltage capacity 12 V 8 6 Ah Headlig...

Страница 92: ...8 3 ry DC connector fuse A p fuse A ...

Страница 93: ... provided and use eference when ordering a new EAU26410 Vehicle identification number The vehicle identification number is stamped into the frame NOTE The vehicle identification number is used to identify your vehicle and may be used to register it with the licensing authority in your area dentification number 1 Vehicle identification number 1 ...

Страница 94: ...9 2 ...

Страница 95: ...dition to notifying Yamaha Motor Corporation ay open an investigation and if it finds that a safety defect exists in a group mpaign However NHTSA cannot become involved in individual problems poration U S A afety Hotline toll free at 1 800 424 9393 or 366 0123 in Washington D C nsportation Washington D C 20590 You can also obtain other information ...

Страница 96: ...corporated into any new ve e or delivery to the ultimate purchaser or while it is in use or 2 the use of has been removed or rendered inoperative by any person TITUTE TAMPERING ARE THE ACTS LISTED BELOW ystems i e modification removal etc haust system Muffler Exhaust pipe Silencer ake system Air cleaner case Air cleaner element Intake duct ...

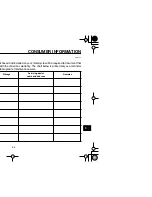
Страница 97: ...9 EAU26611 rchased and installed on your motorcycle will be required to document that with the emissions warranty The chart below is printed only as a reminder table proof of maintenance work Mileage Servicing dealer name and address Remarks ...

Страница 98: ...9 6 Mileage Servicing dealer name and address Remarks ...

Страница 99: ...CONSUMER INFORMATION 9 7 2 3 4 5 6 7 8 9 EAU26661 S A STREET AND ENDURO MOTORCYCLE LIMITED ...

Страница 100: ...9 8 ...

Страница 101: ...towing phone calls even food and lodging when you are away from home This superb coverage goes into effect when you purchase Y E S so it applies to any warranty repairs as well as covered repairs during your entire Y E S plan period Y E S coverage is honored at any authorized Yamaha dealer nationwide Y E S coverage is transferable to a new owner if you sell or trade in That can make your Yamaha mu...

Страница 102: ...9 10 benefits of y knowing after your maha with We ll be d ...

Страница 103: ...brake lock lever 3 7 Rear brake lock lever cable adjusting 6 28 Rider backrest adjusting 3 11 S Safe riding points 1 4 Safety defects reporting 9 3 Safety information 1 1 Seat 3 10 Sidestand 3 15 Spark plug checking 6 13 Specifications 8 1 Starting off 5 2 Starting the engine 5 1 Start switch 3 6 Steering checking 6 33 Storage 7 3 Storage compartments 3 12 T Tail brake light 6 38 Throttle cable fr...

Страница 104: ......

Страница 105: ...YAMAHA MOTOR CO LTD PRINTED IN JAPAN 2005 7 0 4 1 E ...

Отзывы: