DME-N Network Driver Installation Guide for LS9
11
Windows Vista / 7
1
Select [Start]
→
[Control Panel], then click or double-click [Network and Sharing Center] or [View
network status and tasks].
The “Network and Sharing Center” is displayed.
2
Click [Manage network connection] or [Change Adapter settings] from the “Tasks” list located in the
left side of “Network and Shareing Center” window, then double-click [Local Area Connection].
The “Local Area Connection Status” dialog box will be displayed.
n
The “User Account Control” dialog box may appear. Click [Continue].
n
If the “Local Area Connection properties” dialog box appears, skip ahead to step 4.
3
Click [Properties].
The “Local Area Connection properties” dialog box will be displayed.
n
The “User Account Control” dialog box may appear. Click [Continue].
4
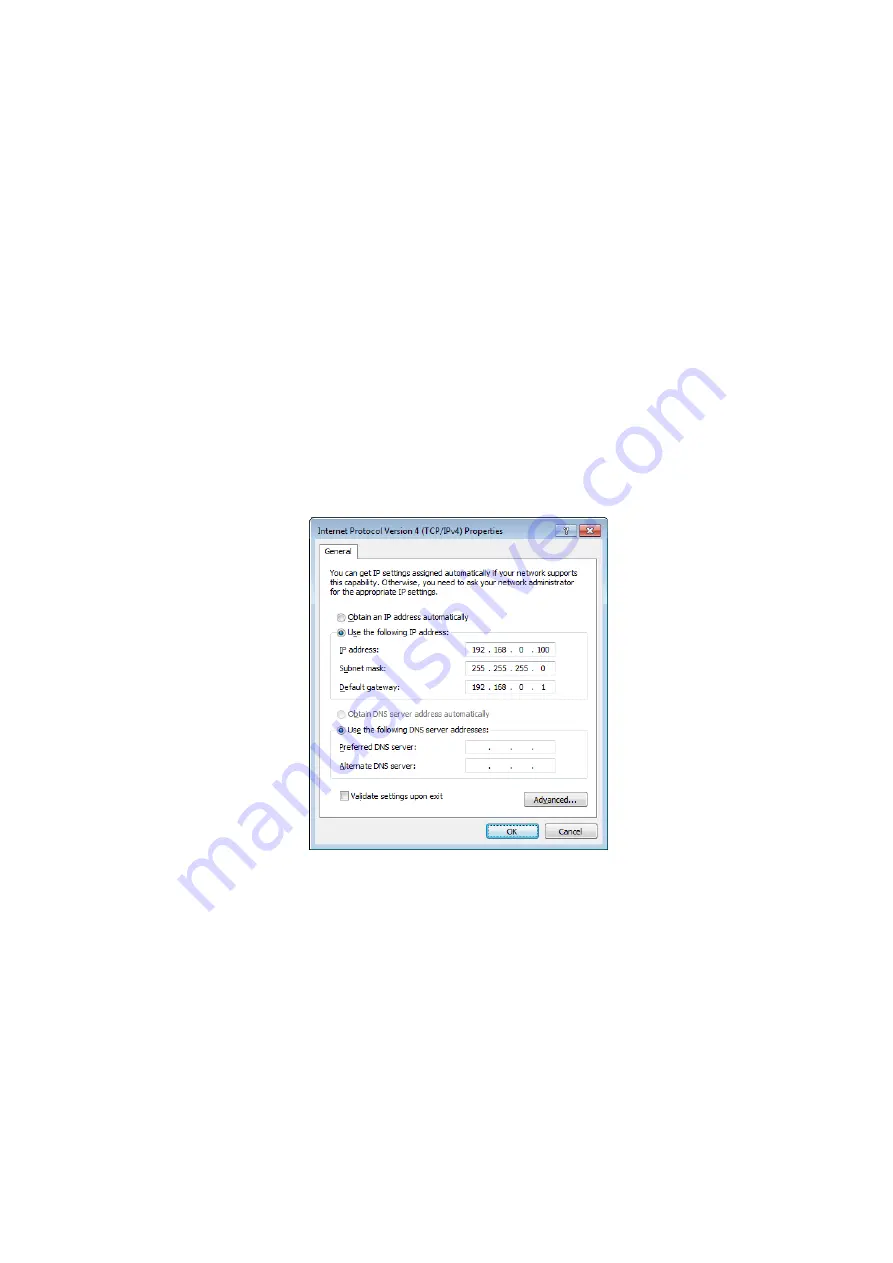
Select [Internet Protocol Version 4(TCP/IPv4)], then click [Properties].
The “Internet Protocol Version 4(TCP/IPv4) Protocol” dialog box will be displayed.
5
Click [Use the following IP address].
6
Enter your computer’s IP address into [IP address], the Gateway’s IP address into [Default gateway],
and “255.255.255.0” into [Subnet mask].
n
When installing on the same subnet as the DME unit(s), set the gateway’s host address to 254.


