Yamaha LC2 Music Lab Скачать руководство пользователя страница 17

Using a CD or MP3 Player

For the entire class to hear audio from a playback device, simply connect the audio player to the
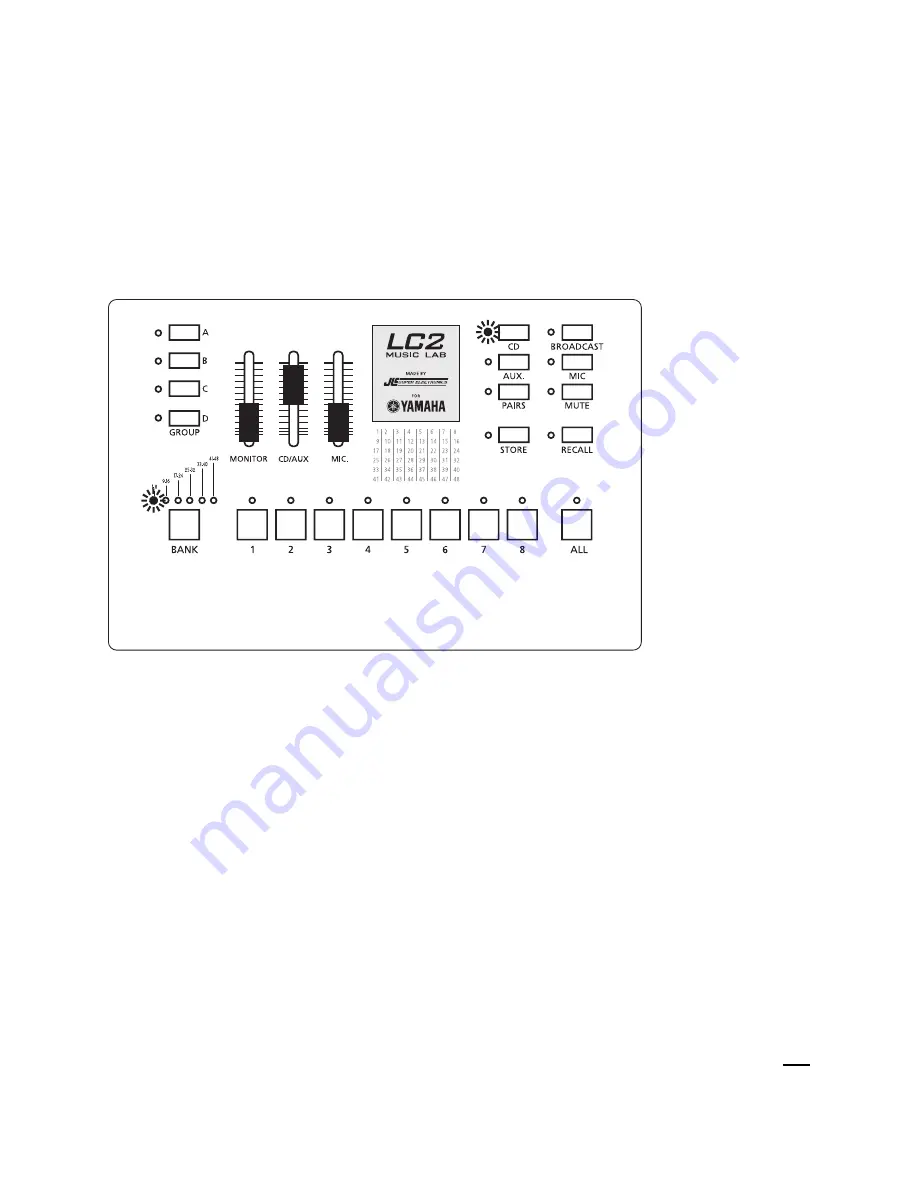
CD IN jack on the hub. Turn on the CD button from the control unit and move the CD/AUX
slider up to desired volume. When the CD input is used, all students will hear the playback regardless
of which student buttons are enabled. You can work with students or groups as described in the
previous sections while providing CD/AUX audio to every student.

15

Содержание LC2 Music Lab

Страница 1: ...L LC C2 2 Music Lab Operation Guide ...

Страница 2: ...ng a Single Student for the Entire Class 5 Addressing All of the Students 6 Choosing to Allow the Entire Class to Interact 7 Quickly Resetting All Buttons 8 Muting All Student Instruments 8 Setting Students In PAIRS 9 Interacting with a PAIR 9 Grouping Students 10 Storing Custom Settings RECALL MEMORY 13 Recalling Settings 14 Using a CD or MP3 Player 15 Recording a Student s Performance Audio 16 U...

Страница 3: ...tton on move the MIC slider up to the desired Controlling Teacher s Instrument Volume Level Use the built in volume control on your instrument to raise or lower its volume in the LC2 lab It s the only instrument volume control you need be concerned with 1 Volume knob onYamaha CP300 ...

Страница 4: ...stalled in the system It then returns to the first bank and cycles through again Labs with no expansion cards will be locked on BANK 1 8 Teachers of larger expanded labs will find themselves jumping through banks quite frequently since they can only view the status of eight students at a time If this is seen as a limitation we recommend using the MUSIC LAB MANAGEMENT SOFTWARE bundled with the LC2 ...

Страница 5: ...NK button would be set where the first light 1 8 is lit and student button 3 would be on Example Two To listen to student 10 press the BANK button until the second light is lit signifying BANK 9 16 Then press button number two for student 10 3 ...

Страница 6: ... by using the MIC slider When you re ready to leave this student s practice room press the lit student button to turn it off Listening to a Single Student If you want to listen in on a student without talking to him the equivalent of putting your ear to the door do not select the MIC button You will know a student is selected when the light above their number is on When the MIC button light is not...

Страница 7: ... on the BROADCAST button The selected student s performance will be heard by entire class To exit this mode effectively sending all students back to their virtual practice rooms turn BROADCAST off by touching the button again 5 In this example student 5 is playing for the class you can make comments with MIC on ...

Страница 8: ...ear each other speak or play but they will hear their own instruments This is the key difference of engaging the ALL button versus switching on every student button The latter would have the students interacting with each other Engaging ALL is like visiting each and every student in their virtual practice room at the same time and the students never leave their rooms To cancel this mode press the ...

Страница 9: ...aha has created a handy shortcut to get all student buttons on or off quickly RECALL MEMORY 8 and RECALL MEMORY 1 are reserved for these important tasks Simply tap the RECALL button and then tap student button 8 to activate all student buttons This one action engages every student button across all banks You will know your lab is in this mode by seeing every student light on the MIC light on and t...

Страница 10: ...ets all of the control unit buttons to off This is the same as turning the power off and then on again without making a trip to the power button on the hub Muting All Student Instruments When it s time for students to pay attention temporarily disable their instruments by turning the MUTE button on Note student MICs are active but reduced in volume TAP HOLD ...

Страница 11: ...matically place student 1 with 2 3 with 4 5 with 6 etc Interacting with a PAIR With the PAIR button on press the student selector button of either member of a pair and turn on MIC Notice that both lights turn on with a single button press Work with pairs exactly as you would with individual students In this example students 7 and 8 make up a pair 9 ...

Страница 12: ...D indicates that you are currently working with that group A steady light next to button A B C and D indicates that the group is active and working with each other but without you Keep in mind that RECALL MEMORY 8 and RECALL MEMORY 1 are factory group presets RECALL MEMORY 8 sets up GROUP A with all student buttons on a kind of super group groups B C D are empty in this memory RECALL MEMORY 1 has ...

Страница 13: ...1 and 12 are group C and students 13 14 15 and 16 are group D In the illustration below you are working with GROUP A which has a flashing light Groups B C and D are working by themselves Example Three You are working with GROUP B which has a flashing light A C and D are working by themselves 11 ...

Страница 14: ...le Four You are working with GROUP C which has a flashing light A B and D are working by themselves Example Five You are working with GROUP D which has a flashing light A B and C are working by themselves 12 ...

Страница 15: ... RECALL MEMORY 8 and RECALL MEMORY 1 are pre set to turn all student buttons on into a kind of super group and all student buttons off students go back to the virtual practice rooms RECALL MEMORIES 2 7 are yours to customize If you had six different classes for example you could have completely different GROUP A B C D configurations for each class at the touch of a button If six different configur...

Страница 16: ...Recalling Settings To RECALL a memory tap the RECALL button then tap the button of the MEMORY desired 14 Press one numbered button 2 7 to recall a preset you have stored TAP TAP ...

Страница 17: ...n the hub Turn on the CD button from the control unit and move the CD AUX slider up to desired volume When the CD input is used all students will hear the playback regardless of which student buttons are enabled You can work with students or groups as described in the previous sections while providing CD AUX audio to every student 15 ...

Страница 18: ...pe or CD recorder to the REC OUT on the hub Then to record the student select the student press RECORD on the recording device and tell the student to play Anything you hear gets sent to the audio recorder 16 In this example student 14 is being recorded ...

Страница 19: ...the AUX IN jacks on the hub Turn on the AUX button on the control unit and then move the CD AUX slider up to desired volume When the AUX input is used all students will hear the device regardless of which student buttons are enabled You can work with students or groups as described in the previous sections while providing CD AUX audio to every student 17 ...

Страница 20: ... come a time when the audio in the LC2 lab needs to be heard by someone in the room who is not wearing headphones With powered speakers like a stereo system connected to the MONITOR OUT of the hub move the MONITOR slider up to volume desired 18 ...

Страница 21: ... 2006 Yamaha Corporation of America www yamaha com ...

Отзывы: