background image

Control Templates

Owner’s Manual

29

Editing a Control Template

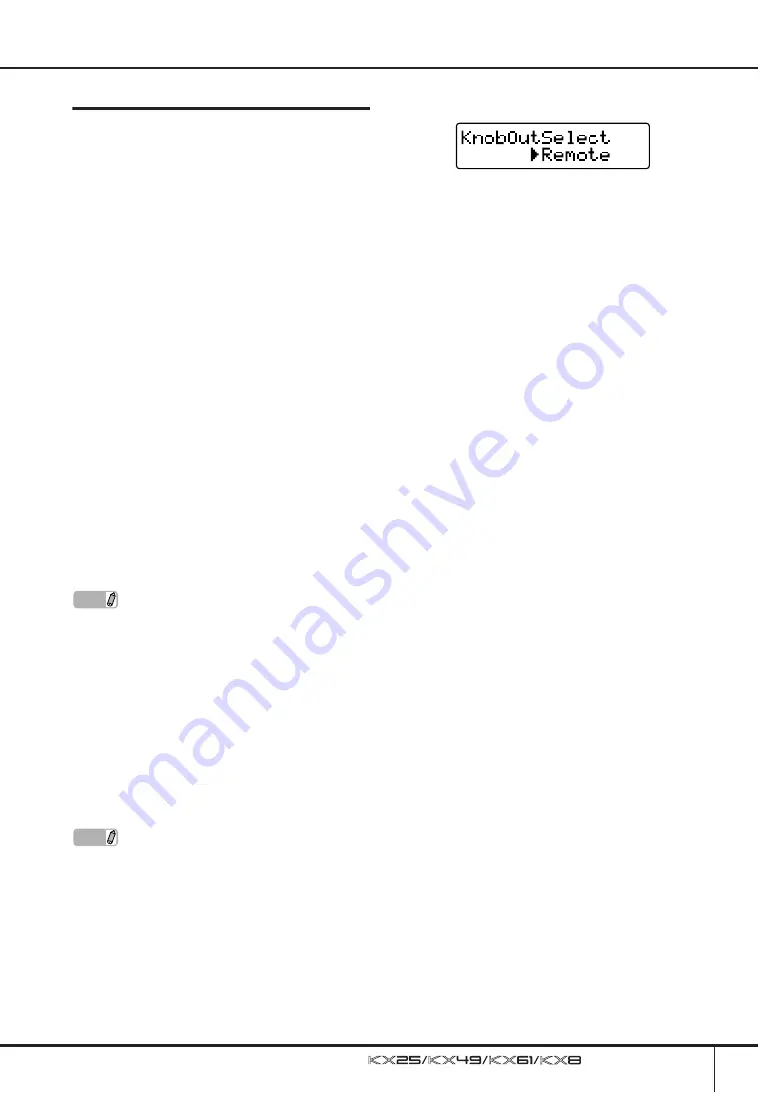
Changing the message type 
generated by using the CONTROL 
knobs

The MIDI messages generated by operating the 
CONTROL knobs are divided into two types: 
Remote and CC (Control Change). Only one of 
these two types can be active, and the type is set 
with the KnobOutSel parameter.

Remote (Remote Control message dedicated to 
Cubase)

When this is selected, Remote Control messages 
dedicated to Cubase will be generated by 
operating the CONTROL knobs and transmitted to 
Cubase via USB-MIDI Port 2. This type of data is 
transmitted via USB-MIDI Port 2, while keyboard 
performance data is transmitted via USB-MIDI Port 
1, meaning that the messages generated by 
operating the CONTROL knobs do not affect the 
keyboard performance but only the VSTi 
parameters.

CC (Control Change)

When this is selected, Control Change messages 
will be generated by operating the CONTROL 
knobs and transmitted to the computer via USB-
MIDI Port 1. When using a DAW other than Cubase, 
only this setting is available.

1.

Press the [CONTROL TEMPLATE] button.

The LED lamp lights and the Control Template 
selection display appears.

2.

Use the DATA [DEC] and [INC] buttons to 
select the desired Control Template.

3.

Use the SELECT [

] and [

] buttons to call 

up “KnobOutSelect.”

4.

Use the DATA [DEC] and [INC] buttons to 
select the desired type of message.

CC ...................... Control change

Remote ............... Remote Control exclusive for 

Cubase

5.

Press the [EXIT] button to return to the 
original display.

NOTE

· When using Cubase, you generally won’t 

need to change this parameter from the 
initial default setting (Remote), although 
there may be times that you should set 
this parameter to “CC” depending on the 
VSTi you’re using.

· Setting the DAW Select parameter to a 

value other than “Cubase4” or “CubaseAI” 
will change the KnobOutSel parameter to 
“CC” automatically even when it is set to 
“Remote.” 

NOTE

If a different, unrelated display appears even 
when you press the [CONTROL 
TEMPLATE] button, press the [CONTROL 
TEMPLATE] button again or press the 
SELECT [

] button once or twice to call up 

the Control Template selection display.

Содержание KX25

Страница 1: ...EN Owner s Manual ...

Страница 2: ...ion or effect works when the unit is operating as designed are not covered by the manu facturer s warranty and are therefore the owners responsibility Please study this manual carefully and consult your dealer before requesting service ENVIRONMENTAL ISSUES Yamaha strives to produce products that are both user safe and environmentally friendly We sincerely believe that our products and the producti...

Страница 3: ...tlets that are on different branch circuit breaker or fuse circuits or install AC line fil ter s In the case of radio or TV interference relocate reorient the antenna If the antenna lead in is 300 ohm ribbon lead change the lead in to co axial type cable If these corrective measures do not produce satis factory results please contact the local retailer authorized to distribute this type of product...

Страница 4: ...rvice personnel Never insert or remove an electric plug with wet hands Do not put burning items such as candles on the unit A burning item may fall over and cause a fire If the AC adaptor cord plug or USB cable becomes frayed or damaged or if there is a sudden loss of sound during use of the instrument or if any unusual smells or smoke should appear to be caused by it immediately turn off the powe...

Страница 5: ...g to the instrument at the minimum level When you are not using the instrument for a long time make sure you unplug the AC power adaptor from the wall AC outlet SPECIAL NOTICES The contents of this Owner s Manual and the copyrights thereof are under exclusive ownership by Yamaha Corporation The screen displays as illustrated in this manual are for instructional purposes and may appear somewhat dif...

Страница 6: ... real time control over parameters in your VSTi software Simply select the Control Template for the VSTi you wish to control 30 pre programmed templates are built in and you can use the four knobs to control the sound of your VSTi remotely Many popular VSTi are covered by the templates however you can also create customize your own to use with your favorite VSTi Powerful Arpeggio feature The KX al...

Страница 7: ...nstallation To activate your software license install Cubase AI4 while the computer is connected to the Internet About the Included Software About support for Cubase Support for Cubase in the accessory disk is provided by Steinberg on its website at the following address http www steinberg net You can visit the Steinberg site also via the Help menu of Cubase The Help menu also includes the PDF man...

Страница 8: ...gio playback 21 Trying out other notes on the keyboard 21 Using the CUBASE FUNCTION Buttons 23 Default functions 23 Assigning different functions to the buttons 23 Controlling the VSTi by Using the CONTROL Knobs 24 Controlling the Transport and Tracks 25 Basic Operation on the KX 26 Display Indications 26 Top display 26 Arpeggio Edit display 26 Control Template display 26 Utility display 26 Changi...

Страница 9: ...Make sure that the STANDBY ON switch of the KX is in the STANDBY position 2 Connect a computer to the USB TO HOST connector of the KX by using a USB cable Turning the Power On and Off 1 Turn the power ON by pressing the STANDBY ON switch to set it to the ON position 2 Turn the power off by pressing the STANDBY ON switch again to set it to the STANDBY position CAUTION Note that a small amount of cu...

Страница 10: ...ype and setting the related parameters 8 CONTROL TEMPLATE button Page 28 Use this button to select a template assigned to CONTROL knobs 9 ARP ON OFF button Page 20 Press this button to enable or disable Arpeggio playback Turning on the button lights up the LED lamp HOLD button Page 21 This button turns the Arpeggio Hold function on and off TEMPO LED Page 32 This LED lamp flashes in time with the t...

Страница 11: ...hese buttons let you control transport functions including record and play within Cubase Pitch Bend wheel Pages 12 17 Controls the pitch bend effect making continuous pitch change Modulation wheel Pages 12 17 Controls the modulation effect STANDBY ON switch Page 9 Press this switch to turn the power on or off STANDBY DC IN connector Page 9 Connect an AC adaptor to this jack MIDI IN connector Page ...

Страница 12: ...i related window and create a track for the VSTi from the KX Real time Parameter Control Use the CONTROL knobs on the KX to control various sound shaping parameters on the VSTi or a connected tone generator Phrase Rhythm Performance with Arpeggio Feature This powerful feature lets you easily play various rhythmic patterns and sequenced phrases These include a wide variety of vintage analog synthes...

Страница 13: ...can be installed as desired By installing Extensions for Steinberg DAW the following functions are available when using the KX and Cubase on your computer Cubase can recognize the KX as a remote controller when connecting the KX to the computer Performing panel operations on the KX such as with the knobs and buttons automatically edits the relevant parameters on the VSTi software Changing the VSTi...

Страница 14: ...ortant Make sure to use the same USB connector as the one used in the installation procedure when you connect the KX and the Windows computer again If you connect the USB cable to a different connector you will have to install the USB MIDI driver again NOTE Make sure to install Cubase before installing Extensions for Steinberg DAW described in step 5 below NOTE If the same version of Extensions fo...

Страница 15: ...ensions for Steinberg DAW by selecting Customize in the Installation Type dialog NOTE Installation of the USB MIDI driver is described in installationguide_en pdf stored in the USB MIDI_Driver folder The Keyboard Setup Assistant window appears when connecting the KX to a computer via USB In this case click the red circle at the top left corner to close this window Precautions when using the USB TO...

Страница 16: ...This means that MIDI communication is only possible via the MIDI connectors and not via USB In the example illustration above this setting lets you play the sound of the tone generator from the KX keyboard Footswitch While holding an optional footswitch Yamaha FC4 or FC5 connected to the SUSTAIN jack the note you pressed then released works as if you held it For organ sounds that have no natural d...

Страница 17: ...ss the EXIT button to return to the original display Setting up on Cubase The MIDI messages generated on the KX by playing the keyboard controlling the Pitch Bend Wheel and the Modulation Wheel and so on are transmitted via USB MIDI Port 1 from the KX to Cubase Keep in mind that MIDI data transmitted via the USB MIDI Ports 2 and 3 are not related to music performance including the instrument chang...

Страница 18: ...AHA KX Port 1 on Macintosh This port is used for data transfer of the musical performance such as keyboard performance note on off Modulation wheel operation Control Change and Pitch Bend wheel operation MIDI Port 2 This port is indicated as Yamaha KX 2 on Windows and YAMAHA KX Port 2 on Macintosh This port is used for data transfer generated by using the DAW REMOTE buttons with the exception of t...

Страница 19: ...VSTi is selected on the Project window or the other window you can open the VSTi window quickly at the touch of a button on the KX s panel 1 On the KX use the Cursor buttons to select the track corresponding to the desired VSTi 2 On the KX press the VSTi WINDOW button to open the VSTi window The VSTi window of the track selected in step 1 will appear 3 On the KX press the CUBASE FUNCTION A button ...

Страница 20: ... selected in step 4 on the previous page You can hear the rhythm pattern play back automatically Trigger the Arpeggio with one finger 1 Press the ARP ON OFF button the lamp lights 2 Press a single note on the keyboard The Arpeggio rhythm pattern starts just by playing a single note with one finger 3 Release the note to stop the Arpeggio NOTE By pressing the OCTAVE button and playing in the same oc...

Страница 21: ...ve the C pressed in step 7 A different rhythm pattern starts 9 Next press the C located a fourth above the G pressed in step 8 A rhythm pattern different from the previous two patterns starts 10 Next press the G located a fifth above the C pressed in step 9 A rhythm pattern different from the previous three patterns starts 11 Finally press the C located a fourth above the G pressed in step 10 the ...

Страница 22: ... note in a specific area as shown below For these DrPc Drum Percussion Arpeggio types the keyboard of the KX is divided into four six note groups each group having a different rhythm pattern The note ranges of these four groups are C F F B C F F B and so on repeating up the keyboard Playing any note in the group will trigger the assigned Arpeggio rhythm pattern On the KX61 for example the rhythm p...

Страница 23: ...ttons The buttons for controlling Cubase can be changed as desired To do this follow the instructions below 1 Select Device Setup from the Device menu The Device Setup dialog appears 2 Click Yamaha KX in the Device column The following buttons are assignable ADD INSTRUMENT TRACK button VSTi WINDOW button CUBASE FUNCTION A and B buttons PROGRAM DEC and INC buttons ASSIGN 1 and ASSIGN 2 buttons MUTE...

Страница 24: ...to the Control Template List on page 45 The time that the value remains displayed can be changed For details refer to Utility Settings on page 36 When using a DAW other than Cubase you need to change the Control Template manually on the KX Changing the functions assigned to the CONTROL knobs When using the VSTi compatible with VST3 in Cubase you can change the functions assigned to the CONTROL kno...

Страница 25: ...ct the desired track in Cubase and use these buttons to perform the desired function ASSIGN 1 button Executes the MIDI Quantize command ASSIGN 2 button Executes the Delete command MUTE button Switches Mute of the selected track On or Off SOLO button Switches Solo of the selected track On or Off Transport Control buttons Use these buttons to control the transport functions button Rewind button Fast...

Страница 26: ...of CONTROL knob assignments Press the EXIT button to return to the original Top display Utility display Call up this display by pressing the UTILITY button the lamp lights This display lets you set the system related parameters Press the EXIT button to return to the original Top display From these displays you can call up the desired parameters by using the SELECT and buttons The arrow indication ...

Страница 27: ...everse the LED status on or off refer to Utility Settings on page 36 Note names of the keyboard The range of the keyboard is indicated by note name as described below Model Range KX25 C2 C4 KX49 C2 C6 KX61 C1 C6 KX8 A 1 C7 The note name assignment above depends on the initial default setting of the KX This assignment can be shifted by using the OCTAVE buttons Press this to shift the octave range d...

Страница 28: ...TEMPLATE button The LED lamp lights and the Control Template selection display appears In this state you can select the Control Template 2 Use the DATA DEC and INC buttons to select the desired Control Template 3 Press the EXIT button to return to the Top display which appears when turning the power on Control Templates NOTE A special KX Editor page 6 available as a free download from the Yamaha w...

Страница 29: ...o the computer via USB MIDI Port 1 When using a DAW other than Cubase only this setting is available 1 Press the CONTROL TEMPLATE button The LED lamp lights and the Control Template selection display appears 2 Use the DATA DEC and INC buttons to select the desired Control Template 3 Use the SELECT and buttons to call up KnobOutSelect 4 Use the DATA DEC and INC buttons to select the desired type of...

Страница 30: ...urn to the original display NOTE The setting here is automatically stored to the internal memory of the KX If you want to back up the setting here use the KX Editor page 6 to store the setting to a computer NOTE If a different unrelated display appears even when you press the CONTROL TEMPLATE button press the CONTROL TEMPLATE button again or press the SELECT button once or twice to call up the Con...

Страница 31: ...n use the DATA INC or DEC button to select the Arpeggio type 5 Select the Arpeggio type by using the DATA DEC and INC buttons 6 Press the EXIT button to return to the Top display Arpeggio NOTE The Arpeggio plays back according to the internal tempo value set in the Utility display or in synchronization with the tempo of the external DAW software depending on the setup of the related parameter For ...

Страница 32: ...ck OK to close the Project Synchronization Setup dialog KX TEMPO 120 KX When MIDI clock is received from an external MIDI device Arpeggio Tempo Determined by the speed with which MIDI clock is received from the external device Playback data DAW software etc MIDI clock Arpeggio Playback data DAW software etc When MIDI clock is not received Tempo Set in the Utility display page 36 NOTE The KX provid...

Страница 33: ...wn Alt1 Alt2 Rnd Determines the playback variation of the Arpeggio When any value other than Orig is selected you can shift the pitch up and down in octave for Arpeggio playback by adjusting the OctRange parameter Orig The original data preprogrammed in the KX will play back Up An Arpeggio of ascending notes will play Down An Arpeggio of descending notes will play Alt1 Alternates Up and Down arpeg...

Страница 34: ...SE FUNCTION B This button functions the same as the F2 key on the Mackie Control ASSIGN 1 This button functions the same as the F3 key on the Mackie Control ASSIGN 2 This button functions the same as the F4 key on the Mackie Control MUTE This button functions the same as the F5 key on the Mackie Control SOLO This button functions the same as the F6 key on the Mackie Control VSTi WINDOW This button...

Страница 35: ...con twice Each new external device corresponds to each of the MIDI Ports in the KX It is a good idea to input your desired device name in the Properties of the new external device in order to easily recognize the MIDI port later 4 Connect the MIDI input output plugs of the KX icon to the MIDI input output plugs of the new external device Assign the names as listed below to the newly added devices ...

Страница 36: ...et to Auto only when MIDI clock is transmitted continuously or External Sync Auto Internal External Auto Determines the tempo source transmitting the MIDI clock to which Arpeggio playback is synchronized Auto When MIDI clock is transmitted continuously from an external MIDI device or computer the internal clock of the KX is not effective and Arpeggio playback is synchronized with the external cloc...

Страница 37: ... MIDI Select USB MIDI USB Determines which connector is used for MIDI transmit receive USB TO HOST or MIDI IN OUT USB The USB TO HOST connector is used for MIDI communication between the computer and the KX When the MIDI Thru parameter below is set to MIDI MIDI or MIDI USB or USB MIDI MIDI can also be transmitted via the MIDI OUT connector MIDI Thru only even if USB is selected here MIDI Only the ...

Страница 38: ...the Top display Off When this is selected the MIDI Thru function is not available MIDI MIDI When this is selected MIDI messages received via the MIDI IN connector will be transmitted through the MIDI OUT connector This setting is available even when the MIDI Select parameter is set to USB MIDI USB When this is selected MIDI messages received via the MIDI IN connector will be transmitted through th...

Страница 39: ...eter is set to MIDI When using the KX and computer set the MIDI Select parameter to USB Confirm whether or not the Control Template corresponding to the VSTi used on the computer is currently selected on the KX If not call up the corresponding Control Template If the corresponding Control Template is not provided on the KX by default create an appropriate Control Template by using the KX Editor A ...

Страница 40: ...ror An error related to data storage memory occurred Device number is off The device number is set to off Device number mismatch The device numbers do not match Executing Displayed while the operation is being performed Please wait Completed Displayed when the operation has been completed Template No xx xxxxxxx Displayed when the Control Template is selected automatically Are you sure No Dec Yes I...

Страница 41: ...ut permission of the copyright owner Data received by means of the SOFTWARE may not be duplicated transferred or distributed or played back or performed for listeners in public without permission of the copyright owner The encryption of data received by means of the SOFTWARE may not be removed nor may the electronic watermark be modified without permission of the copyright owner 3 TERMINATION This...

Страница 42: ...evision of this Agreement will be binding unless in writing and signed by a fully authorized representative of Yamaha ATTENTION PLEASE READ THIS SOFTWARE LICENSE AGREEMENT AGREEMENT CAREFULLY BEFORE USING THIS SOFTWARE YOU ARE ONLY PERMITTED TO USE THIS SOFTWARE PURSUANT TO THE TERMS AND CONDITIONS OF THIS AGREEMENT THIS AGREEMENT IS BETWEEN YOU AS AN INDIVIDUAL OR LEGAL ENTITY AND YAMAHA CORPORAT...

Страница 43: ...E MEDIA INCLUDING THE IMPLIED WARRANTIES OF MERCHANTABILITY AND FITNESS FOR A PARTICULAR PURPOSE 5 DISCLAIMER OF WARRANTY ON SOFTWARE You expressly acknowledge and agree that use of the SOFTWARE is at your sole risk The SOFTWARE and related documentation are provided AS IS and without warranty of any kind NOTWITHSTANDING ANY OTHER PROVISION OF THIS AGREEMENT YAMAHA EXPRESSLY DISCLAIMS ALL WARRANTI...

Страница 44: ... DAW For Windows Cubase 4 Cubase Studio 4 Cubase AI4 SONAR 6 For Macintosh Cubase 4 Cubase Studio 4 Cubase AI4 Logic7 2 Digital Performer 5 1 Functions to be controlled differ depending on the software Controller Pitch Bend Wheel x 1 Modulation Wheel x 1 CONTROL knobs x 4 assignable Display 16 characters x 2 lines LED lamp backlit Connectors USB TO HOST MIDI IN OUT DC IN FOOT SWITCH SUSTAIN Power ...

Страница 45: ...ersonic2 Hypersonic 8 HALion3 HALion 9 Native Instruments PRO 53 Pro 53 10 FM8 FM8 11 MASSIVE Massive 12 KORG Polysix Polysix 13 WAVESTATION Wavestation 14 Mono Poly MonoPoly 15 M1 M1 16 MS 20 MS 20 17 M AUDIO GForce impOSCar impOSCar 18 Minimonsta Minimonsta 19 Oddity Oddity 20 Arturia Analog Factory AnalogFactory 21 CS 80V CS 80V 22 Jupiter 8V Jupiter 8V 23 Minimoog V Minimoog V 24 Novation Musi...

Страница 46: ...no Kit DrPc 46 Trance 4 4 4 140 DrPc 47 DreamDnc 4 4 4 136 DrPc 48 Ibiza 4 4 2 135 R B Kit 1 DrPc 49 EuroTeck 4 4 2 140 Tekno Kit DrPc 50 Club Hus 4 4 2 128 R B Kit 1 DrPc 51 House 4 4 2 123 DrPc 52 Garage 4 4 2 127 Tekno Kit DrPc 53 AcoJazz 4 4 4 204 Jazz Kit DrPc 54 ModernJz 4 4 16 218 DrPc 55 ShfBlues 4 4 4 115 Stereo GM DrPc 56 SlwBlues 4 4 2 49 DrPc 57 PnBoogie 4 4 8 160 DrPc 58 Reggae 4 4 4 ...

Страница 47: ...Bass Ld Seq 155 RandmSeq 4 4 1 90 Sci Fi Category Arp No Arp Name Time Signature Length Original Tempo Instrument Type Seq 156 Vel Gruv 4 4 1 134 Saw Ld Seq 157 X Sweep 4 4 1 140 Seq 158 Simple1 4 4 1 130 Chiff Ld Seq 159 Simple2 4 4 1 130 Seq 160 Simple3 4 4 1 130 Seq 161 Basic 4 4 1 130 Brightness Seq 162 FifthSQ1 4 4 1 130 5th Ld Seq 163 FifthSQ2 4 4 1 130 Seq 164 MuteLine 4 4 1 134 Saw Ld Seq ...

Страница 48: ...1 4 4 4 120 Distortion GtPl 265 PowerRk2 4 4 4 120 Category Arp No Arp Name Time Signature Length Original Tempo Instrument Type GtPl 266 PowerRk3 4 4 4 120 GtPl 267 AlterRk1 4 4 4 97 Overdrive GtPl 268 AlterRk2 4 4 4 97 GtPl 269 XoverRk1 4 4 2 100 GtPl 270 XoverRk2 4 4 2 100 Distortion GtPl 271 Rck Roll 4 4 4 172 Clean GtPl 272 GuitrPp1 4 4 2 90 Nylon GtPl 273 GuitrPp2 4 4 1 90 GtPl 274 GuitrPp3 ...

Страница 49: ...4 4 120 GtPl 330 Lick5 4 4 1 120 Strn 331 Strings 4 4 1 101 StereoSt1 Strn 332 New R B 4 4 2 90 Strn 333 Pizz 4 4 1 120 Pizz Bras 334 Funk1 4 4 4 132 Brass Sect Bras 335 Funk2 4 4 1 132 Bras 336 Samba 4 4 2 120 RdPp 337 Hip Hop 4 4 2 105 TenorSax 2 RdPp 338 Soul 4 4 4 120 RdPp 339 Flutter 4 4 1 120 Lead 340 R B Dsc1 4 4 1 110 Bass Ld Lead 341 R B Dsc2 4 4 2 110 Lead 342 Regeton 4 4 4 98 Caliop Ld ...

Страница 50: ...gnized Remarks Basic Default Channel Changed 1 16 x x 1 16 Default Mode Messages Altered 3 x x x x Velocity Note ON Note OFF o 9nH v 1 127 o 8nH v 0 x x After Touch Key s Ch s x x x x Pitch Bend o x Control Change 0 32 1 7 10 11 6 38 64 65 66 71 75 91 93 96 97 100 101 0 127 o o o o o o o o o o o x x x x x x x x x x x Bank Select Data Entry Sustain Sw Portamento Sw Sostenuto Sound Controller Effect...

Страница 51: ... o Common Song Pos Song Sel Tune x x x x x x System Real Time Clock Commands o x o x Reset All Cntrls All Sound Off x x x x Mode 1 OMNI ON POLY Mode 2 OMNI ON MONO o Yes Mode 3 OMNI OFF POLY Mode 4 OMNI OFF MONO x No Aux Messages Local ON OFF All Notes OFF Active Sense Reset x x o x x x x x ...

Страница 52: ...Device Number 37 Display 10 26 Display Time 37 E ENTER 11 25 34 ESC 11 25 34 EXIT 10 Extensions for Steinberg DAW 13 External 36 F Factory Set 37 Fast forward 25 34 Fix 27 36 Footswitch 16 G GateTime 33 H Hard1 27 36 Hard2 27 36 HOLD 10 21 I Installation 13 Internal 36 K Knob 24 Knob Functions Select button 10 KX Editor 6 M MIDI 37 MIDI IN 11 MIDI OUT 11 MIDI port 18 MIDI Select 37 MIDI Thru 37 38...

Страница 53: ...AIN 11 16 Swing 33 SwingValue 33 Sync 36 T TEMPO 10 Tempo 32 36 TOOLS for KX 13 Top display 26 TRACK Track Control buttons 11 25 TRANSPORT Trasnport Control buttons 11 25 U USB 37 USB bus powered device 9 USB MIDI port 18 USB TO HOST 11 USB MIDI Driver 13 UTILITY 10 36 V VELOCITY CURVE 10 27 Velocity Curve 27 VeloCurve 36 VeloFix 36 VSTi 19 VSTi Remote 29 VSTi WINDOW 10 34 ...

Страница 54: ...Owner s Manual 54 MEMO ...

Страница 55: ...618511 NORWAY Norsk filial av Yamaha Scandinavia AB Grini Næringspark 1 N 1345 Østerås Norway Tel 67 16 77 70 ICELAND Skifan HF Skeifan 17 P O Box 8120 IS 128 Reykjavik Ice land Tel 525 5000 RUSSIA Yamaha Music Russia Office 4015 entrance 2 21 5 Kuznetskii Most street Moscow 107996 Russia Tel 495 626 0660 OTHER EUROPEAN COUNTRIES Yamaha Music Central Europe GmbH Siemensstraße 22 34 25462 Rellingen...

Страница 56: ...English only http www yamahasynth com Yamaha Manual Library http www yamaha co jp manual U R G Pro Audio Digital Musical Instrument Division Yamaha Corporation 2008 Yamaha Corporation 8 APTY C0 Printed in China WQ82380 ...

Отзывы: