background image

Genos  Owner’s Manual

77

3

Singing wi

th S

o

ng Playback—Setti

ng Up

5

Follow the steps below, depending on which Type (and mode) 
you selected.

If you selected the Chordal Type:

5-1

Make sure that the [ACMP] button is turned on.

5-2

Play back a Style while playing chords, or play back a Song which contains 
chords.
Vocal harmonies based on the chords are applied to your singing.

If you selected the Vocoder or Vocoder-Mono Type:

5-1

As necessary, change the “Keyboard” setting to “Off,” “Upper,” or “Lower.”
When “Upper” or “Lower” is selected, playing the right-hand or left-hand 
section of the keyboard will control the Vocoder effect. When “Off” is 
selected, playing the keyboard will not control the Vocoder effect.

5-2

Play melodies on the keyboard or play back a Song, and sing into the micro-
phone.
You’ll notice that you don’t actually have to sing pitched notes. The 
Vocoder effect takes the words you say and applies them to the pitch of the 
instrument sounds.

Using Synth Vocoder

These are special effects that graft the characteristics of your voice onto synthesizer and other sounds, for unusual 
machine‐like or robotic effects, as well as unique choir sounds, which you can control with your own singing and play-
ing.

1

Execute steps 1–3 in “Using Vocal Harmony” on page 76. 
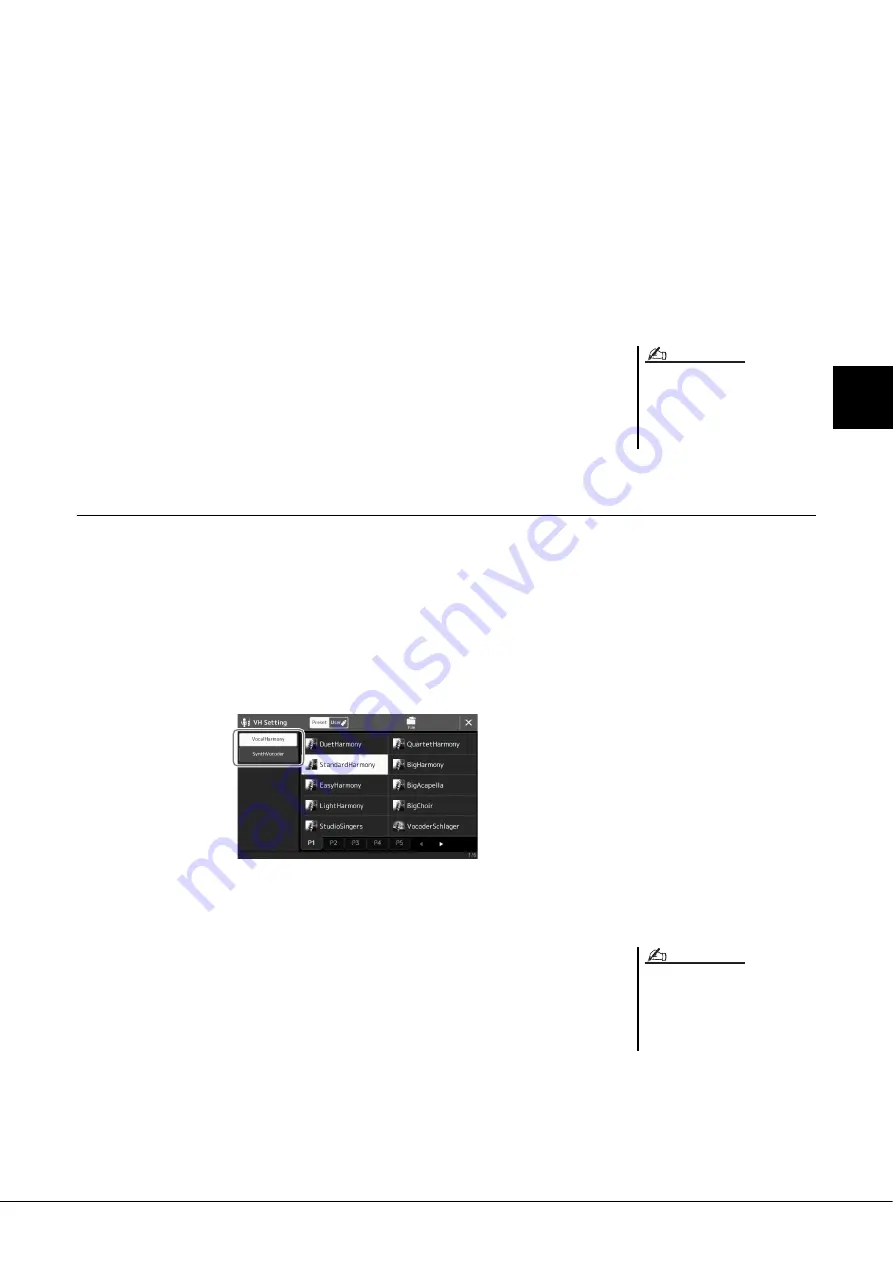
2

From the Vocal Harmony Type Selection display, select the 
Synth Vocoder category from the sub categories.

3

Touch the desired Synth Vocoder Type to select it.

4

Try holding down a note on the keyboard and speak or sing 
into the microphone.

Also, try changing notes as you say/sing different words, hitting a separate note for 
each word.

For Vocoder Types, the effect is applied 
to a maximum of three notes of the 
chord you play; for Vocoder-Mono, the 
effect is only applied to single notes 
(last note applied).

NOTE

You can change the Keyboard setting 
(Off/Upper/Lower), determining which 
part of the keyboard (or Song) controls 
the effect. For details, refer to the Refer-
ence manual on the website.

NOTE

Содержание genos

Страница 1: ...EN Owner s Manual Before using the instrument be sure to read PRECAUTIONS on page 5...

Страница 2: ...s and the pro duction methods used to produce them meet these goals In keeping with both the letter and the spirit of the law we want you to be aware of the following Battery Notice This product MAY c...

Страница 3: ...other antenna or transmitter For CANADA This device complies with Industry Canada s applicable licenceexempt RSSs Operation is subject to the following two conditions 1 This device may not cause inte...

Страница 4: ...g The wide blade or the third prong are provided for your safety If the provided plug does not fit into your outlet consult an electrician for replacement of the obsolete outlet 10 Protect the power c...

Страница 5: ...tlet using a multiple connector Doing so can result in lower sound quality or possibly cause overheating in the outlet When removing the electric plug from the instrument or an outlet always hold the...

Страница 6: ...lcohol cleaning fluids or chemical impregnated wiping cloths Saving data Edited Song Style Voice MIDI setup data etc are lost when you turn off the power to the instrument without saving This also occ...

Страница 7: ...ce or music production using these contents is recorded and the permission of Yamaha Cor poration is not required in such cases About functions data bundled with the instrument Some of the preset song...

Страница 8: ...rolled and Administered by EMI LONGITUDE MUSIC All Rights Reserved International Copyright Secured Used by Permission Moon River from the Paramount Picture BREAKFAST AT TIFFANY S Words by Johnny Merce...

Страница 9: ...ctronics to give you stunning sound with maximum musical versatility a beautiful instrument from every perspective In order to make the most of your Genos s features and vast performance potential we...

Страница 10: ...to connect the instrument to smart devices such as an iPhone iPad etc Computer related Operations page 113 Includes instructions on connecting the instrument to a computer and operations related to tr...

Страница 11: ...ilities for new sounds and styles is virtually unlimited Quick and easy set up with Playlist and Registration Playlist is the new way to quickly setup Genos no matter how large your repertoire is Orga...

Страница 12: ...Management 37 Entering Characters 40 Locking the Panel Settings Panel Lock 41 Using the Metronome 41 Quick Guide For Performing on Genos 42 Operation Guide 1 Playing with Styles Setups 44 Setting up...

Страница 13: ...re by Using the Playlist 96 Operation Guide 8 Customizing for Optimum Performance 100 Customizing the Shortcuts on the Home Display 100 Setting the Functions or Shortcuts to the ASSIGNABLE Buttons 100...

Страница 14: ...y itself Understanding the basic features and operations of Genos Main Functions Panel Controls and Terminals Display Structure Basic Operations Quick Guide Making basic connections and setting for Ge...

Страница 15: ...amaha Expansion Manager Owner s Manual Bundled with the software Installing Expansion Pack data to the instrument Creating your own original Expansion Packs Creating your own original contents Creatin...

Страница 16: ...WAV data for playing back during your perfor mance Songs Playing back MIDI audio files For Genos the term Song refers to MIDI or audio data such as preset songs commercially available files etc Not on...

Страница 17: ...d settings The Playlist function makes it easy to manage and call up your songs and the related settings no matter how numerous The Playlist allows you to recall a specific song from more than 10 song...

Страница 18: ...uper Articulation Voices iJoystick MODULATION HOLD button Page 66 For using pitch bend or modulation functions o PHONES jack Page 22 For connecting a pair of headphones 0Cross Fader Page 85 Adjusts th...

Страница 19: ...anel settings for the Style 3MULTI PAD CONTROL buttons Pages 59 70 Selects and plays a rhythmic or melodic Multi Pad phrase 4VOICE SELECT buttons Page 52 Selects a Voice for each of the keyboard parts...

Страница 20: ...5 DIGITAL OUT jack Page 109 For connecting audio devices such as a stereo system 6ASSIGNABLE FOOT PEDAL jacks Page 110 For connecting footswitches and or foot controllers 7LINE OUT jacks Page 108 For...

Страница 21: ...turning the phantom power switch to ON or OFF When connecting a device not requiring phantom power to the MIC INPUT jack make sure to turn the phantom power switch to OFF NOTICE When the phantom powe...

Страница 22: ...al speakers GNS MS01 refer to page 116 For instructions on connecting other speakers refer to page 108 Connecting a microphone By connecting a microphone to the MIC INPUT jack either XLR or standard 1...

Страница 23: ...NING CAUTION When disconnecting the power cord first turn off the power then follow this procedure in reverse order NOTE Turning the Power On Off Until the Home display appears no operations can be ca...

Страница 24: ...hown on the display 1 Call up the Utility operation display First press the MENU button to call up the Menu display Then touch Menu 2 to move to page 2 on the display if necessary and touch Utility 2...

Страница 25: ...g the display Auto Power Saving Lets you set the amount of time that elapses before the Auto Power Saving function decreases brightness of the LIVE CON TROL view Touch this to call up the list of sett...

Страница 26: ...E CONTROL sliders For details on the display structure see page 27 LCD Main Display touch screen The LCD indicates the parameters and values related to the currently selected operation You can operate...

Страница 27: ...utton while the knobs display is already shown or pressing the SLIDER ASSIGN button while the sliders dis play is already shown switches the Assign Type of the corresponding con troller group For deta...

Страница 28: ...ctions and various detailed settings for the instrument can be accessed from the Menu display Also depending on the particular function you can call up the File Selection display to select desired fil...

Страница 29: ...settings page 33 Voice Part Setup display This is for making detailed settings such as Voice Edit and Effect settings of the key board parts For details on the Voice Part Setup display refer to the R...

Страница 30: ...r parts Touching a Voice name calls up the Voice Selection display for the corresponding part wSong area Indicates information for the current Song s Touching a Song name calls up the Song Selection d...

Страница 31: ...is active For instructions on programming the sequence refer to the Refer ence Manual on the website eClock The current time is shown here rMIC Input level indicator When a microphone is connected thi...

Страница 32: ...eSelectable data files The files that can be selected are shown If two or more pages are available you can call up another page by touching the desired page tab at the bottom of this area rFolder Path...

Страница 33: ...r Close at the lower right of pop up displays When a message information or confirmation dialog appears touching the appro priate item such as Yes or No closes the message If you want to quickly retur...

Страница 34: ...ate Touch and hold the display knob and rotate your finger around the knob to change the parameter value Touch and hold This instruction means to touch the object in the display and hold it for a whil...

Страница 35: ...ta dial or the DEC INC buttons to adjust the value This is useful if you have difficulty adjusting by touching on the display or want finer control over the adjustment Selecting an item from a list wi...

Страница 36: ...button or move the knob slider joystick or con nected pedal corresponding to the desired setting display to instantly call up that display For example pressing one of the REGISTRATION MEMORY 1 10 butt...

Страница 37: ...l up the File Edit pop up window For example the display shown below Voice Selection is called up via VOICE SELECT RIGHT 1 button 2 Touch Save to call up the display for selecting the saving des tinat...

Страница 38: ...for selecting the desired file folder 4 Select the desired file or folder by touching it 5 Touch Rename at the top of the display to call up the Charac ter Entry window 6 Input the name of the selecte...

Страница 39: ...the dis play for selecting the desired files folders 4 Select the desired files folders by touching each item One or more files folders can be selected highlighted To cancel the selection touch the sa...

Страница 40: ...space key indicated in the illustra tion above 4 Touch OK to finalize the characters name keywords etc you have input Entering Characters 2 1 Depending on the display for charac ter entry you are work...

Страница 41: ...then input the same PIN code you entered in step 2 The metronome provides a click sound giving you an accurate tempo guide when you practice or letting you hear and check how a specific tempo sounds...

Страница 42: ...rts Harmony Arpeggio or Multi Pads for the selected Style Setting up the Voices p 48 Setting up keyboard parts Making Song playback settings p 72 Setting up Harmony Arpeggio p 56 Storing the Song s pa...

Страница 43: ...tion Memory in a Playlist p 96 Creating a Playlist Record as a shortcut to the Regis tration Memory Editing the Playlist for your live performance set list p 98 Creating a new Playlist for your live p...

Страница 44: ...ROL ACMP button is turned on When the button is turned on both the rhythm part and auto accompaniment can be played back during Style playback At the same time the specific left hand section of the ke...

Страница 45: ...example playing a simple major triad for a country song may result in a jazzy seventh chord or playing an on bass chord may result in inappropriate or unexpected accompaniment Free Play These Styles...

Страница 46: ...ger This method lets you easily play chords in the accompaniment range of the keyboard using only one two or three fingers Fingered This lets you finger your own chords on the chord section of the key...

Страница 47: ...as you play a chord with your left hand the selected Style starts Each Style has four One Touch Setting setups Press any other of the ONE TOUCH SETTING 1 4 buttons to try out other setups Optimum Pane...

Страница 48: ...nd sections of the keyboard Split Turn on the LEFT part and at least one of the RIGHT 1 3 parts The F 2 and lower keys are used for the LEFT part while the upper keys excluding F 2 are used for the RI...

Страница 49: ...Split Point Fingering window MENU Split Fingering 2 Set the Split Point Holding the LEFT part Voice Left Hold By turning on the PART ON OFF LEFT HOLD button when the LEFT part is ON the LEFT part Voic...

Страница 50: ...ssing the desired key on the keyboard w Split Point Style Left Right 3 Sets each Split Point individually Specify the Split Point directly from the keyboard by simultaneously holding the correspond in...

Страница 51: ...When this is set to On the bass part of the current Style is muted and the Voice of the muted bass part is assigned to the left part Split Point Right 3 Split Point Left Split Point Style LEFT Voice s...

Страница 52: ...he Voice type and its defining characteristics are indicated above the Voice name There are various Voice character istics however only the following ones are covered here For detailed explanations re...

Страница 53: ...to File Management page 37 Creating Original Organ Flutes Voices The term footage is a reference to the sound generation of traditional pipe organs in which the sound is produced by pipes of different...

Страница 54: ...ll the Ensemble Parts are handled as Right parts the Left hand part is not available in this mode although the Auto Accom paniment can be turned on and Styles can be played with the left hand Entering...

Страница 55: ...cted another Voice you can confirm that the Ensemble Voice mode is no longer active To do this press the Home button to return to the Home display and check that the Voice area shows four different Vo...

Страница 56: ...up the detailed settings popup window For more information refer to the Reference Manual on the web site 5 Play the keyboard The effect selected in step 4 is applied to the right hand melody To turn o...

Страница 57: ...ACMP and the LEFT part on off status Keep in mind that Trill works only when you hold down two notes on the keyboard simultaneously or the last two notes if more than two notes are held and it plays...

Страница 58: ...g the Arpeggio Quantize func tion Arpeggio playback can be syn chronized with Song Style playback allowing any slight imperfections in the timing to be corrected This can be set in the display MENU Vo...

Страница 59: ...d playback control refer to Controlling Multi Pad Playback page 70 Setting up Multi Pads You can also call up the Multi Pad Selection display via the Home display page 30 NOTE For basic operations of...

Страница 60: ...memorize your panel settings A message appears prompting you to save the panel settings at this time To go on and memorize various panel settings to other buttons touch No then repeat steps 2 4 as ne...

Страница 61: ...t the octave value to 0 press the and buttons simultaneously Changing the Pitch of the Keyboard If you want to transpose the pitch of the Audio Song use the Pitch Shift parameter on page 80 The Transp...

Страница 62: ...ormally three Slider Assign Types Balance and Assign Types 1 and 2 and they can be switched in sequence by pressing the SLIDER ASSIGN button The selected Assign Types for knobs and sliders will be res...

Страница 63: ...s foot controllers You can assign various functions to optional footswitches foot controllers 1 To call up the Edit display touch MENU Assignable 2 Double tap touch twice the desired item in the Foot...

Страница 64: ...section of the keyboard Make sure that the ACMP button is on press the SYNC STOP button then play the keyboard INTRO I III buttons Genos features three different Intro sections that let you add an in...

Страница 65: ...E A F buttons To start playback with a fade in When playback is stopped press the button to which this function has been assigned Then press the START STOP button for Style or the PLAY PAUSE button fo...

Страница 66: ...he currently selected section The MAIN VARIATION A D button lamps also flash in red when the fill in is playing Blue The section contains data but is not currently selected Off The section contains no...

Страница 67: ...in a very legato but firm way the pitch slides up from C to E S Art2 Voices Some of the wind instrument and strings Voices feature a special technology called AEM which utilizes detailed samples of s...

Страница 68: ...2 Playing the keyboard while holding down the available ART button changes the nature of the Voice For example in the case of the NylonGuitar Voice in A GUITAR category holding down the ART 1 button...

Страница 69: ...u select S Art S Art2 Voices for two or more keyboard parts using an ART button simultaneously affects all parts for which S Art S Art2 Voices are selected When an Example 3 effect is assigned to both...

Страница 70: ...easure When the Style or MIDI Song is stopped pressing the Multi Pad button starts playback immediately While the Style or MIDI Song is play ing back pressing the STYLE CON TROL START STOP or SONG A B...

Страница 71: ...CMP is off press any note or play back a Style When ACMP is on play a chord in the chord section or play back a Style If you enable standby for a Multi Pad during Style or Song playback pressing any n...

Страница 72: ...of the actual sound itself The performance information refers to which keys are played at what timing and at what strength just as in a musical score Based on the recorded performance information the...

Страница 73: ...d depending on which you have selected last time 2 Touch the display to switch the Song playback mode Song File Compatibility You can play back the following types of Songs Preset Songs MIDI Songs You...

Страница 74: ...gs touch MIDI For detailed playback operations and the crossfade function refer to pages 78 85 2 For basic operations of the Song Selection display refer to File Selec tion Display page 32 You can sel...

Страница 75: ...ong List For details on how to edit the Song List refer to the Reference Manual on the web site When selecting an existing Song List 2 1 Call up the Song List File Selection display by touching the So...

Страница 76: ...usage cases Applying Effects to the Microphone Sound Vocal Harmony Make sure to connect a microphone before using Vocal Harmony and Synth Vocoder For instructions on connecting a microphone and making...

Страница 77: ...ds you say and applies them to the pitch of the instrument sounds Using Synth Vocoder These are special effects that graft the characteristics of your voice onto synthesizer and other sounds for unusu...

Страница 78: ...ponding side SONG A or SONG B During playback pressing it pauses playback Pressing it again resumes Song playback from the current position Selecting previous next Song PREV or NEXT button Press or to...

Страница 79: ...tion pop up window When you press or hold the PREV or NEXT button a setting dis play appears showing the current position of the Song When the win dow is shown on the display you can also use the Data...

Страница 80: ...of an Audio Song in semitone steps from 12 to 12 A B Repeat Playback This lets you repeatedly play back a specified range between points A and B 1 Touch Play Pause to start playback 2 Specify the rep...

Страница 81: ...ng name to call up the Song Selection Display 5 2 Save the Song file page 37 Jumping to a Song Position Marker during playback Simply touching the one of the Song Position 1 4 during Song playback jum...

Страница 82: ...t playback from the top of the Song 2 After passing the 1 point touch Loop to turn the loop function on The Song plays back up to the 2 point then goes back to 1 and loops between the two points 3 To...

Страница 83: ...MENU Score The instrument can display the music notation of commercially available music data or your recorded Songs The displayed notation is generated by the instrument based on the Song data As a r...

Страница 84: ...is playing back the color of the lyrics changes indicating the current position For details on the Lyrics display refer to the Reference Manual on the website Displaying Text Regardless of whether a...

Страница 85: ...to your voice through a microphone or not For details on the Vocal Harmony function including Harmony type selection refer to page 76 Using the Talk function Turning the Talk function on by pressing t...

Страница 86: ...edure for the Mixer Panel 1 2 Use this display when you want to adjust the balance between the entire Style part entire Song A part entire Song B part Left part Right 1 3 parts Multi Pad part Mic part...

Страница 87: ...n save the Song to the User drive or USB flash drive If you want to recall the settings for future use select the Song file saved here 1 Call up the operation display via RECORDING MIDI Multi Recordin...

Страница 88: ...er settings then save them as a Style file or Song file step 5 on page 87 Turning Each Channel of the Style or MIDI Song On Off Style Channels Each Style contains the channels listed below Rhythm 1 2...

Страница 89: ...display touch the Style 1 2 tab Song 1 8 tab or Song 9 16 tab 2 Touch the instrument icon below the channel name to call up the Voice Selection display then select the desired Voice 3 As necessary ma...

Страница 90: ...t can be transmitted to and played on portable music players by using a computer This instru ment allows you to record up to 80 minutes per single recording Before recording make the necessary setting...

Страница 91: ...keyboard performance Style playback or Multi pad playback 2 Before recording check the recording levels on the Rec Moni tor meter by playing the keyboard Style etc and adjust them accordingly by usin...

Страница 92: ...u can save all ten registered panel setups as a Single Registration Memory Bank file Playlist The Playlist function allows you to create your own live performance set list You can select only the desi...

Страница 93: ...tom Panel Setups with Registration Memory The list of items to be registered to Registration Memory Selecting the items to be registered The Registration Memory window contains the list for selecting...

Страница 94: ...use the REGIST BANK buttons to select a Bank 3 Press one of the blue lit numbered buttons 1 10 in the Reg istration Memory section The selected button lights in red 2 You can tag Registration Memory...

Страница 95: ...lay then select the desired Bank 2 Touch Menu then Regist Bank Info to call up the Regist Bank Info display This display consists of two pages Voice related and Style related You can switch among the...

Страница 96: ...Playlist 2 1 Touch Add Record on the display The Registration Bank Select display appears 2 2 Touch the desired Registration Bank file to register as a Playlist Record The new Playlist Record is added...

Страница 97: ...ection display 3 Touch the desired Playlist file and then close the display 4 Touch the Record name on the Playlist display and then touch Load The Registration Memory Bank registered as the Playlist...

Страница 98: ...ist allows you to copy the existing Playlist file as a new Playlist file 1 Press the PLAYLIST button to call up the Playlist display 2 Touch Append Playlist on the display The Playlist File Selection...

Страница 99: ...rder of the Records 2 1 Touch the desired Record you want to move 2 2 Touch Up Down to move the Record you selected in Step 2 1 3 Touch Save to save the appended Records to the current Playlist file D...

Страница 100: ...the Assignable display via MENU Assignable 2 Double tap touch twice the desired item from the six locations of the Home Shortcuts area The function selection pop up window appears 3 Touch the desired...

Страница 101: ...obal Settings Utility Speaker Connectiv ity Determines how the sound is output from the speaker and the digital output volume Display Touch Screen Contains display related settings such as brightness...

Страница 102: ...R2 in the EQ display then touch Save to call up the Character Entry window 5 3 In the Character Entry window change the name as necessary then touch OK to save the data Adjusting the Sound at the Fina...

Страница 103: ...ck data created by Yamaha or create your own original Expansion Pack data by using the Yamaha Expansion Manager software on your computer For instructions on how to install the Expansion Packs refer t...

Страница 104: ...the right most key on the keyboard turn the power on This restores all set tings to the factory default Confirming the Firmware Version and Hardware ID Restoring the Factory programmed Settings You c...

Страница 105: ...h Backup to save the backup file to the USB flash drive Restoring the Backup file To do this touch Restore in step 3 above When the operation is complete the instrument will be restarted automatically...

Страница 106: ...to other electronic components turn off the power of all components Also before turning any components on or off make sure to set all volume levels to minimum 0 Otherwise dam age to the components el...

Страница 107: ...the display lights in green or yellow Make sure that the meter does not light in orange or red since this indicates that the input level is too high 4 Adjust the volume balance between the microphone...

Страница 108: ...e Optional Yamaha GNS MS01 Speaker Connecting Audio Devices LINE OUT jacks AUX IN jacks DIGITAL OUT jack Since Genos has no built in speakers you need to monitor its sound output via external audio eq...

Страница 109: ...ack has the same output signal as the LINE OUT MAIN jacks By using this jack you can record the keyboard performance or Song playback of this instrument to external media e g a computer or CD recorder...

Страница 110: ...effect on a Super Articulation Super Articulation 2 Voice 3 VOLUME Controls volume You can also change the function assignments to the pedals as desired Example Controlling SONG A start stop by footsw...

Страница 111: ...connected to each of the USB TO DEVICE terminals Formatting a USB flash drive You should format the USB flash drive only with this instrument page 112 A USB flash drive formatted on another device ma...

Страница 112: ...reless LAN function 1 Connect to the USB TO HOST terminal via a Wireless MIDI Adaptor UD BT01 2 Connect to the MIDI terminals via a Wireless MIDI Adaptor MD BT01 2 1 The wireless LAN function may not...

Страница 113: ...annels The MIDI settings such as transmit receive channels on the instrument can be set via MENU MIDI For details refer to the Reference Manual on the website Connecting to a Computer USB TO HOST term...

Страница 114: ...Pages Reference Manual Mixer For adjusting the parameters of each part such as volume pan and EQ It also allows you to adjust overall sound controls such as Master Compressor and Master EQ 86 Channel...

Страница 115: ...e playback related settings such as OTS Link timing Dynamics Control etc Song Setting For making Song playback related settings such as Guide function Channel settings etc Chord Tutor Indicates how to...

Страница 116: ...Use the phone cables to connect the speakers to the respective outputs on Genos Either cable can be used interchangeably with either output jack Appendix Use only the supplied cables NOTICE Satellite...

Страница 117: ...lugs of Genos and the subwoofer to an appropriate AC outlet 8 Set the volume controls MASTER VOLUME on Genos and MAIN VOLUME on the subwoofer to minimum 9 Turn on the power of Genos then the subwoofer...

Страница 118: ...A PLAY PAUSE Menu Song Setting Play PREV NEXT SONG B PLAY PAUSE PREV NEXT SONG A SONG B CROSS FADER RECORDING Guide TIMING TAP TEMPO Menu Metronome Tap Tempo TEMPO Menu Style Setting TEMPO TRANSPOSE T...

Страница 119: ...ART ON OFF R3 R3 LEFT HOLD Split Point Fingering SUSTAIN Mixer Chorus Reverb Panel HARMONY ARPEGGIO Keyboard Harmony Arpeggio HOME MENU STYLE VOICE SONG PLAYLIST ASSIGNABLE A Menu Assignable Assignabl...

Страница 120: ...Unplug the headphones Connect the footswitch to the appropriate jack Check whether the external speaker is connected and the volume control is adjusted properly pages 108 116 The sound is distorted or...

Страница 121: ...side MIDI Songs cannot be played back during MIDI recording operation Stop MIDI Record ing when you want to play back a MIDI Song Audio Songs cannot be selected The file format may not be compatible w...

Страница 122: ...y to the microphone as possible Use a directional microphone Turn down the Master volume Style volume or Song volume control pages 23 86 Separate the microphone from the external speakers as far as po...

Страница 123: ...ith VCM 10 User Master Compressor 5 Preset 5 User Master EQ 5 Preset 2 User Part EQ 28 Parts Vocal Harmony 54 Preset 60 User The User number represents the total of Vocal Harmony and Synth Vocoder Syn...

Страница 124: ...allpaper Customization Yes Storage and Connectivity Storage Internal Memory User Drive Yes approx 58 GB External Drives USB flash drive Connectivity Headphones Standard stereo phone jack PHONES Microp...

Страница 125: ...10 Footage 53 Footswitch 63 110 Format 112 G Gateway Buttons 28 H Harmony Keyboard Harmony 56 Harmony Vocal Harmony 76 85 Headphones 22 Home Display 28 30 I Intro Style 64 iPhone iPad 112 iPhone iPad...

Страница 126: ...ong List 16 73 78 Song Position Marker 81 Specifications 123 Split 48 Split Point 49 Style 16 44 Super Articulation Voice 67 Sustain 67 Synchro Start MIDI Song 79 Synchro Start Multi Pad 71 Synchro St...

Страница 127: ...Genos Owner s Manual 127 Memo...

Страница 128: ...ay charge a fee for the physical act of transferring a copy and you may at your option offer warranty protection in exchange for a fee 2 You may modify your copy or copies of the Program or any portio...

Страница 129: ...y the Free Software Foundation 10 If you wish to incorporate parts of the Program into other free programs whose distribution conditions are different write to the author to ask for permission For sof...

Страница 130: ...ting non free programs These disadvantages are the reason we use the ordinary General Public License for many libraries However the Lesser license provides advantages in certain special circumstances...

Страница 131: ...e the object code for the work under the terms of Section 6 Any executables containing that work also fall under Section 6 whether or not they are linked directly with the Library itself 6 As an excep...

Страница 132: ...THE LIBRARY IS LICENSED FREE OF CHARGE THERE IS NO WARRANTY FOR THE LIBRARY TO THE EXTENT PERMITTED BY APPLICABLE LAW EXCEPT WHEN OTHERWISE STATED IN WRITING THE COPYRIGHT HOLDERS AND OR OTHER PARTIES...

Страница 133: ...t be misrepresented as being the original source 3 This Copyright notice may not be removed or altered from any source or altered source distribution The Contributing Authors and Group 42 Inc specific...

Страница 134: ...canonware com All rights reserved Copyright C 2007 2012 Mozilla Foundation All rights reserved Copyright C 2009 2014 Facebook Inc All rights reserved Redistribution and use in source and binary forms...

Страница 135: ...Genos Owner s Manual 135...

Страница 136: ...documents will cause this warranty to be void This warranty covers only the Original Owner and is not transferable In Order to Obtain Warranty Service Warranty service will only be provided for defec...

Страница 137: ...tps europe yamaha com en support compliance doc html LT Lithuanian SUPAPRASTINTA ES ATITIKTIES DEKLARACIJA A Yamaha Music Europe GmbH patvirtinu kad radijo rengini tipas Genos atitinka Direktyv 2014 5...

Страница 138: ...400 43 G teborg Sweden Tel 46 31 89 34 00 DENMARK Yamaha Music Denmark Fillial of Yamaha Music Europe GmbH Tyskland Generatorvej 8C ST TH 2860 S borg Denmark Tel 45 44 92 49 00 FINLAND F Musiikki Oy A...

Страница 139: ......

Страница 140: ...Yamaha Global Site https www yamaha com Yamaha Downloads http download yamaha com ZW77440 Manual Development Group 2017 Yamaha Corporation Published 08 2017 POAP B0 Printed in China...

Отзывы: