background image


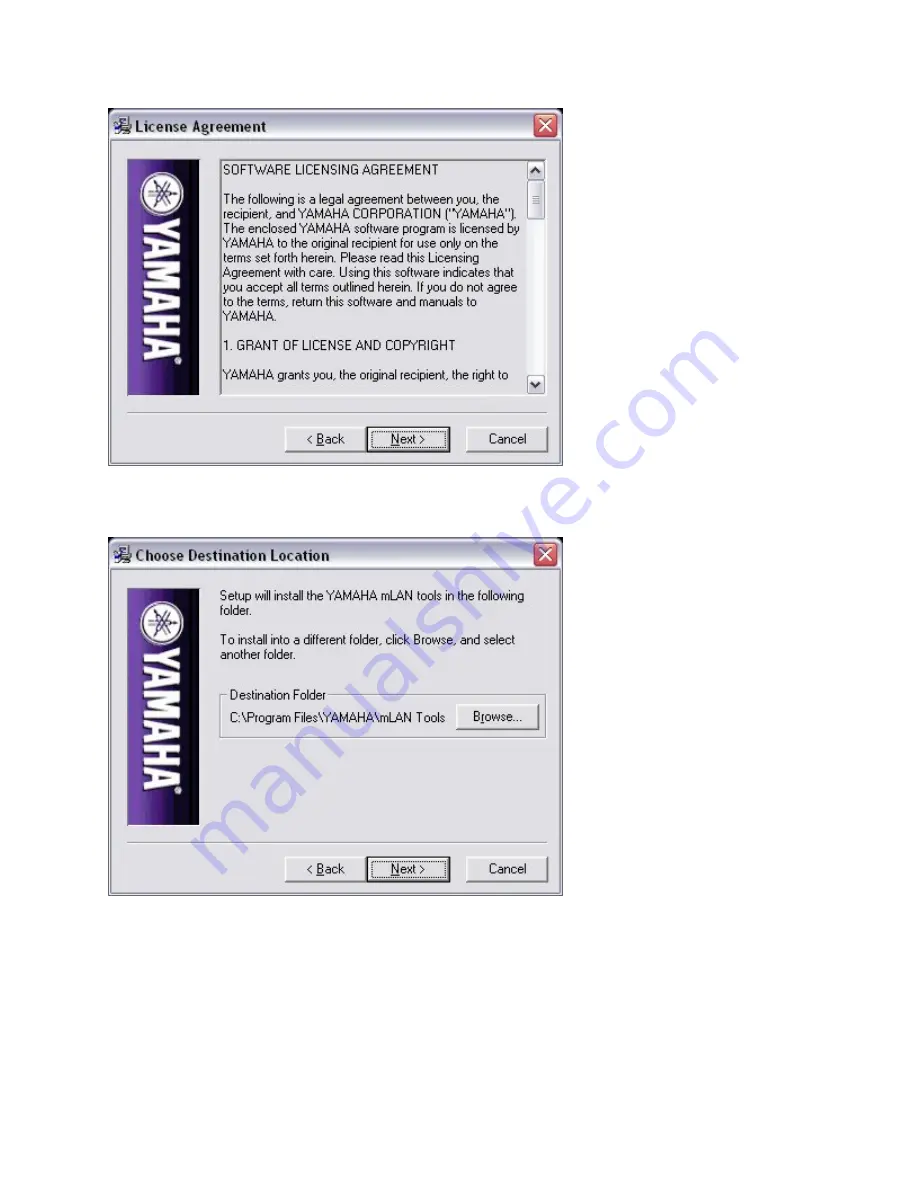
Destination Location window, typically you will just hit “Next”.  If you wish to 
choose a different location, choose “Browse”.   


You will always want to install mLAN on the drive that contains your 
operating system (XP). 
 
 
Once done, the applications will install themselves.  You will see a window 
with the installation percentage bars. 

Содержание FIRESTATION

Страница 1: ...igitally signed and any other default window error boxes When this happens simply choose continue anyway and keep moving along If you have undeterminable problems please contact tech support WWW PRESO...

Страница 2: ...CD When installing from disc the installer should auto run The following applies when installing from CD ROM or from downloadable zip file First you will see the Firestation welcome window Click OK as...

Страница 3: ...e the Presonus splash screen and at the bottom right hand corner of your screen the Yamaha welcome window Here it gives you some general pre installation suggestions Click Next Next you will see the L...

Страница 4: ...t If you wish to choose a different location choose Browse You will always want to install mLAN on the drive that contains your operating system XP Once done the applications will install themselves Y...

Страница 5: ...r screen asking you to complete a Hardware Wizard and if it completed successfully The Hardware Wizard should appear within 10 seconds so be patient and wait for it When it appears it will pop up in t...

Страница 6: ...to manually click the Next button when selectable When it begins installing you will see a window telling you that this has not passed windows logo testing Do no be concerned with this Click Continue...

Страница 7: ...and continue through the installer You may still be able to manually update the driver within the Device Manager At this stage you will now see the Patchbay Initialization window appear at the bottom...

Страница 8: ...ee Hardware Wizard s appearing in the upper left hand corner of your screen to install the Yamaha mLAN MIDI In Port and the Yamaha mLAN MIDI Out Port While they are installing you may see the windows...

Страница 9: ...If you are performing a reinstallation you may also see the Hardware Wizard for the Yamaha mLAN Audio Port...

Страница 10: ...hat you are installing mLAN do not be surprised if you do not see this yet When you enable WDM sequences for the first time this Wizard will appear See Part 2 Once the Hardware Wizard s have finished...

Страница 11: ...onnections automatically So if you are performing an update from an older version of mLAN software or you are re installing then check the Launch Patchbay box and then click Next If you are installing...

Страница 12: ...EXT and toggle the LED to mLAN Click Finish to finalize the installation Lastly if you checked the Launch Patchbay box after you click Finish the Patchbay will run and then you will see a window appe...

Страница 13: ...he connections Don t worry about the exclamation Click OK At this stage your mLAN LED under CLOCK on the front of the Firestation should now be solid If it isn t then you will need to manually make yo...

Страница 14: ...panic if you see window message boxes popping up about the drivers not digitally signed and any other default window error boxes When this happens simply choose continue anyway and keep moving along...

Страница 15: ...ote Don t worry about the yellow by the 61883 Class Bus Device This is normal and should be here This is a firewire data stream standard There is a yellow by it because Windows thinks it needs a drive...

Страница 16: ...Please do as follows 1 Use the UNINSTALLER EXE located in the programs menu within the YAMAHA MLAN TOOLS 2 Go into ADD AND REMOVE PROGRAMS and delete the YAMAHA MLAN BUS listed in there if present 3 R...

Страница 17: ...want to delete anything mLAN related Be careful not to delete things that are not You may see some files like mlang dll and ATMLANE EXE DO NOT delete these 5 Once this is done go into the DEVICE MANAG...

Страница 18: ...LICK and UNINSTALL your firewire cards driver 6 Now restart your computer Note Doing this will not mess anything up it will refresh with a new driver once you restart the computer Doing this just ulti...

Страница 19: ...The mLAN Control Panel...

Страница 20: ...ID numbers that are automatically assigned by the computer You will never change these Send will always be 0 and Receive will be 16 or above 4 Audio sequences must both be set to 8 5 MIDI sequences bo...

Страница 21: ...processed last Send Playback and Receive Input respectively Here go as low as you can but try to find a happy middle ground leaving a bit of headroom The second stage is your recording program itself...

Страница 22: ...ttings you must hit the SET button In doing so the Receive side will disconnect Simply run the Patchbay make your channel connections if necessary and hit APPLY 3 If you cannot see the Revert SET butt...

Страница 23: ...help with making your connections CTRL SHIFT By holding these two keys down continuously while right clicking on a name all 8 inputs will connect together This quick key will allow only the right choi...

Страница 24: ...re devices The difference is that this is digital and not physical The MIDI section CONNECTED MIDI is the same as audio integrally but you are connecting the physical IN to the driver Input and the dr...

Страница 25: ...nally and ultimately hit APPLY for all of these settings to take effect You can also make a save file of the current configuration Go to the Patchbay s file menu and select Save As Give it a name and...

Страница 26: ...ing for your bit depth It also has its own buffer section See buffer settings guide for more information The ASIO drivers should install automatically The ASIO driver will only appear when ASIO based...

Отзывы: