background image

DVD-S661

8

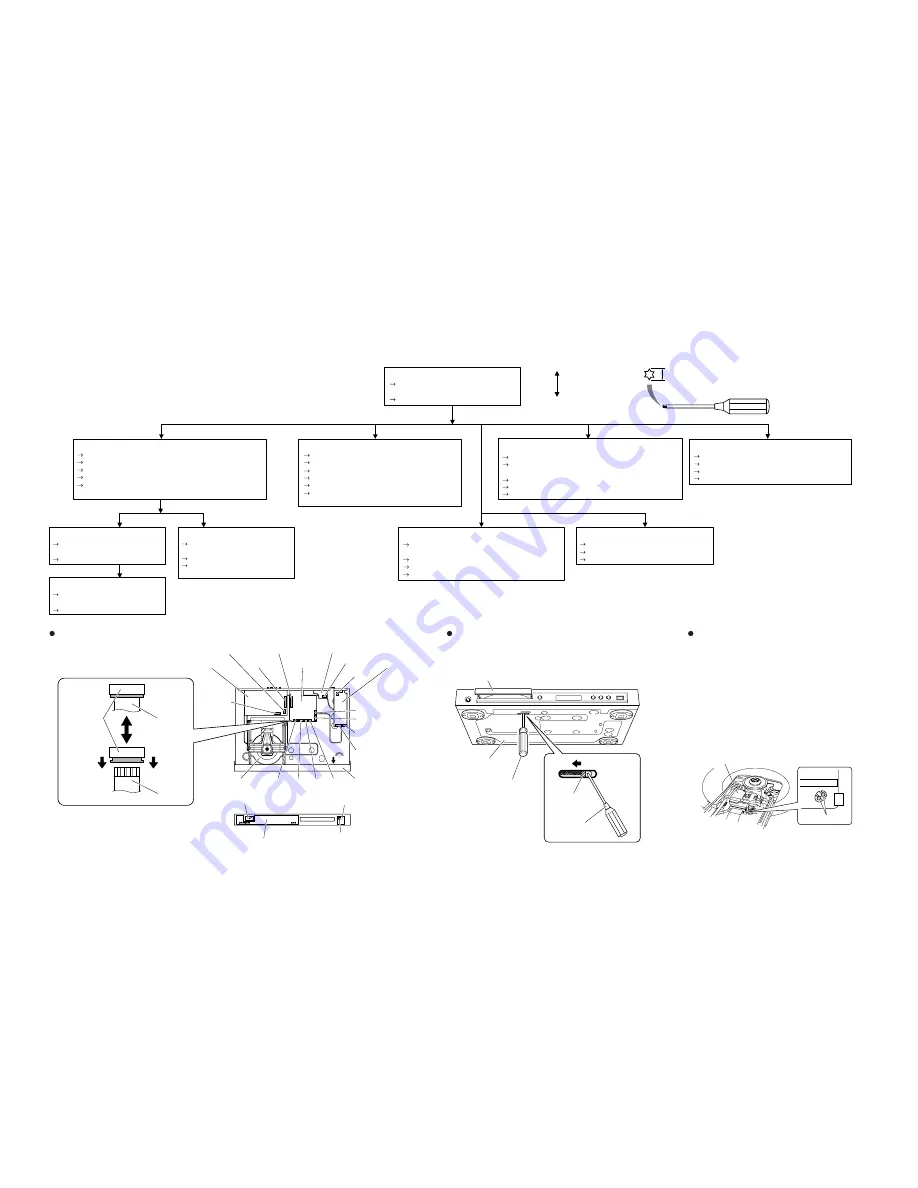
DISASSEMBLY PROCEDURES

Screw driver

Slider

Optical pick up

Solder

1100

1201

(MONO P.C.B.)

1201

(AV P.C.B.)

CN101

Power supply unit

DVD mechanism

Front panel

1103

1105

1102

1101

FRONT (2) P.C.B.

FRONT (3) P.C.B.

View A

CN3

1207

1301

1205

CN1

MONO P.C.B.

AV P.C.B.

1200

(FRONT P.C.B.)

FRONT (1) P.C.B.

FRONT (4) P.C.B.

1200

(AV P.C.B.)

A

Unlock

Lock

Flexible flat cable

Flexible flat cable

1101

(MONO P.C.B.)

Flatblade screwdriver

Bottom side

Tray

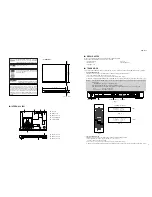
Top Cover [240]

 Remove 5 screws [250] (2 on side and 3 on
 rear side).
 Lift cover from rear side to remove.  

DVD Mechanism [1300-1]

Solder the lauds of the optical pick up. (Fig. 3)

Unlock tray cover ass'y and close tray.
Remove 4 screws (DVD mechanism to frame).
Lift DVD mechanism up slightly and move it backward 
to remove. 

MONO P.C.B. [1003]

Solder the lauds of the optical pick up. (Fig. 3)

AV P.C.B. [1002] 

Remove 3 cable connections [1100] [1200 (AV P.C.B.)]
[1201 (AV P.C.B.)].
Remove 5 screws [260] (P.C.B. to rear panel).
Release 2 spacers locking (P.C.B. to frame). 
Dismount P.C.B..

Power Supply Unit [1005]

Remove 3 cable connections [CN101] [CN1] [CN3].
Remove 2 screws [256] (P.C.B. to frame).
Release 2 spacers locking (P.C.B. to frame).
Dismount power supply unit. 

FRONT (1) P.C.B. [1001 (1)]

Remove 4 screws [260] (P.C.B. to front
panel).
Dismount P.C.B..

FRONT (3) P.C.B. [1001 (3)]

Remove 2 screws [260] (P.C.B. to front
panel).
Dismount P.C.B..

FRONT (2) P.C.B. [1001 (2)]

Remove 2 screws [260] (P.C.B. to front 
panel).
Dismount P.C.B..
Remove cable connection [1200 
(FRONT P.C.B.)].

Front Panel [101] 

Remove 4 cables connections. [1105] [1205] [CN3] [1301]
Open tray. (Fig. 2)


Unlock tray lid and close tray.
Remove 2 screws [251] (Front panel to bottom). 
Unlock front panel by releasing successively 4 snaps (2 on the 
side and 2 on the bottom). 

Mounting

Dismounting

See REPLACEMENT PARTS LIST for item numbers.

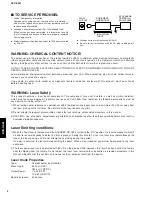
2.7 mm

When disassembling, use the special screw driver with tip shape in figure.

T10

Remove 7 cable connections [1101] [1102] [1103] [1105]
[1201 (MONO P.C.B.)] [1205] [1207].
Remove 3 screws [256] (P.C.B. to frame).
Remove screw [260] (P.C.B. to rear panel).
Dismount P.C.B..

Remove 3 cable connections [1101] [1102] [1103].
Open tray. (Fig. 2) 

FRONT (4) P.C.B. [1001 (4)]

Remove cable connection [1301].
Remove 2 screws [260] (P.C.B. to rear panel).
Dismount P.C.B..

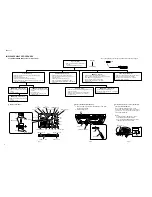
How to manually eject the tray

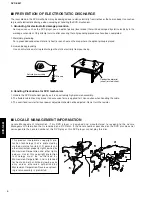
Preventive measure for laser diode from
electrostatic breakdown

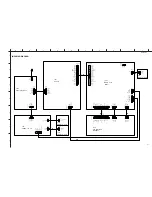
Cable connections

Fig. 3

Fig. 1

Fig. 2

When replacing the MONO P.C.B. or DVD 
mechanism, solder between lands of the optical 
pick up P.C.B. to protect the laser diode against 
electrostatic breakdown.

Notes

• Use an anti-static soldering iron to short-

circuit and unshort-circuit laser diode.

• After you have finished repairing, remove the 

solder from the short-circuit location.

a. Move the slider in the direction indicated with a screw driver 

until the tray is ejected.

b. Gently pull the tray out.

Содержание DVD-S661

Страница 1: ...AHA are continually striving to improve YAMAHA products Modifications are therefore inevitable and specifications are subject to change without notice or obligation to retrofit Should any discrepancy appear to exist please contact the distributor s Service Division WARNING Static discharges can destroy expensive components Discharge any static electricity your body may have accumulated by groundin...

Страница 2: ...n the production of this product contains LEAD In addition other electrical electronic and or plastic where applicable components may also contain traces of chemicals found by the California Health and Welfare Agency and possibly other entities to cause cancer and or birth defects or other reproductive harm DO NOT PLACE SOLDER ELECTRICAL ELECTRONIC OR PLASTIC COMPONENTS IN YOUR MOUTH FOR ANY REASO...

Страница 3: ... is connected to the mains even when the player is switched off This primary area is not shielded so it is possible to touch copper tracks and or components when servicing the player Service personnel have to take precautions to prevent touching this area or components in this area Note The screws on the DVD mechanism may never be touched removed or re adjusted Handle the DVD mechanism with care w...

Страница 4: ...tic electricity in the working environment Only attempt service after ensuring that all grounding procedures have been completed 1 Worktable grounding Put a grounded conductive material sheet or iron sheet on the area where the optical pickup is placed 2 Human body grounding Use an anti static wrist strap to discharge the static electricity from your body 1M ohms Conductive material sheet or steel...

Страница 5: ...DVD S661 5 DVD S661 FRONT PANEL REAR PANEL G model G model REMOTE CONTROL PANEL ...

Страница 6: ... USB device MP3 fs 32 44 1 48 kHz 96 128 256 320 kbps WMA fs 44 1 kHz 62 to 192 kbps fs 48 kHz 128 to 192 kbps DivX 3 Mbps or less JPEG 3072 x 2048 dpi or less Supported USB devices FLASH memory FAT16 or FAT32 format Card reader up to 6 slots Portable audio player External hard disk drive 80 GB or less TV STANDARD PAL 50 Hz NTSC 60 Hz Number of lines 625 525 Playback Multistandard PAL NTSC CONNECT...

Страница 7: ...rademarks of DTS Inc Manufactured under license from Dolby Labo ratories Dolby Pro Logic and the double D symbol are trademarks of Dolby Laboratories This product incorporates copyright protection technology that is protected by method claims of certain U S patents and other intellectual property rights owned by Macrovision Corporation and other rights owners Use of this copyright protection techn...

Страница 8: ... 260 P C B to front panel Dismount P C B FRONT 2 P C B 1001 2 Remove 2 screws 260 P C B to front panel Dismount P C B Remove cable connection 1200 FRONT P C B Front Panel 101 Remove 4 cables connections 1105 1205 CN3 1301 Open tray Fig 2 Unlock tray lid and close tray Remove 2 screws 251 Front panel to bottom Unlock front panel by releasing successively 4 snaps 2 on the side and 2 on the bottom Mo...

Страница 9: ...according to the PLAY key of the main unit Panel Key Test The display changes as shown below as the specified key is pressed Initial display Initial display All segments on Lighting of segments in lattice OFF OFF ON OFF ON OFF Canceling Test Mode Disconnect the power cable from the AC power outlet Press OPEN CLOSE key of the main unit Press STANDBY ON key of the main unit Press OPEN CLOSE key of t...

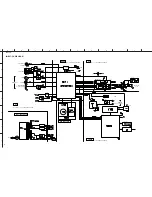
Страница 10: ...19 7103 7105 1100 1521 15 37 7100 7102 3 1 2 8 9 5 6 1105 1108 41 42 27 14 38 10 12 KEY1 3 6121 6122 16 15 12 11 10 9 AUDIO OUT L R HDMI AV MONO FRONT Power Supply Unit AV DVD Mechanism See page 21 22 SCHEMATIC DIAGRAM See page 23 24 SCHEMATIC DIAGRAM See page 18 20 SCHEMATIC DIAGRAM See page 21 22 SCHEMATIC DIAGRAM SC SY 7300 7106 INT_IR EXT_IR D D SFH615 1 4 3 2 5V_STBY 7115 7113 7114 7105 7106 ...

Страница 11: ...2 3 4 5 18 17 16 SFV24R 1ST SFV24R 1ST TROUT 5 4 3 2 1 TXD PH 1103 6 5 4 3 2 1 PH 1102 SP SP L_SW GND SLED SLED T RF CD DVD C Vc F VCC GND PD B A 1101 24 15 14 13 12 11 10 9 8 7 6 23 5 4 3 2 1 22 21 20 19 26 27 28 29 3 30 4 5 6 7 8 9 TRIN LOAD LOAD GND C NC VR CD LD CD E VR DVD NC MD GND LD LD DVD HFM F T F D 18 19 2 20 21 22 23 24 25 1 26 S0 GND 30FE BT VK N 1201 B5B EH A 1 10 11 12 13 14 15 16 1...

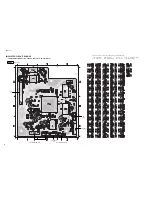
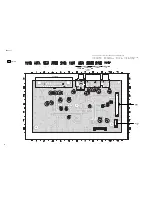
Страница 12: ...ILABLE The first digit of a component indicates the component type 1xxx Connector 3xxx Resistor 5xxx Coil 7xxx IC Transistor FET 2xxx Capacitor 4xxx SMD jumper 6xxx Diode 9xxx Wire jumper DVD Mechanism Unit AV 1100 MONO DVD Mechanism Unit FRONT 3 1522 AV 1201 FRONT 1 1102 Top view HDMI ...

Страница 13: ...S661 13 The first digit of a component indicates the component type 1xxx Connector 3xxx Resistor 5xxx Coil 7xxx IC Transistor FET 2xxx Capacitor 4xxx SMD jumper 6xxx Diode 9xxx Wire jumper MONO Bottom view ...

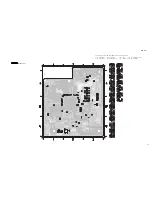
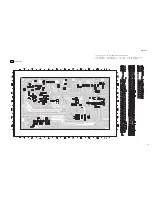
Страница 14: ...component type 1xxx Connector 3xxx Resistor 5xxx Coil 7xxx IC Transistor FET 2xxx Capacitor 4xxx SMD jumper 6xxx Diode 9xxx Wire jumper MONO 1201 AV SCART AUDIO OUT VIDEO S VIDEO COMPONENT Y PR CR PB CB COAXIAL DIGITAL OUT L R VIDEO OUT AV MONO 1207 Top view ...

Страница 15: ... S661 15 The first digit of a component indicates the component type 1xxx Connector 3xxx Resistor 5xxx Coil 7xxx IC Transistor FET 2xxx Capacitor 4xxx SMD jumper 6xxx Diode 9xxx Wire jumper AV Bottom view ...

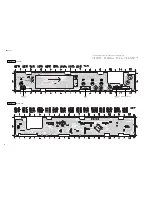
Страница 16: ...type 1xxx Connector 3xxx Resistor 5xxx Coil 7xxx IC Transistor FET 2xxx Capacitor 4xxx SMD jumper 6xxx Diode 9xxx Wire jumper FRONT 2 1200 OPEN CLOSE HDMI LED PLAY PAUSE STOP PROGRESSIVE LED FRONT 1 FRONT 1 FRONT 4 1301 Power Supply Unit MONO 1206 Bottom view Top view ...

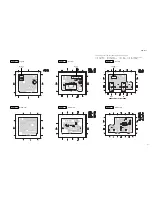
Страница 17: ...ottom view FRONT 3 Bottom view FRONT 4 Bottom view Top view FRONT 3 Top view FRONT 4 Top view STANDBY ON USB The first digit of a component indicates the component type 1xxx Connector 3xxx Resistor 5xxx Coil 7xxx IC Transistor FET 2xxx Capacitor 4xxx SMD jumper 6xxx Diode 9xxx Wire jumper ...

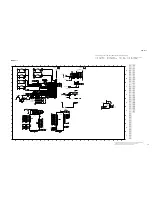
Страница 18: ... MDI1 20 YUV4 200 DACVSSA 201 202 19 TPI VREF 190 191 FS 192 YUV0 DACVSSC 193 194 YUV1 195 DACVDDB 196 182 DVDD3_8 RD21 183 RD20 184 185 RD19 186 RD18 187 RD17 188 RD16 DACVDDC 189 175 DVSS_11 RD25 176 RD24 177 178 DQM3 DQM2 179 TNI 18 RD23 180 181 RD22 RD31 168 RD30 169 17 CDFOP 170 RD29 RD28 171 RD27 172 DVDD18_5 173 RD26 174 160 RA8 DVSS_9 161 162 RA7 DVSS_10 163 RA6 164 RA5 165 RA4 166 167 DVD...

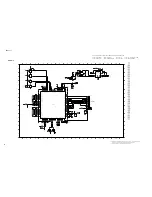
Страница 19: ...9 150R 150R 3248 2235 22p D F227 3209 150R D 5201 1u8 2202 47p 3253 47R 1u8 5206 47p 47p 2201 2212 2236 22p 2243 28 41 54 6 12 46 52 16 100n 36 40 18 1 14 27 3 9 43 49 5 7 8 10 11 13 42 44 39 15 37 38 19 2 4 45 47 48 50 51 53 25 26 29 30 31 32 33 34 20 21 17 Φ DRAM 1M X 16 X 4 23 24 22 35 F205 7206 IS42S16400A F224 5203 1u8 6 5 8 4 7 EEPROM Φ 2Kx8 1 2 3 M24C16 RDW6 7212 2 3 1 5 4 74HC1G125GW 7201 ...

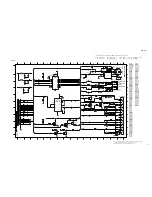
Страница 20: ...3319 3327 33R BC817 25W 7308 HDMI_3V3_A T307 3325 330R 47R 3306 T305 HDMI_1V8 3322 47R 47R 3317 12 13 7 14 11 74LVC08APW 7303 4 2 7 14 3 7303 1 74LVC08APW 1 47R 3310 3313 47R 1302 200mA BLM18P 5306 BSN20 7307 3 1 2 2314 3 2 6 7 8 100n Φ LTC4300A 2IMS8 7302 1 4 5 51 VSS1 3 78 VSS2 40 VSSD 19 WRF 77 XDN 64 VID 9 VIE 12 VIF 80 VIG 13 VIH 1 VREF 79 VSS1 1 46 VSS1 2 VDD1 1 8 VDD1 2 11 VDD1 3 55 VDD2 36...

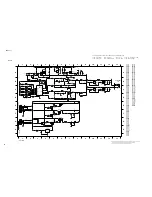
Страница 21: ... 6 1 2121 680p BC847BPN 7106 1 220R 3138 3118 470R 100n 2102 2118 220p 3163 10K 2101 10u 50V T110 4u7 50V 100n 2104 3154 2134 8 9 75R 26 27 28 29 3 30 4 5 6 7 17 18 19 2 20 21 22 23 24 25 1 10 11 12 13 14 15 16 1100 T105 T106 220p 2125 T108 3148 68R 10K 3129 4105 T100 T121 220p 2130 10K 3130 T109 10K 3124 T131 75R 3128 1 2 5 11 14 3 6 10 13 16 T107 7100 TS5V330PW 4 7 9 12 15 8 VIDEO SW 3166 10K 21...

Страница 22: ... 1V6 12 3V 7205 BC857B T202 T200 BC817 25 7204 4K7 3203 7200 BC807 25 10K 3257 6203 BAS316 3233 7217 1 3 2 4K7 1 3 2 BC817 40 2 3 4 5 BC817 40 7216 B5B EH A 1201 1 25V 470n 2224 7 8 4 2210 100u 7213 2 LM833D 5 6 100n 2206 3220 1K0 2220 10K 100n BAS316 3252 3202 6200 7206 470R BC847B 3246 1K5 T209 2207 50V 10u 3244 10K 10K 220K 3224 3211 T216 BAS316 6201 3232 470R 3227 100R 2219 100n 2211 470n T207...

Страница 23: ... 8166FTNN 3106 470R 3146 T108 10K PDZ5 6 B 6101 100K 3133 3115 T102 47R 3142 100K 100K 3143 47R 3113 LTL 8166FTNN 6121 35V 2106 100K 3131 4u7 10R 47R 3101 3107 100K 3140 100K 3132 10K 3111 3110 10K T106 T112 T110 47u 2103 35V 47R 3151 1K0 100K 3124 3105 SIN 21T 1 8S B 1109 1 9 10 7 14 8 6 74LVC08AD 7106 3 74LVC08AD 7106 2 4 5 7 14 10K 3116 1107 100K 3135 3137 100K 2 GND 1 OUT 3 VS 7102 13 7 14 11 ...

Страница 24: ...02 B4 2303 A4 3301 B2 3302 A4 3303 B3 3304 A2 7300 A3 7301 B2 470R 3304 10p 2303 1 10 2 MSJ 035 12A PC 1302 2302 10p 10K 3302 7300 SFH615 1 4 3 2 5V_STBY 1 10 2 5V_STBY 1303 MSJ 035 12A PC 1301 B3B EH A 1 2 3 2301 100n 3301 10K 3303 470R 7301 BC847BW GND EXT_IR to FRONT 1 _1104 Page 23 C2 to FRONT 1 _1103 Page 23 H3 to MONO_1105 Page 18 F5 REMOTE CONTROL OUT IN FRONT 2 FRONT 4 FRONT 3 STANDBY ON U...

Страница 25: ...DVD S661 25 MEMO MEMO MEMO MEMO ...

Страница 26: ... Black 256 3 x 6 S Tight with the brim 250 251 260 3 x 8 P Tight Black 3 x 15 S Tight Black Note The replacement battery cover is not available 101 110 161 169 251 271 190 230 240 250 250 250 256 256 256 260 260 256 256 260 260 260 260 336 1001 1 1001 3 1001 Front panel ass y Chassis EMC spring B 2 1002 1003 1004 1005 8009 8100 2000 No replacement part available 1001 4 2003 2004 ...

Страница 27: ... B ASS Y AV 3139 248 52351 1003 AAX82170 P C B ASS Y MONO DVM91USB 3139 248 51821 1004 AAX79060 DVD MECHANISM UNIT WXD8829 3139 247 13341 s 1005 AAX79050 POWER SUPPLY UNIT 06P15 3139 247 13351 8009 AAX53460 FLEXIBLE FLAT CABLE 24P 280mm P 0 5mm 3139 241 00391 8100 AAX77800 FLEXIBLE FLAT CABLE 30P 60mm P 1 25mm 3139 241 02491 ACCESSORIES 2000 AAX82300 REMOTE CONTROL DVD 16 2422 549 01442 2003 AAX21...

Страница 28: ...NDBY ON key RECEIVER AMPLIFIER Standby mode Standby mode Power ON PLAY Power ON PLAY Standby mode CD player DVD player AC OUTLET OFF DVD player CD player Power ON Power ON DVD CD PLAYER AC OUTLET linked DVD CD PLAYER AC OUTLET unlinked Starting IR code transmission Power ON PLAY IR code When the DVD player receives the IR code PLAY the power is turned on and the disc is played at the same time Pow...

Отзывы: