background image


iii


CAUTION: READ THIS BEFORE OPERATING YOUR UNIT.


1


To assure the finest performance, please read this 
manual carefully. Keep it in a safe place for future 
reference.


2


Install this sound system in a well ventilated, cool, 
dry, clean place — away from direct sunlight, heat 
sources, vibration, dust, moisture, or cold. In a 
cabinet, allow about 2.5cm (1 inch) of free space 
all around this unit for adequate ventilation.


3


Locate this unit away from other electrical 
appliances, motors, or transformers to avoid 
humming sounds.


4


Do not expose this unit to sudden temperature 
changes from cold to hot, nor locate this unit in 
an environment with high humidity (i.e., a room 
with a humidifier) to prevent condensation inside 
this unit, which may cause an electrical shock, fire, 
damage to this unit, and/or personal injury.


5


Avoid installing this unit in a location where 
foreign objects may fall onto this unit or where 
this unit may be exposed to liquid dripping or 
splashing. On the top of this unit, do not place:
– Other components, as they may cause damage 

and/or discoloration on the surface of this unit.

– Burning objects (i.e., candles), as they may 

cause fire, damage to this unit, and/or personal 
injury.

– Containers with liquid in them, as they may fall, 

spilling the liquid and causing an electrical 
shock to the user and/or damage to this unit.


6


Do not cover this unit with a newspaper, 
tablecloth, curtain, etc. in order not to obstruct 
heat radiation. If the temperature inside this unit 
rises, it may cause fire, damage to this unit, and/or 
personal injury.


7


Do not plug in this unit to a wall outlet until all 
connections are complete.


8


Do not operate this unit upside-down. It may 
overheat, possibly causing damage.


9


Do not use excessive force on switches, knobs 
and/or cords.


10


When disconnecting the power cord from the 
wall outlet, grasp the plug; do not pull the cord.


11


Do not clean this unit with chemical solvents; this 
might damage the finish. Use a clean, dry cloth.


12


Use only the voltage specified on this unit. Using 
this unit with a higher voltage than specified is 
dangerous and may cause fire, damage to this 
unit, and/or personal injury. YAMAHA will not be 
held responsible for any damage resulting from 
use of this unit with a voltage other than as 
specified.


13


To prevent damage by lightning, disconnect the 
power cord from the wall outlet during an 
electrical storm.


14


Do not attempt to modify or fix this unit. Contact 
qualified YAMAHA service personnel when any 
service is needed. The cabinet should never be 
opened for any reason.


15


When not planning to use this unit for long 
periods of time (i.e., vacation), disconnect the AC 
power plug from the wall outlet.


16


Be sure to read the “TROUBLESHOOTING” 
section on common operating errors before 
concluding that this unit is faulty.


17


Before moving this unit, press STANDBY/ON to 
set the unit in standby mode, then disconnect the 
AC power plug from the wall outlet.

When playing DTS encoded CDs, excessive noise will 
be heard from the analog stereo outputs. To avoid 
possible damage to the audio system, the consumer 
should take proper precautions when the analog 
stereo outputs of the player are connected to an 
amplification system. To enjoy DTS Digital 
Surround™ playback, an external 5.1-channel DTS 
Digital Surround™ decoder system must be 
connected to the digital output of the player.


LASER SAFETY


This unit employs a laser. Due to possible eye injury, 
only a qualified service person should remove the 
cover or attempt to service this device.


DANGER


This unit emits visible laser radiation when open. 
Avoid direct eye exposure to beam.
When this unit is plugged into a wall outlet, do not 
place your eyes close to the opening of the disc tray 
and other openings or look inside.


Be sure to place this unit on a level surface.


If not so, this unit will fail to work normlly at the 
PLAYXCHANGE operation and cause damage to the 
disc(s) and this unit itself.


WARNING


TO REDUCE THE RISK OF FIRE OR ELECTRIC 
SHOCK, DO NOT EXPOSE THIS UNIT TO 
RAIN OR MOISTURE.


LASER


Type

Semiconductor laser GaAlAs

Wave length

650 nm (DVD)
780 nm (VCD/CD)

Output Power

7 mW (DVD/VCD/CD)

Beam divergence

60 degree

Содержание DV-C6760

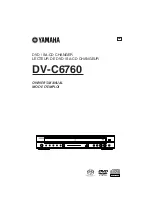
Страница 1: ...0 DVD SA CD CHANGER LECTEUR DE DVD SA CD CHANGEUR DV C6760 OWNER S MANUAL MODE D EMPLOI UA ...

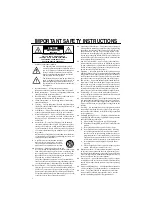
Страница 2: ...to replace your obsolete outlet Do not defeat the safety purpose of the polarized plug 13 Power Cord Protection Power supply cords should be routed so that they are not likely to be walked on or pinched by items placed upon or against them paying particular at tention to cords at plugs convenience receptacles and the point where they exit from the product 14 Lightning For added protection for this...

Страница 3: ...outlets that are on different branch circuit breaker or fuse circuits or install AC line filter s In the case of radio or TV interference relocate reorient the antenna If the antenna lead in is 300 ohm ribbon lead change the lead in to coaxial type cable If these corrective measures do not produce satisfactory results please contact the local retailer authorized to distribute this type of product ...

Страница 4: ...y the voltage specified on this unit Using this unit with a higher voltage than specified is dangerous and may cause fire damage to this unit and or personal injury YAMAHA will not be held responsible for any damage resulting from use of this unit with a voltage other than as specified 13 To prevent damage by lightning disconnect the power cord from the wall outlet during an electrical storm 14 Do...

Страница 5: ...stopped point 14 On Screen Display OSD 14 Special DVD Features 15 Playing a Title 15 Camera Angle 15 Audio 15 Subtitles 15 Special VCD SVCD Features 16 Playback Control PBC 16 Preview Function 16 SA CD Super Audio CD 17 Playing a disc 17 Changing SA CD playback area and layer 17 Audio CD 18 Playing a disc 18 Playing MP3 DivX JPEG Kodak Picture CD 18 General Operation 18 Selecting a folder and trac...

Страница 6: ...ot use disc with tape scals or paste on it damage to the unit may result Do not use a disc printed on its surface by a commercially available label printer When a disc becomes dirty clean it with a cleaning cloth Wipe the disc from the centre out Do not wipe in a circular motion Do not use solvents such as benzine thinner commercially available cleaners or antistatic spray intended for analog reco...

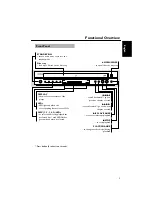
Страница 7: ...the current status of the player LEDs LED lights up when the corresponding feature is set to ON DISC 1 2 3 4 5 LEDs to select and directly playback the preferred disc each LED flashes green when button is selected S Q search backward go to a previous chapter or track R T search forward go to the next chapter or track B PLAY PAUSE to start or interrupt playback 9 STOP to stop playback PLAYXCHANGE t...

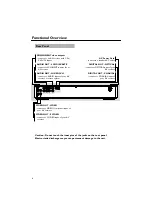
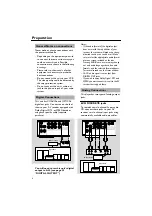
Страница 8: ... 6CH DISCRETE connect to 6CH INPUT inputs of your AV receiver AUDIO OUT MIXED 2CH connect to AUDIO inputs of your AV receiver or stereo system AC Power Cord connect to a standard AC outlet DIGITAL OUT OPTICAL connect to OPTICAL input of your AV receiver DIGITAL OUT COAXIAL connect to COAXIAL input of your AV receiver VIDEO OUT VIDEO connect to VIDEO composite input of your AV receiver VIDEO OUT S ...

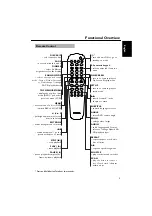
Страница 9: ... A B repeat a specific segment SHUFFLE play tracks in random order SCAN play the first 6 seconds or less of each track chapter within a disc DISC SKIP select another disc PAGE not used with this model DIMMER select 3 different brightnesses for the display SOUND MODE selects the required sound mode Stereo Virtual Surround or Multi channel change SA CD playback area TOP MENU RETURN display the top l...

Страница 10: ... Notes If the audio format of the digital output does not match the capabilities of your receiver the receiver will produce a strong distorted sound or no sound at all Make sure to select the appropriate audio format at menu screen included on the disc Pressing AUDIO once or more may change not only audio languages but also audio formats and the selected format appears for several seconds on the s...

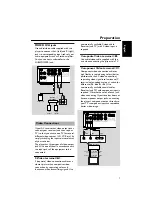
Страница 11: ...mmercially available S video cable Receiver and TV with S video input is required Composite Video terminal B Use audio video cable supplied with this unit when connecting the player to a TV Component Video terminal C Component video connection achieves high fidelity in reproducing colors better performance than S video connection separating video signal into luminance Y terminal color coded as gre...

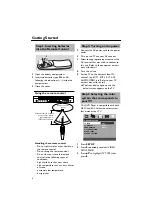
Страница 12: ...o connect to this unit Refer to the equipment owner s manual for detail 4 Turn this unit on 5 Set the TV to the correct Video IN channel e g EXT1 EXT2 AV1 AV2 AUDIO VIDEO etc Refer to your TV owner s manual for detail The front display lights up and the default screen appears on the TV This DVD Player is compatible with both NTSC and PAL Select the color system that matches your TV 1 Press SETUP 2...

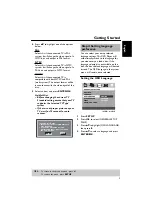
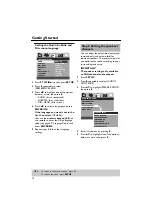
Страница 13: ... auto recover You can select your own preferred language settings This DVD Player will automatically switch to the language for you whenever you load a disc If the language selected is not available on the disc the disc s default language will be used instead The OSD language in the system menu will remain once selected Setting the OSD Language 1 Press SETUP 2 Press 1 2 to select GENERAL SETUP PAG...

Страница 14: ...vel for individual speakers These adjustments let you optimize the sound according to your surroundings and setup IMPORTANT The speaker settings only available on Multi channel audio outputs 1 Press SETUP 2 Press 2 repeatedly to select AUDIO SETUP PAGE 3 Press 34 to highlight SPEAKER SETUP then press 2 4 Enter its submenu by pressing 2 5 Press 34 to highlight one of the options below at a time the...

Страница 15: ...ing in relation to the listening position distance for center and surround speakers 0 MS 15 MS 6 Press 1 2 to adjust the setting that best suit your surround sound needs 7 Press ENTER OK to confirm Helpful Hints Use the longer delay time settings when the surround speakers are closer to the listener than the front speakers The test tone will be automatically generated to help you judge the sound l...

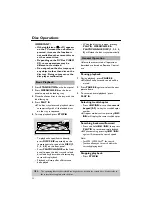
Страница 16: ...oad any discs without interrupting current disc playback Playback will stop after all discs have been played When the disc tray is open pressing PLAY B OPEN CLOSE PLAYXCHANGE DISC 1 2 3 4 5 will close the disc tray automatically Unless otherwise stated all operations described are based on Remote Control use Pausing playback 1 During playback press PAUSE Playback will pause and sound will be muted...

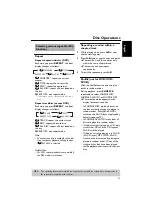
Страница 17: ...e same chapter track The section will now repeat continuously 3 To exit the sequence press A B Shuffle not for DVD VCD SVCD With the Shuffle function you can play tracks in random order 1 During playback press SHUFFLE repeatedly to select SHUFFLE DISC SHUFFLE ALL DISC or SHUFFLE OFF The selected mode appears on the display for several seconds In SHUFFLE DISC mode all tracks on the disc currently p...

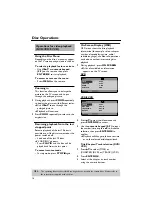
Страница 18: ...op mode press STOP 9 again On Screen Display OSD OSD menu shows the disc playback information for example title or chapter number elapsed playing time audio subtitle language a number of operations can be done without interrupting disc playback 1 During playback press ON SCREEN A list of available disc information appears on the TV screen DVD VCD SVCD 2 Press 34 to view the information and press E...

Страница 19: ...epeat Time Display DVD VCD 1 Press 34 to select REPEAT or TIME DISP 2 Press ENTER OK 3 Press 34 to highlight your selection and press ENTER OK Time display CD Each time you press ON SCREEN the time display changes as follows Playing a Title 1 Press MENU The disc title menu appears on the TV screen 2 Use 1 234 or numeric keypad 0 9 to select a play option 3 Press ENTER OK to confirm Camera Angle Pr...

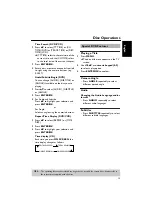
Страница 20: ...C INTERVAL This function is used to divide a disc into six parts by regular intervals and display them on one page to preview the whole disc TRACK INTERVAL This function is used to divide a single track into six parts by regular intervals and display them on one page to help you preview the selected track 4 Use 1 234 to select a track or use numeric keypad 0 9 to input the selected track number ne...

Страница 21: ...rea and layer You can change the SA CD playback area by pressing the SOUND MODE button and change the playback layer by pressing the AUDIO button On hybrid discs with SA CD and CD layers the player will always start playing the SA CD layer multi channel area You can change between SA CD multi channel and SA CD stereo area by pressing SOUND MODE depending on availability of the mode on the disc or ...

Страница 22: ...Selecting a folder and track file 1 Press 34 to select the folder and press ENTER OK to open the folder 2 Press 34 to select a track file 3 Press ENTER OK to confirm Playback will start from the selected file to the end of the folder 1 Load a Picture disc Kodak Picture CD JPEG For Kodak disc the slide show will begin For JPEG disc the picture menu appears on the TV screen 2 Press PLAY B to start t...

Страница 23: ...re horizontally Scan Effect Press ANGLE repeatedly to choose different scan effect Various of scan effect appears on the top left hand corner on the TV screen Playing MP3 music and JPEG picture simultaneously 1 Load a disc that contains music and picture The disc menu appears on the TV screen 2 Select an MP3 track 3 During MP3 music playback select a picture from the TV screen and press PLAY B The...

Страница 24: ... WMA DivX You can play the contents of the disc in the order you want by programming the tracks to be played Up to 20 tracks can be stored 1 In GENERAL SETUP PAGE press 34 to highlight PROGRAM then press 2 to select FTS 2 Press ENTER OK to confirm To input your favorite tracks chapter 3 Use the numeric keypad 0 9 to enter a valid track chapter number 4 Use 1 234 to move the cursor to the next posi...

Страница 25: ... to highlight EXIT on the program menu then press ENTER OK OSD Language This menu contains various language options for display language on the screen For details see page 9 Screen Saver This function is used to turn the screen saver on or off 1 In GENERAL SETUP PAGE press 34 to highlight SCREEN SAVER then press 2 ON Select this if you wish to turn off the TV screen when disc playback is stopped o...

Страница 26: ... OK to confirm Setting the analog output Set Analog Output to match your DVD Player s playback capability 1 In AUDIO SETUP PAGE press 34 to highlight ANALOG OUTPUT then press 2 STEREO Select this to change channel output to stereo which delivers sound from only the two front speakers and subwoofer VIRTUAL SURROUND Select this to reproduce the surround channels virtually MULTI CHANNEL Select this s...

Страница 27: ...on disc PCM data stream will be converted to 48kHz 96kHz Playback a disc recorded at the sampling rate of 96kHz If the 96kHz disc is copy protected the digital output will be muted to comply with the standards Speaker Setup This menu contains setup options for your audio output which makes the speaker setup system reproduce high quality surround sound For details see page 10 CD Upsampling This fea...

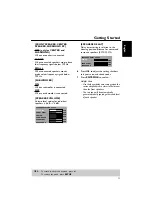
Страница 28: ... TV For details see page 8 Setting the TV Display Set the aspect ratio of the DVD Player according to the TV you have connected The format you select must be available on the disc If it is not the setting for TV display will not affect the picture during playback 1 In VIDEO SETUP PAGE press 34 to highlight TV DISPLAY then press 2 2 Press 34 to highlight one of the options below 4 3 PAN SCAN Select...

Страница 29: ...his to personalize your picture color by adjusting the brightness contrast tint and color saturation 2 Press 34 to select a setting then press ENTER OK to confirm your selection 3 If you select PERSONAL then proceed to steps 4 7 The PERSONAL PICTURE SETUP menu appears 4 Press 34 to highlight one of the following options BRIGHTNESS Increase the value will brighten the picture or vice versa Choose z...

Страница 30: ...tions is that subtitles are intended for hearing persons and captions are for the hearing impaired Subtitles rarely show all of the audio For example captions show sound effects e g phone ringing and footsteps while subtitles don t Before you select this function please ensure that the disc contains closed captions information and your TV set also has this function 1 In VIDEO SETUP PAGE press 34 t...

Страница 31: ...n so parental control function has no effect on these type of discs This applies to most illegal DVD discs Some DVDs are not encoded with a rating though the movie rating may be printed on the Disc cover The rating level feature does not work for such Discs PBC Playback Control You can set the PBC to ON or OFF This feature is available only on Video CD 2 0 with playback control PBC feature For det...

Страница 32: ...new six digit password 5 Enter the new six digit password a second time to confirm The new six digit password will now take effect 6 Press ENTER OK to confirm Restoring to original settings Setting the DEFAULT function will reset all options and your personal settings to the factory defaults except your password for Parental Control and Disc Lock 1 In PREFERENCE PAGE press 34 to highlight DEFAULT ...

Страница 33: ...7789 Javanese 7486 Castilian Spanish 6983 Kalaallisut 7576 Catalan 6765 Kannada 7578 Chamorro 6772 Kashmiri 7583 Chechen 6769 Kazakh 7575 Chewa Chichewa Nyanja 7889 Khmer 7577 Chichewa Chewa Nyanja 7889 Kikuyu Gikuyu 7573 Chinese 9072 Kinyarwanda 8287 Chuang Zhuang 9065 Kirghiz 7589 Church Slavic Slavonic 6785 Komi 7586 Church Slavonic Church 6785 Korean 7579 Chuvash 6786 Kuanyama Kwanyama 7574 Co...

Страница 34: ...78 Tonga Tonga Islands 8479 Nyanja Chichewa Chewa 7889 Tsonga 8483 Nynorsk Norwegian 7878 Tswana 8478 Occitan post 1500 Proven 7967 Turkish 8482 Old Bulgarian Old Slavonic 6785 Turkmen 8475 Old Church Slavonic Old 6785 Twi 8487 Old Slavonic Church 6785 Uighur 8571 Oriya 7982 Ukrainian 8575 Oromo 7977 Urdu 8582 Ossetian Ossetic 7983 Uzbek 8590 Ossetic Ossetian 7983 Vietnamese 8673 Pali 8073 Volapük...

Страница 35: ... picture distortion may appear depending on the disc being played back This is not a malfunction Completely distorted picture or black white picture with DVD Make sure the disc is compatible with the DVD Player Ensure that the DVD Player s TV Type is set to match that of the Disc and your TV No sound or distorted sound Adjust the volume Check that the speakers are connected correctly No audio at d...

Страница 36: ...some operating commands during playback Operations may not be permitted by the disc Refer to the instructions of the disc jacket DVD Player cannot read CDs DVDs Use a commonly available cleaning CD DVD to clean the lens before sending the DVD Player for repair Menu items cannot be selected Press STOP twice before selecting Setup Menu Depending on the disc availability some menu items cannot be sel...

Страница 37: ...pression sys tem MP3 is the abbreviation of Motion Picture Experts Group 1 or MPEG 1 Audio Layer 3 By using MP3 format one CD R or CD RW can contain about 10 times as much data volume as a regular CD can Multichannel DVD is specified to have each sound track constitute one sound field Multichannel refers to a structure of sound tracks having three or more chan nels Parental Control A function of t...

Страница 38: ...ers AUDIO PERFORMANCE DA Converter 24bit 192kHz Signal Noise 1 kHz 105dB Dynamic range 1 kHz 95dB DVD fs 96 kHz 2Hz 44kHz fs 48 kHz 2Hz 22kHz SVCD fs 48 kHz 2Hz 22kHz fs 44 1kHz 2Hz 20kHz CD VCD fs 44 1kHz 2Hz 20kHz Distortion and Noise 1 kHz 0 0035 TV STANDARD PAL 50Hz NTSC 60Hz Number of lines 625 525 Playback Multistandard PAL NTSC CONNECTIONS Y Output Cinch green Pb Cb Output Cinch blue Pr Cr ...

Страница 39: ...2 RELLINGEN BEI HAMBURG F R OF GERMANY YAMAHA ELECTRONIQUE FRANCE S A RUE AMBROISE CROIZAT BP70 CROISSY BEAUBOURG 77312 MARNE LA VALLEE CEDEX02 FRANCE YAMAHA ELECTRONICS UK LTD YAMAHA HOUSE 200 RICKMANSWORTH ROAD WATFORD HERTS WD18 7GQ ENGLAND YAMAHA SCANDINAVIA A B J A WETTERGRENS GATA 1 BOX 30053 400 43 VÄSTRA FRÖLUNDA SWEDEN YAMAHA MUSIC AUSTRALIA PTY LTD 17 33 MARKET ST SOUTH MELBOURNE 3205 VI...

Отзывы: