9
CLP-970/CLP-970M/CLP-970C/CLP-970A/CLP-970AM/CLP-970AC
DISASSEMBLY PROCEDURE
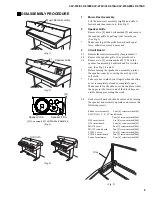
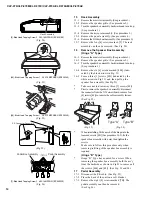
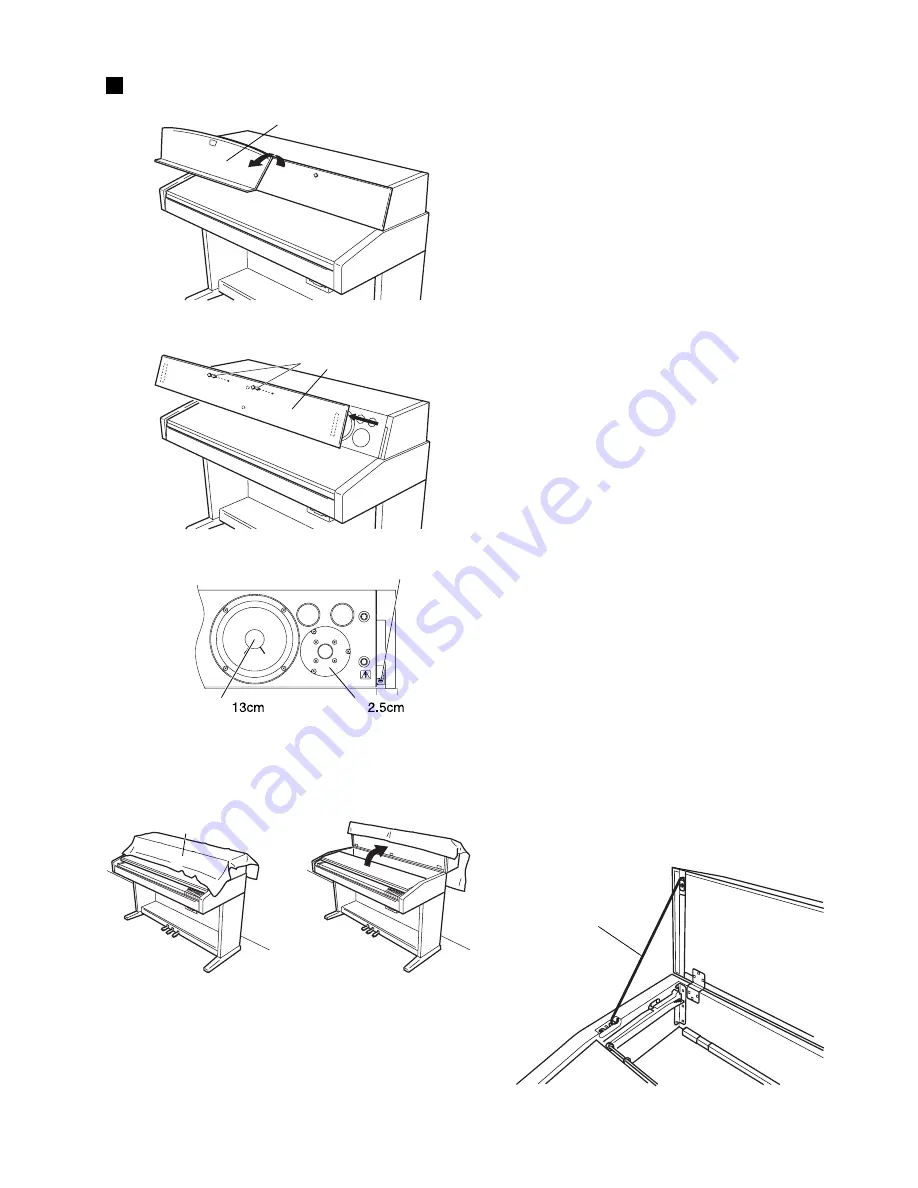
(Fig. 1)
1
Music Rest Assembly
Lift the music rest assembly slightly and slide it
forward and then remove it. (See Fig.1)
2
Speaker Grille
Remove two [2] knob bolts marked [2] and remove
the speaker grille by pulling it out towards you.
(See Fig.2)
*
Make sure to pull the grille forward with equal
force, otherwise, it may be cracked.
3
Circuit Board
3-1
Remove the music rest assembly. (See procedure 1.)
3-2
Remove the speaker grille. (See procedure 2.)
3-3
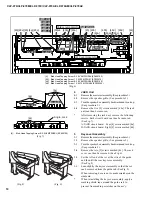
Remove two [2] screws marked [57]. Turn the
speaker box assembly backward and fix it with a
stay. (See Fig.3, 4 and 5)
*
Before turning the speaker box assembly, protect
the speaker cones by covering the ass'y up with
soft cloth.
*
Take care not to pinch your fingers when the slide
cover is completely closed or completely open.
Make sure to fix the slide cover on the place where
the upper (or the lower) end of the black keys are
visible during proceeding the work.
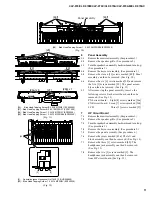
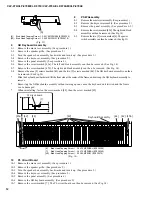
3-4
Each circuit board can then be removed by turning
the speaker box assembly upwards and remove the
following screws.
Shilde cover assembly
Four [4] screws marked[89]
SWX XG, A, C, E, F Circuit Boards:
Four [4] screws marked[46a]
DM circuit board:
Six [6] screws marked[46b]
NW circuit board:
Four [4] screws marked[45]
MA120 cover:
Two [2] screws marked[48a]
MA120 circuit board:
Two [2] screws marked[48b]
FU120L cover:
Two [2] screws marked[48c]
FU120L circuit board:
Two [2] screws marked[48d]
Power Transformer:
Four [4] screws marked[44]
(Fig. 2)
Music Rest Assembly
[2]
Speaker Grille
(Fig. 4)
(Fig. 3)
(Fig. 5)
[57]: Cup screw 5.0X12 MFZN2BL (VS608700)
Stay
Soft cloth
[57]
Speaker
Speaker


