background image

9

Description

Description

1. 

Brosses

 - Fixées de manière définitive aux supports de 

tambour, livrées de série avec des poils en nylon de 
0,5 mm de diamètre. Des brosses à 0,7 mm de dia-
mètre en option sont disponibles pour les travaux de ba-
layage de matières fines.

2. 

Ensemble arbre de transmission inférieur

 - Livré à 

part dans le carton, doit être monté sur l'ensemble 
ProSweep/carter d'engrenage. Contient le câble d'en-
traînement flexible, le carter d'arbre extérieur et l'auto-
collant de sécurité.

3. 

Câble d'entraînement flexible

 - L'extrémité du câble 

se loge dans le coupleur d'arbre de transmission des 
modèles Série Pro Attachment ou Split Boom. Lubrifier 
le câble d'entraînement toutes les 25 heures avec de la 
graisse hautes températures pour automobile.

4. 

Ensemble carter d'engrenage de brosses

 - Les 

brosses sont livrées prémontées sur le carter d'engre-
nage dans le carton. Les brosses tournent vers l'opéra-
teur lorsqu'on les observe depuis la position de ce 
dernier.

5. 

Type et numéro de série

Содержание ECHO ProSweep MTA-PS

Страница 1: ...DE SECURITÉ LE NON RESPECT DES RÈGLES DE SÉCURITÉ ENTRAÎNE UN ISQUE DE BLESSURE GRAVE WARNUNG LESEN SIE DIE BEDIENUNGSANLEITUNG SORGFÄLTIG DURCH UND BE FOLGEN SIE DIE SICHERHEITSREGELN ANDERNFALLS BESTEHT DAS RISIKO SCHWERER VERLETZUNGEN AVVERTENZA LEGGERE E SEGUIRE ATTENTAMENTE LE ISTRUZIONI PER LAVORARE IN CONDIZIONI DI MASSIMA SICUREZZA LA MANCATA OSSERVANZA DELLE ISTRUZIONI POTREBBE PROVOCARE ...

Страница 2: ......

Страница 3: ...er OPERATOR S MANUAL ProSweep Attachment MTA PS ENGLISH Original instructions WARNING READ THE INSTRUCTIONS CAREFULLY AND FOLLOW THE RULES FOR SAFE OPERATION FAILURE TO DO SO COULD RESULT IN SERIOUS INJURY ...

Страница 4: ...conversion error in some cases Loaning or assigning your product When loaning the product described in this manual to another party ensure that the person borrowing and working with the product receives the operator s manual along with the product If you assign your product to another party please enclose the operator s manual with the product when handing it over Enquiries Please contact your dea...

Страница 5: ...mbols 4 Location in which a safety decal is attached 5 Handling the product 5 Description 9 Before you start 10 Packing list 10 Assembly 10 Operation 12 Maintenance and care 13 Servicing guidelines 13 Maintenance and care 13 Storage 16 Specifications 17 Declaration of conformity 18 ...

Страница 6: ...means DANGER WARNING CAUTION This symbol accompanied by the word DANGER calls attentions to an act or a condition which will lead to serious personal injury or death of op erators and bystanders This symbol accompanied by the word WARNING calls attentions to an act or a condition which can lead to serious personal injury or death of op erators and bystanders CAUTION indicates a potentially hazardo...

Страница 7: ...erly before using your product in order to ensure correct operation Failure to do so could lead to an accident or serious injury Do not use the product for anything other than its intended purpose You must not use the product for any purpose other than those described in the operator s manual To do so could lead to an accident or serious injury Do not modify the product You must not modify the pro...

Страница 8: ... and then check that engine has been switched off and the attachment has stopped moving Any contact with the cutter blade could cause serious injury Avoid hot surfaces During operation the complete unit especially the drive shaft housing power head muffler area and gear box may become very hot too hot to touch Avoid contact during and immediately after operation You could burn yourself if you touc...

Страница 9: ...ing Limit the number of hours of operation Try to fill each day with jobs where operating the trimmer or other hand held power equipment is not required If you experience discomfort redness and swelling of the fingers followed by whitening and loss of feeling consult your physician before exposing yourself further to cold and vibration Failure to observe these instructions could result in damage t...

Страница 10: ...k shoes with toecaps Protect the feet h Shin guards Protect the legs Failure to observe these precautions could result in damage to your sight or hear ing or lead to a serious injury When necessary please use the protective gear below Dust mask Protects the breathing apparatus Bee net To deal with attacks by bees Wear proper clothing Do not wear ties jewellery or loose dangling clothing which coul...

Страница 11: ... assembled to the ProSweep gear housing assembly Contains flexible drive cable outer shaft housing and safety decal 3 Flexible drive cable Cable end fits into drive shaft coupler of Pro Attachment Series or Split Boom models Lubricate drive cable every 25 hours with high tempera ture automotive grease 4 Brush gear housing assembly Brushes come pre assembled to the gear housing in the carton Brushe...

Страница 12: ...r housing mounting bolt B The following parts are packed separately in the packing box When you have unpacked the box please check the parts that it contains Contact your dealer if anything is missing or broken 1 Lower drive shaft assembly 2 Brushes gear housing assembly 3 Storage hook assembly 4 Operator s manual WARNING Read the operator s manual carefully to ensure that you assemble the product...

Страница 13: ... 3 Remove cardboard spacer from coupler if necessary 4 Carefully fit attachment drive shaft assembly into coupler B to decal assembly line C making sure that the inner lower drive shaft engages upper drive shaft mount 5 Rotate locator pin A 1 4 turn clockwise to engage lower shaft hole Insure locator pin is fully engaged by twisting low er drive shaft Locator pin should snap flush in coupler Full ...

Страница 14: ...ial 7 Use an angle of 15 30º This helps direct debris and reduces operator fatigue WARNING Moving parts can amputate fingers or cause severe injuries Keep hands clothing and loose objects away from all openings Always stop engine disconnect spark plug and make sure all moving parts have come to a complete stop before removing obstructions clearing debris or servicing unit NOTE Refer to your power ...

Страница 15: ...t the spark plug wire and make sure all moving parts have come to a com plete stop before removing obstructions clearing debris or servicing unit Allow unit to cool before performing service Wear gloves to protect hands from sharp edges and hot surfaces Component System Maintenance Procedure Frequency Drive shaft Grease Every 25 hours of use Gear housing Grease Yearly Brushes Inspect Tighten Repla...

Страница 16: ...seat lower drive shaft end into gear housing shaft mount 8 Install and tighten locator screw A 9 Tighten gear housing mounting bolt B Brush replacement Brushes that are broken off deformed or worn to within 25 4 mm of the brush holder drum should be replaced for best sweeping efficiency 1 Locate brush holder access hole A near outer drum end 2 Hold 8 mm nut B from turning with open end wrench inse...

Страница 17: ...and care 5 Install new brush holder drum aligning hole A in drum axle with axle shaft hole 6 Install drum cap aligning cap holes with axle shaft and brush holder drum holes 7 Install bolt and locknut Tighten securely ...

Страница 18: ...ith the weight resting on brushes which could bend over a long period of time Store attach ment with lower shaft housing in a horizontal or vertical po sition to prevent grease loss from open shaft end Storage hook installation 1 Insert small end of hook into locating hole on attachment shaft 2 Slide plastic cap onto end of attachment shaft IMPORTANT Do not immerse this attachment in water Water w...

Страница 19: ... quality lithium grease Rotational direction of output seen from right side Anticlockwise maximum rotational frequency of the spindle 280 r min Brushes Specified brush diameter 317 mm Max sweeping width 589 mm Vibration levels ISO 22867 ahv eq Front handle Rear handle 4 7 4 6 m s Uncertainty K 4 0 m s Sound pressure level ISO 22868 LpAeq 94 9 dB A Uncertainty KpA 2 5 dB A Sound power level ISO 228...

Страница 20: ...of harmonized standard EN ISO 22867 2011 the requirements of Directive 2014 30 EU use of harmonized standard EN ISO 14982 2009 the requirements of Directive 2011 65 EU use of harmonized standard EN 50581 2012 the requirements of Directive 2000 14 EC Conformity assessment procedure followed ANNEX V Measured sound power level 106 dB A Guaranteed sound power level 109 dB A Serial Number 35101001 to 3...

Страница 21: ...19 1Notes and rear cover MEMORANDUM ...

Страница 22: ...X771209 4602 2018 1 7 2 Suehirocho Ohme Tokyo 198 8760 JAPAN PHONE 81 428 32 6118 FAX 81 428 32 6145 ...

Страница 23: ...D UTILISATION Outil ProSweep MTA PS FRANÇAIS Notice originale AVERTISSEMENT LIRE ATTENTIVEMENT LES INSTRUCTIONS ET SUIVRE LES RÈGLES DE SÉCURITÉ LE NON RESPECT DES RÈGLES DE SÉCURITÉ ENTRAÎNE UN RISQUE D ACCIDENTS GRAVES ...

Страница 24: ...égères erreurs de conversion peuvent survenir dans certains cas Prêt ou cession du produit à un tiers Si le produit décrit dans ce manuel est prêté à un tiers veiller à lui confier également le manuel d utilisation fourni avec le produit Si le produit est cédé à un tiers transmettre le manuel d utilisation fourni avec le produit lors de la vente Renseignements S adresser à un revendeur pour toute ...

Страница 25: ...ndications 4 Symboles 4 Emplacement de l étiquette de sécurité 5 Manipulation de l appareil 5 Description 9 Avant de commencer 10 Contenu de l emballage 10 Assemblage 10 Fonctionnement 12 Entretien 13 Instructions d entretien de l appareil 13 Entretien 13 Remisage 16 Caractéristiques 17 Déclaration de conformité 18 ...

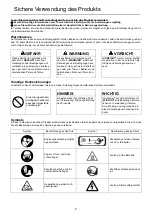
Страница 26: ...on de chacun de ces symboles DANGER AVERTISSEMENT ATTENTION Ce symbole associé au mot DANGER signale une action ou une situation présentant un risque de blessure corporelle grave ou d acci dent mortel pour l utilisateur et les personnes à proximité Ce symbole associé au mot AVERTISSEMENT signale une action ou une situation présentant un risque de blessure corporelle grave ou d accident mortel pour...

Страница 27: ...nt pour les tâches décrites dans ce manuel d utilisation Le non respect de cette règle de sécurité entraîne un risque d accident ou de blessure grave Ne pas modifier l appareil Aucune modification ne doit être apportée à l appareil Le non respect de cette règle de sécurité entraîne un risque d accident ou de blessure grave Tout dysfonctionnement dû à une modification de l appareil n est pas couver...

Страница 28: ...sion la tête de l appareil la zone du silencieux et la transmission peuvent devenir brûlants beaucoup trop chauds pour pouvoir être touchés Éviter tout contact avec ces éléments pendant et immédiatement après l utilisation Il existe un risque de brûlure en cas de contact avec un composant à haute température AVERTISSEMENT Utilisateurs du produit L appareil ne doit pas être utilisé si l utilisateur...

Страница 29: ... l utilisation de l appareil ou d une autre machine portative En cas d inconfort de rougeur et de gonflement au niveau des doigts suivis d un blanchissement et d une perte de sensibilité consulter un médecin avant de s exposer à nouveau au froid et aux vibrations Le non respect de ces instructions peut être dangereux pour la santé Lésions attribuables au travail répétitif Une trop grande sollicita...

Страница 30: ...apantes à bouts renforcés protègent les pieds h Protège tibias protègent les jambes Le non respect de ces mesures de précaution peut entraîner une dégradation de la vue ou de l ouïe de l utilisateur ainsi qu un risque de blessure grave Si nécessaire utiliser les équipements de protection ci dessous Masque anti poussière protège les voies respiratoires Voilette de protection protège contre les piqû...

Страница 31: ...tient le câble d en traînement flexible le carter d arbre extérieur et l auto collant de sécurité 3 Câble d entraînement flexible L extrémité du câble se loge dans le coupleur d arbre de transmission des modèles Série Pro Attachment ou Split Boom Lubrifier le câble d entraînement toutes les 25 heures avec de la graisse hautes températures pour automobile 4 Ensemble carter d engrenage de brosses Le...

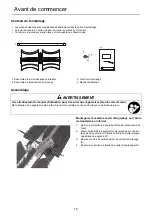
Страница 32: ...brayage A 4 Desserrer le boulon de fixation de carter d engrenage B Les pièces suivantes sont conditionnées séparément dans le carton d emballage Lors de l ouverture du carton passer en revue les pièces qu il contient Contacter un revendeur si une pièce est manquante ou endommagée 1 Ensemble arbre de transmission inférieur 2 Ensemble brosses carter d engrenage 3 Crochet de remisage 4 Manuel d util...

Страница 33: ...oupleur si nécessaire 4 Insérer soigneusement l arbre de transmission de l outil dans le coupleur B jusqu à la ligne d assemblage tracée sur l étiquette C en vérifiant que l arbre de transmission infé rieur intérieur s enclenche dans la fixation de l arbre de transmission supérieur 5 Tourner la goupille de positionnement A de 1 4 de tour dans le sens des aiguilles d une montre pour l enclencher da...

Страница 34: ... plus fa cilement les débris tout en réduisant la fatigue de l opéra teur AVERTISSEMENT Les pièces en mouvement peuvent être à l origine de blessures graves voire d amputations L utilisateur doit éloigner ses mains vêtements et tout objet non fixé de toutes les ouvertures Toujours arrêter le moteur déconnecter la bougie et vérifier que toutes les pièces en mouvement se sont complètement immobilisé...

Страница 35: ...ifier que toutes les pièces en mouvement se sont complètement immobilisées avant de retirer tout obs tacle d éliminer des débris ou de procéder à l entretien de l appareil Laisser refroidir l appareil avant de procéder à son entretien Porter des gants pour se protéger les mains des arêtes tranchantes et surfaces brûlantes Composant système Procédure d entretien Fréquence Arbre de transmission Lubr...

Страница 36: ...ité de l arbre de transmission inférieur en appui dans la fixation d arbre du carter d engrenage 8 Poser et serrer la vis de positionnement A 9 Serrer le boulon de fixation de carter d engrenage B Remplacement des brosses Les brosses cassées déformées ou usées à moins de 25 4 mm du tambour porte brosse doivent être remplacées pour assurer la meilleure efficacité de balayage 1 Repérer l orifice d a...

Страница 37: ...brosse en alignant l orifice A de l axe du tambour sur celui de l axe d entraînement 6 Poser l embout de tambour en alignant ses orifices sur ceux de l axe d entraînement et du tambour porte brosse 7 Poser la vis et le contre écrou Serrer fermement ...

Страница 38: ...pourraient plier au bout d un certain temps Ranger l outil avec le carter d arbre inférieur en position ho rizontale ou verticale pour prévenir toute perte de graisse par l extrémité ouverte de l arbre Installation du crochet de remisage 1 Insérer l extrémité fine du crochet dans le trou de positionne ment de l arbre de l outil 2 Placer la protection en plastique sur l extrémité de l arbre de l ou...

Страница 39: ...lithium de bonne qualité Sens de rotation de la sortie vu du côté droit Sens inverse des aiguilles d une montre Fréquence de rotation maximale de la broche 280 tr min Brosses Diamètre des brosses spécifiées 317 mm Largeur maximale de balayage 589 mm Niveaux de vibrations ISO 22867 ahv eq Poignée avant poignée arrière 4 7 4 6 m s Incertitude K 4 0 m s Niveau de pression sonore ISO 22868 LpAeq 94 9 ...

Страница 40: ...30 UE utilisation de la norme harmonisée EN ISO 14982 2009 aux exigences de la directive 2011 65 UE utilisation de la norme harmonisée EN 50581 2012 aux exigences de la directive 2000 14 CE Procédure d évaluation de la conformité suivie ANNEXE V Niveau de puissance sonore mesuré 106 dB A Niveau de puissance sonore garanti 109 dB A Numéro de série 35101001 à 35200000 Tokyo 1er janvier 2019 YAMABIKO...

Страница 41: ...19 1Remarques et dos de couverture NOTES ...

Страница 42: ...X771209 4602 2018 1 7 2 Suehirocho Ohme Tokyo 198 8760 JAPON TÉLÉPHONE 81 428 32 6118 FAX 81 428 32 6145 ...

Страница 43: ...NLEITUNG Anbaugerät ProSweep MTA PS DEUTSCH Original Gebrauchsanleitung WARNUNG LESEN SIE DIE BEDIENUNGSANLEITUNG SORGFÄLTIG DURCH UND BEFOLGEN SIE DIE SICHERHEITSREGELN ANDERNFALLS BESTEHT DAS RISIKO SCHWERER VERLET ZUNGEN ...

Страница 44: ...itunter geringe Umrechnungsfehler vor liegen können Verleihen oder Übereignen des Produkts Wenn Sie das in dieser Anleitung beschriebene Produkt verleihen muss die Person die das Produkt ausleiht und ver wendet auch die zugehörige Bedienungsanleitung erhalten Wenn Sie das Produkt einer anderen Person übereignen muss die Bedienungsanleitung zusammen mit dem Produkt ausgehändigt werden Anfragen Bei ...

Страница 45: ...ymbole 4 Stelle an der sich ein Sicherheitsaufkleber befindet 5 Umgang mit dem Produkt 5 Beschreibung 9 Bevor Sie beginnen 10 Packliste 10 Zusammenbau 10 Betrieb 12 Wartung und Pflege 13 Wartungsrichtlinien 13 Wartung und Pflege 13 LAGERUNG 16 Technische Daten 17 Konformitätserklärung 18 ...

Страница 46: ...g der einzelnen Symbole genau verstehen GEFAHR WARNUNG VORSICHT Dieses Symbol in Verbindung mit dem Wort GEFAHR macht auf Handlungen oder Bedingungen auf merksam die zu schweren Verletzun gen oder zum Tod von Bediener und umstehenden Personen führen Dieses Symbol in Verbindung mit dem Wort WARNUNG macht auf Handlungen oder Bedingungen auf merksam die zu schweren Verletzun gen oder zum Tod von Bedi...

Страница 47: ...sanleitung vor der Inbetriebnahme des Produkts aufmerksam durch um eine korrekte Bedienung zu gewährleisten Andernfalls kann es zu Unfällen bzw schweren Verletzungen kommen Produkt nur für den vorgesehenen Zweck verwenden Das Produkt darf nicht für andere als die in dieser Bedienungsanleitung genannten Zwecke verwendet werden Andernfalls kann es zu Unfällen bzw schweren Verletzungen kommen Keine V...

Страница 48: ...gestellt ist und das Anbauteil stillsteht Jeder Kontakt mit dem Schneidmesser kann zu schweren Verletzungen führen Heiße Oberflächen vermeiden Das komplette Gerät kann im Betrieb sehr heiß werden insbesondere das Rohr mit Antriebswelle die Mo toreinheit der Schalldämpfer und das Getriebegehäuse und zwar so heiß dass sie nicht gefahrlos berührt werden können Vermeiden Sie eine Berührung während und...

Страница 49: ...Minimum Teilen Sie jeden Arbeitstag so ein dass auch Arbeiten ohne Trimmer oder tragbare motorisierte Geräte verrichtet werden Wenn Ihre Finger schmerzen rot und angeschwollen sind und schließlich bleich und gefühllos werden müssen Sie einen Arzt aufsuchen bevor Sie sich weiterhin Kälte und Vibrationen aussetzen Eine Nichtbefolgung dieser Anweisung kann zu gesundheitlichen Schäden führen RSI Syndr...

Страница 50: ...beinschützer schützen die Beine Bei Nichtbeachtung dieser Sicherheitsvorkehrungen sind Ihr Augenlicht und Ihr Gehör gefährdet und es drohen sonstige schwere Verletzungen Falls erforderlich verwenden Sie auch folgende Schutzausrüstung Staubmaske schützt das Atmungssystem Bienennetz schützt vor angreifenden Bienen Geeignete Schutzkleidung tragen Tragen Sie keine Krawatten Schmuckstücke oder lose wei...

Страница 51: ...werden Enthält flexible Antriebs welle äußeres Wellengehäuse und Sicherheitsaufkle ber 3 Flexible Antriebswelle Das Wellenende passt bei Geräten der Serie Pro Attachment oder bei Modellen mit geteilten Anbauteilen in das Verbindungselement der Antriebswelle Schmieren Sie die flexible Antriebs welle alle 25 Betriebsstunden mit Hochtemperatur schmiermittel für Kraftfahrzeuge 4 Baugruppe aus Bürsten ...

Страница 52: ...A 4 Lösen Sie den Befestigungsbolzen des Getriebegehäuses B Die nachfolgend aufgeführten Einzelteile sind in der Verpackung enthalten Überprüfen Sie nach dem Auspacken die Vollständigkeit des Inhalts Wenden Sie sich an Ihren Händler wenn Teile fehlen oder beschädigt sind 1 Untere Antriebswellenbaugruppe 2 Baugruppe aus Bürsten und Getriebegehäuse 3 Aufhänger und Haken 4 Bedienungsanleitung WARNUNG...

Страница 53: ...e die Antriebswelle des Anbaugeräts vorsichtig bis zur Montagelinie des Aufklebers C in das Verbindungselement B Dabei muss die innen liegende un tere Antriebswelle in die Halterung der oberen Antriebswelle einrasten 5 Drehen Sie den Positionierstift A um eine Vierteldrehung nach rechts bis er im Loch des unteren Schafts einrastet Achten Sie darauf dass der Positionierstift vollständig ein geraste...

Страница 54: ...nen Winkel zwischen 15 und 30º Dadurch lässt sich das Material leichter dirigieren und Sie ermüden nicht so schnell WARNUNG Bewegte Teile können Finger amputieren oder schwere Verletzungen verursachen Halten Sie Hände Kleidung und lose Gegenstände von allen Öffnungen fern Stoppen Sie immer den Motor ziehen Sie das Zündkabel ab und achten Sie darauf dass alle bewegten Teile vollständig zum Stillsta...

Страница 55: ...r abstellen das Zündkabel abziehen und sicherstellen dass alle bewegten Teile zu einem vollständigen Stillstand gekommen sind bevor Hindernisse entfernt Schneidgut beseitig oder das Gerät gewartet wird Lassen Sie das Gerät abkühlen bevor Sie eine Wartung durchführen Zum Schutz der Hände vor scharfen Kanten und heißen Flächen stets Schutzhandschuhe tragen Komponente System Wartungsvorgang Häufigkei...

Страница 56: ...die Wellen halterung des Getriebegehäuses ein 8 Drehen Sie die Zentrierschraube A ein und ziehen Sie sie fest 9 Ziehen Sie den Befestigungsbolzen des Getriebegehäuses B fest Auswechseln der Bürsten Bürsten in der Bürstenhaltertrommel die abgebrochen verformt oder bis auf 25 4 mm abgenutzt sind sollten ausgewechselt wer den um die Kehrwirkung zu verbessern 1 Suchen Sie die Zugangsbohrung des Bürste...

Страница 57: ... Sie die Bohrung A in der Trommelachse an der Achswel lenbohrung aus 6 Bauen Sie die Trommelabdeckung ein und richten Sie die Bohrungen der Abdeckung an der Achswelle und an den Bohrungen der Bürstenhaltertrommel aus 7 Drehen Sie Bolzen und Sicherungsmutter ein Ziehen Sie sie fest ...

Страница 58: ...iegt sonst könnten sich diese im Laufe der Zeit verbiegen Lagern Sie das Anbaugerät so dass sich das Gehäuse der unteren Welle in einer waagerechten oder senkrechten Position be findet damit kein Fett aus dem offenen Wellenende austritt Montage des Lagerungshakens 1 Führen Sie das kleine Ende des Hakens in das Positionier loch an der Anbauwelle 2 Schieben Sie die Kunststoffkappe auf das Ende der A...

Страница 59: ... Lithiumfett Drehrichtung der Ausgangswelle von rechts gesehen Gegen den Uhrzeigersinn Maximale Rotationsfrequenz der Spindel 280 U min Bürsten Spezifizierter Bürstendurchmesser 317 mm Max Kehrbreite 589 mm Schwingungspegel ISO 22867 ahv eq Vorderer Griff hinterer Griff 4 7 4 6 m s Unsicherheit K 4 0 m s Schalldruckpegel ISO 22868 LpAeq 94 9 dB A Unsicherheit KpA 2 5 dB A Schallleistungspegel ISO ...

Страница 60: ...n Norm EN ISO 22867 2011 Anforderungen der Richtlinie 2014 30 EU Verwendung der harmonisierten Norm EN ISO 14982 2009 Anforderungen der Richtlinie 2011 65 EU Verwendung der harmonisierten Norm EN 50581 2012 Anforderungen der Richtlinie 2000 14 EG Konformitätsbewertungsverfahren nach ANHANG V Gemessener Schallleistungspegel 106 dB A Garantierter Schallleistungspegel 109 dB A Seriennummer 35101001 b...

Страница 61: ...19 1Notizen und hintere Umschlagseite NOTIZEN ...

Страница 62: ...X771209 4602 2018 1 7 2 Suehirocho Ohme Tokio 198 8760 JAPAN TELEFON 81 428 32 6118 FAX 81 428 32 6145 ...

Страница 63: ...E Accessorio ProSweep MTA PS ITALIANO Istruzioni originali AVVERTENZA LEGGERE E SEGUIRE ATTENTAMENTE LE ISTRUZIONI PER LA VORARE IN CONDIZIONI DI MASSIMA SICUREZZA LA MANCATA OSSERVANZA DELLE ISTRUZIONI POTREBBE PROVOCARE LESIONI GRAVI ...

Страница 64: ...ori di riferimento e in alcuni casi ci potrebbero essere lievi errori di conversione Prestito o cessione del prodotto In caso di prestito o cessione del prodotto descritto in questo manuale consegnare alla persona che lo riceve in prestito e che dovrà utilizzarlo anche il manuale per l operatore Se si cede o vende il prodotto a terzi consegnare anche il manuale dell operatore assieme al prodotto R...

Страница 65: ...e in cui è applicata una decalcomania 5 Gestione del prodotto 5 Descrizione 9 Prima di iniziare 10 Contenuto della confezione 10 Montaggio 10 Funzionamento 12 Manutenzione e cura 13 Guida alla manutenzione 13 Manutenzione e cura 13 Rimessaggio 16 Caratteristiche tecniche 17 Dichiarazione di conformità 18 ...

Страница 66: ...COLO richiama l atten zione su un azione o una condizione che potrebbe causare infortuni gravi o la morte di utenti o di persone presen ti Questo simbolo accompagnato dalla parola AVVERTENZA richiama l attenzione su un azione o una condi zione che potrebbe causare lesioni gravi o la morte di utenti o di persone presenti ATTENZIONE indica una situazio ne potenzialmente pericolosa che se non evitata...

Страница 67: ...gettato Non utilizzare il prodotto per eseguire lavori diversi da quelli descritti nel manuale dell operatore La mancata osservanza di queste precauzioni potrebbe causare un incidente o lesioni gravi Non modificare il prodotto Non modificare il prodotto La mancata osservanza di queste precauzioni potrebbe causare un incidente o lesioni gravi Qualsiasi guasto causato da modifiche apportate al prodo...

Страница 68: ...iscaldate Durante il funzionamento l intera unità può surriscaldarsi in particolare l alloggiamento dell albero moto re la testa l area della marmitta e il carter ingranaggi Evitare di toccare questi componenti durante e su bito dopo il funzionamento Il contatto con componenti ad alta temperatura potrebbe causare ustioni AVVERTENZA Utenti del prodotto Il prodotto non deve essere utilizzato da pers...

Страница 69: ...are di pianificare altri lavori nell arco della giornata lavorativa in cui non sia richiesto l uso del decespugliatore o di altre macchine portatili Se si accusano disagi e disturbi e se si riscontrano arrossamenti e gonfiore delle dita seguiti da pallore e perdita di sensibilità rivolgersi al proprio medico prima di esporsi di nuovo al freddo e alle vibrazioni La mancata osservanza di queste istr...

Страница 70: ...nte o scarpe da lavoro antiscivolo con protezione delle punte Proteggono i piedi h Parastinchi Proteggono gli stinchi La mancata osservanza di queste precauzioni potrebbe causare danni alla vista o all udito o lesioni gravi Se necessario utilizzare anche i seguenti indumenti Respiratore Protegge l apparato respiratorio Rete anello di metallo Per proteggersi dalle api Indossare indumenti idonei Non...

Страница 71: ...i Contiene un cavo di comando flessibile l alloggiamento dell albero esterno e una decalcomania 3 Cavo di comando flessibile L estremità del cavo si inserisce nell accoppiamento dell albero motore delle unità serie Pro Attachment o Split Boom Lubrificare il cavo di comando ogni 25 ore con grasso per autoveicoli resistente alle alte temperature 4 Gruppo carter ingranaggi delle spazzole Le spaz zole...

Страница 72: ...ntare il bullone di montaggio B del carter ingranaggi Le seguenti parti sono state imballate separatamente nella scatola di imballaggio Dopo aver aperto la confezione controllare che siano presenti tutte le parti In caso di parti mancanti o rotte contattare il rivenditore 1 Gruppo albero motore inferiore 2 Gruppo scatola ingranaggi spazzole 3 Gancetto porta accessorio 4 Manuale per l operatore AVV...

Страница 73: ...cautela il gruppo albero motore nell accoppia tore B fino alla linea della decalcomania C prestando at tenzione che l albero motore inferiore interno si innesti correttamente nel supporto dell albero motore superiore 5 Ruotare il perno di centraggio A di 1 4 di giro in senso ora rio per innestarlo nel foro dell albero inferiore Accertarsi che il perno di centraggio sia innestato correttamente ruot...

Страница 74: ...lo di 15 30 In questo modo è più facile dirigere i detriti e si riduce la fatica dell operatore AVVERTENZA Le parti rotanti possono amputare dita o causare gravi lesioni Allontanare le mani gli abiti ed eventuali oggetti pen denti da tutte le aperture Prima di rimuovere eventuali ostruzioni pulire i detriti o eseguire interventi di manutenzione sull unità arrestare sempre il motore scollegare la c...

Страница 75: ...stare sempre il motore scollegare il cavo della candela e accertarsi che tutte le parti rotanti si siano ar restate completamente Prima di eseguire un intervento di manutenzione lasciare raffreddare l unità Indossare guanti per proteggere le mani da bordi taglienti e superfici surriscaldate Componente sistema Procedura di manutenzione Frequenza Albero motore Aggiungere del grasso Ogni 25 ore d uso...

Страница 76: ... 8 Montare e serrare il perno A 9 Serrare il bullone di montaggio B del carter ingranaggi Sostituzione della spazzola Al fine di garantire la massima efficienza di spazzatura sostituire le spazzole rotte deformate o che mostrano livelli di usura fino a 25 4 mm rispetto al tamburo del supporto spazzole 1 Posizionare il foro di accesso A del supporto spazzole ac canto all estremità del tamburo ester...

Страница 77: ...spazzole allineando il foro A nell assale del tamburo con il foro dell albero assa le 6 Montare il cappuccio del tamburo allineandone i fori con l al bero dell assale e i fori del tamburo del supporto spazzole 7 Montare il bullone e il controdado Serrare saldamente ...

Страница 78: ...le che potrebbero piegarsi con il passare del tempo Conservare l accessorio con l alloggia mento dell albero inferiore in posizione orizzontale o vertica le per evitare perdite di grasso dall estremità aperta dell albero Montaggio del gancio porta accessorio 1 Inserire l estremità piccola del gancio nell apposito foro sull albero dell accessorio 2 Far scorrere il tappo in plastica sull estremità d...

Страница 79: ...l litio di buona qualità Senso di rotazione visto dal lato destro Senso antiorario frequenza massima di rotazione del mandrino 280 giri min Spazzole Diametro spazzola specificato 317 mm Larghezza massima arco di spazzolatura 589 mm Livelli di vibrazioni ISO 22867 ahv eq Impugnatura anteriore Impugnatura posteriore 4 7 4 6 m s Incertezza K 4 0 m s Livello pressione acustica ISO 22868 LpAeq 94 9 dB ...

Страница 80: ...CE uso della norma armonizzata EN ISO 22867 2011 i requisiti richiesti dalla Direttiva 2014 30 CE uso della norma armonizzata EN ISO 14982 2009 i requisiti richiesti dalla Direttiva 2011 65 CE uso della norma armonizzata EN 50581 2012 i requisiti richiesti dalla Direttiva 2000 14 CE Conforme alla procedura di accertamento dell ALLEGATO V Livello di potenza acustica misurato 106 dB A Livello di pot...

Страница 81: ...19 1Note e quarta di copertina MEMORANDUM ...

Страница 82: ...X771209 4602 2018 1 7 2 Suehirocho Ohme Tokyo 198 8760 GIAPPONE TELEFONO 81 428 32 6118 FAX 81 428 32 6145 ...

Страница 83: ...INSTRUCCIONES Accesorio ProSweep MTA PS ESPAÑOL Instrucciones originales ADVERTENCIA LEA ATENTAMENTE LAS INSTRUCCIONES Y SIGA LAS INDICA CIONES PARA UN FUNCIONAMIENTO SEGURO DE NO HACERLO PODRÍA SUFRIR LESIONES GRAVES ...

Страница 84: ...ligero error de conversión Préstamo o asignación del producto Cuando preste el producto descrito en este manual a una tercera persona asegúrese de que la persona que recibe y trabaja con el producto reciba el manual de instrucciones con el mismo Si asigna el producto a una tercera persona adjunte el manual de instrucciones con el producto cuando haga la entrega Consultas Póngase en contacto con su...

Страница 85: ...n la que se encuentra un adhesivo de seguridad 5 Manipulación del producto 5 Descripción 9 Antes de comenzar 10 Lista de piezas 10 Montaje 10 Funcionamiento 12 Mantenimiento y cuidados 13 Directivas de asistencia 13 Mantenimiento y cuidados 13 Almacenamiento 16 Características técnicas 17 Declaración de conformidad 18 ...

Страница 86: ...ión sobre una acción o sobre unas condi ciones que causarán heridas perso nales importantes o incluso la muerte al operario y a los transeúntes Este símbolo acompañado por la pa labra ADVERTENCIA llama la atención sobre una acción o sobre unas condiciones que pueden causar heridas personales importantes o in cluso la muerte al operario y a los transeúntes PRECAUCIÓN indica una situa ción potencial...

Страница 87: ...tes de utilizar el producto a fin de asegurar un funcio namiento correcto Si no lo hace podría producirse un accidente o una lesión grave No utilice el producto para un uso distinto para el que está diseñado No debe utilizar el producto para ningún propósito distinto de los descritos en el manual de instrucciones De hacerlo podría provocar un accidente o una lesión grave No modifique el producto N...

Страница 88: ...rio haya parado de moverse Cualquier contacto con la cuchilla de corte podría provocar una lesión grave Evite las superficies calientes Durante el funcionamiento toda la unidad y en especial el alojamiento del eje de transmisión el cabezal de potencia la zona del silenciador y la caja de engranajes pueden calentarse hasta un punto que resulte inseguro tocarlas Evite el contacto durante e inmediata...

Страница 89: ...abajo Intente también hacer cada día trabajos en los que no sea necesario usar el cortabordes u otros equipos eléctricos de sujeción manual Si experimenta molestias rojez o hinchazón de los dedos seguidos de una pérdida de sensación y emblanqueci miento de los mismos consulte con su médico antes de volver a exponerse al frío y a las vibraciones Si no tiene en cuenta estas instrucciones podría perj...

Страница 90: ...ies h Protectores para las espinillas Protegen las piernas Si no tiene en cuenta estas precauciones podría derivar en daños en la visión o en la audición o dar lugar a una lesión grave En caso necesario utilice la ropa de protección descrita a continuación Mascarilla para el polvo Protege el aparato respiratorio Red para abejas Para hacer frente a ataques de abejas Utilice indumentaria adecuada No...

Страница 91: ...ProSweep Contiene un ca ble para transmisión flexible el alojamiento del eje ex terior y un adhesivo de seguridad 3 Cable para transmisión flexible El extremo del cable se ajusta en el acoplador del eje de transmisión de los modelos Split Boom o de la serie Pro Attachment Lubri que el cable para transmisión cada 25 horas con grasa de automoción de alta temperatura 4 Conjunto de la caja de engranaj...

Страница 92: ...e montaje de la caja de engranajes B En la caja de embalaje están empaquetadas de forma separada las siguientes piezas Cuando haya desempaquetado la caja compruebe que contenga las siguientes piezas Póngase en contacto con su distribuidor si falta alguna o está rota 1 Conjunto del eje de transmisión inferior 2 Cepillos conjunto de la caja de engranajes 3 Conjunto de gancho de almacenaje 4 Manual d...

Страница 93: ...l acoplador si fuera nece sario 4 Coloque con cuidado el conjunto del eje de transmisión en el acoplador B para adherir la línea de montaje C asegu rándose de que el eje de transmisión inferior interior se aco pla en el soporte del eje de transmisión superior 5 Gire el pasador de fijación A 1 4 de vuelta en el sentido ho rario para que se acople al orificio del eje inferior Asegúrese de que el pas...

Страница 94: ... ángulo de 15 30º Esto facilita dirigir los residuos y reduce el cansancio del operario ADVERTENCIA Las piezas móviles pueden amputar los dedos o provocar lesiones graves Mantenga las manos ropa y objetos sueltos alejados de todas las aberturas Detenga siempre el motor desconecte el cable de la bujía y asegúrese de que todas las piezas móviles se han detenido por completo antes de eliminar atascos...

Страница 95: ...de la bujía y asegúrese de que todas las piezas móviles se han detenido por completo antes de eliminar atascos restos o realizar un mantenimiento de la unidad Deje que la unidad se enfríe antes de realizar cualquier operación de servicio en la misma Utilice guantes para proteger las manos de los bordes afilados y aristas así como de las superficies calientes Componente Sistema Procedimiento de man...

Страница 96: ...de transmisión inferior en el soporte del eje de la caja de engranajes 8 Monte y apriete el tornillo de fijación A 9 Apriete el perno de montaje de la caja de engranajes B Sustitución del cepillo Los cepillos que se rompan se deformen o se desgasten a 25 4 mm del tambor del soporte del cepillo deberían sustituirse para mejorar la eficiencia del barrido 1 Ubique el orificio de acceso del soporte de...

Страница 97: ...illo alineando el orificio A del eje del tambor con el orificio del eje principal 6 Monte la tapa del tambor alineando los orificios de la tapa con los orificios del eje principal y del tambor del soporte del cepillo 7 Monte el perno y la contratuerca Apriételos con firmeza ...

Страница 98: ...podrían doblarse con el paso del tiempo Almacene el accesorio con el alojamiento del eje in ferior en posición horizontal o vertical para evitar la pérdida de grasa por el extremo abierto del eje Instalación del gancho de almacenaje 1 Introduzca el extremo pequeño del gancho en el orificio de colocación situado en el eje del accesorio 2 Coloque la tapa de plástico sobre el extremo del eje del ac c...

Страница 99: ...asa de litio de buena calidad Dirección de giro del eje de salida visto desde la derecha En sentido contrario a las agujas del reloj Frecuencia máxima de giro del eje 280 rpm Cepillos Diámetro del cepillo especificado 317 mm Anchura de barrido máx 589 mm Niveles de vibración ISO 22867 ahv eq Asa delantera Asa trasera 4 7 4 6 m s Tolerancia K 4 0 m s Nivel de presión acústica ISO 22868 LpAeq 94 9 d...

Страница 100: ... 22867 2011 los requisitos de la Directiva 2014 30 UE aplicación de la norma armonizada EN ISO 14982 2009 los requisitos de la Directiva 2011 65 UE aplicación de la norma armonizada EN 50581 2012 los requisitos de la Directiva 2000 14 CE Procedimiento de valoración de conformidad según ANEXO V Nivel de potencia acústica medida 106 dB A Nivel de potencia acústica garantizado 109 dB A Número de seri...

Страница 101: ...19 1Notas y contraportada MEMORANDO ...

Страница 102: ...X771209 4602 2018 1 7 2 Suehirocho Ohme Tokio 198 8760 JAPÓN TELÉFONO 81 428 32 6118 FAX 81 428 32 6145 ...

Страница 103: ......

Страница 104: ...X771209 4602 2018 1 1 7 2 Suehirocho Ohme Tokyo 198 8760 JAPAN PHONE 81 428 32 6118 FAX 81 428 32 6145 ...


Отзывы: