background image

Components Overview

사용안내

8

9

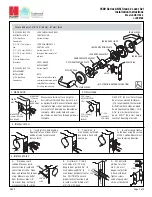
Front Body         

(Front Body, install on the outside of the door)

Basic Contents

The contents of this product may be subject to change without notice for performance or quality improvement.

Front Body

Back Body

•Remote control

•Remote control module

•Strike for a double side door

•Magnet for a single door

》 Optional Accessory 

(purchase separately)

》 Basic Contents

User Guide

Installation Template

Back Body           

(Back Body, install on the inside of the door) 

1.5V AA Alkaline Batteries

Striker

Dead Bolt

Battery Cover

Slot for Remote Control
module 

(Optional extra)

Registration button

Manual Thumb Turn

Manual Thumb Turn 
Button 

Open / Close Button

9V Emergency battery
(Optional)

4 Card Keys

(

Card Key model only

)

4 Batteries 
Screws

Keypad (10-Key)

Dead Bolt Jam Lamp

Card Key Reader

(Card Key model only)

Low battery Indicator

Emergency Power Supply 
Terminal

Directions 

Содержание YDG313

Страница 1: ...ISL 0000 00 Printed in Korea The functions and design of this product can be changed without prior notice for quality improvement YDG313...

Страница 2: ...securing it at the same time The future of locking is already here and ready for use Get rid of all your concerns regarding the security of your home and use a Yale Digital Door Lock to unlock the do...

Страница 3: ...rity is improved compared to a normal knob 3 Clip type bracket The installation convenience is improved by the clip type bracket with a very strong double side tape 4 Modern thin design It is the Soli...

Страница 4: ...n the manual thumb turn to lock unlock pressing buttons together Open Close Button Manual Set Press button button Press button Auto Set Press button button Press button Contact the Card key on Card ke...

Страница 5: ...essory purchase separately Basic Contents User Guide Installation Template Back Body Back Body install on the inside of the door 1 5V AA Alkaline Batteries Striker Dead Bolt Battery Cover Slot for Rem...

Страница 6: ...to 12 digits 1 Touch with palm 2 Enter User PIN Code 3 Touch with palm Step Icon Description Touch the keypad of the Front Body gently with your palm or press button to end Touch the keypad of the Fro...

Страница 7: ...thin 5 seconds after closing the door Turn the manual thumb turn to unlock pressing buttons together Press Open Close button 5 Sec 5 Sec Open Door from Inside Press Open Close button Press Open Close...

Страница 8: ...sed To Set Auto Locking Mode Press Registration button 1 Enter 2 Enter number and on the keypad 3 4 Press Registration button To Set Manual Locking Mode Press Registration button 1 Enter 2 Enter numbe...

Страница 9: ...efault setting High Even when the Inside Forced Lock mode is set the High Temperature Alarm releases the lock status automatically High Temperature Alarm When there s high temperature of the inside It...

Страница 10: ...sed 3 minute Lock Feature At 3 minute Lock mode no button will work except the button inside To Release 3 minute Lock 3 minute Lock mode won t affect any alarm and is sustained even after the product...

Страница 11: ...ay only be examined through the Remote Control Note The wireless encryption algorithm resorts to the floating ID technology where the wireless User PIN Code is changed every time the Remote Control is...

Страница 12: ...lace all 4 batteries for the following cases The Low Battery Lamp on the Front Body lights on The alarm melody will sound a nursery rhyme starting with ting a ling melodies The battery life vary depen...

Отзывы: