7000 Series Parts Manual
69
Copyright © 1998-2020, ASSA ABLOY Access and Egress Hardware Group, Inc. All rights reserved.
Reproduction in whole or in part without the express written permission of ASSA ABLOY Access and
Egress Hardware Group, Inc. is prohibited. Patent pending and/or patent www.assaabloydss.com/patents.
Concealed Vertical Rod Exit Devices
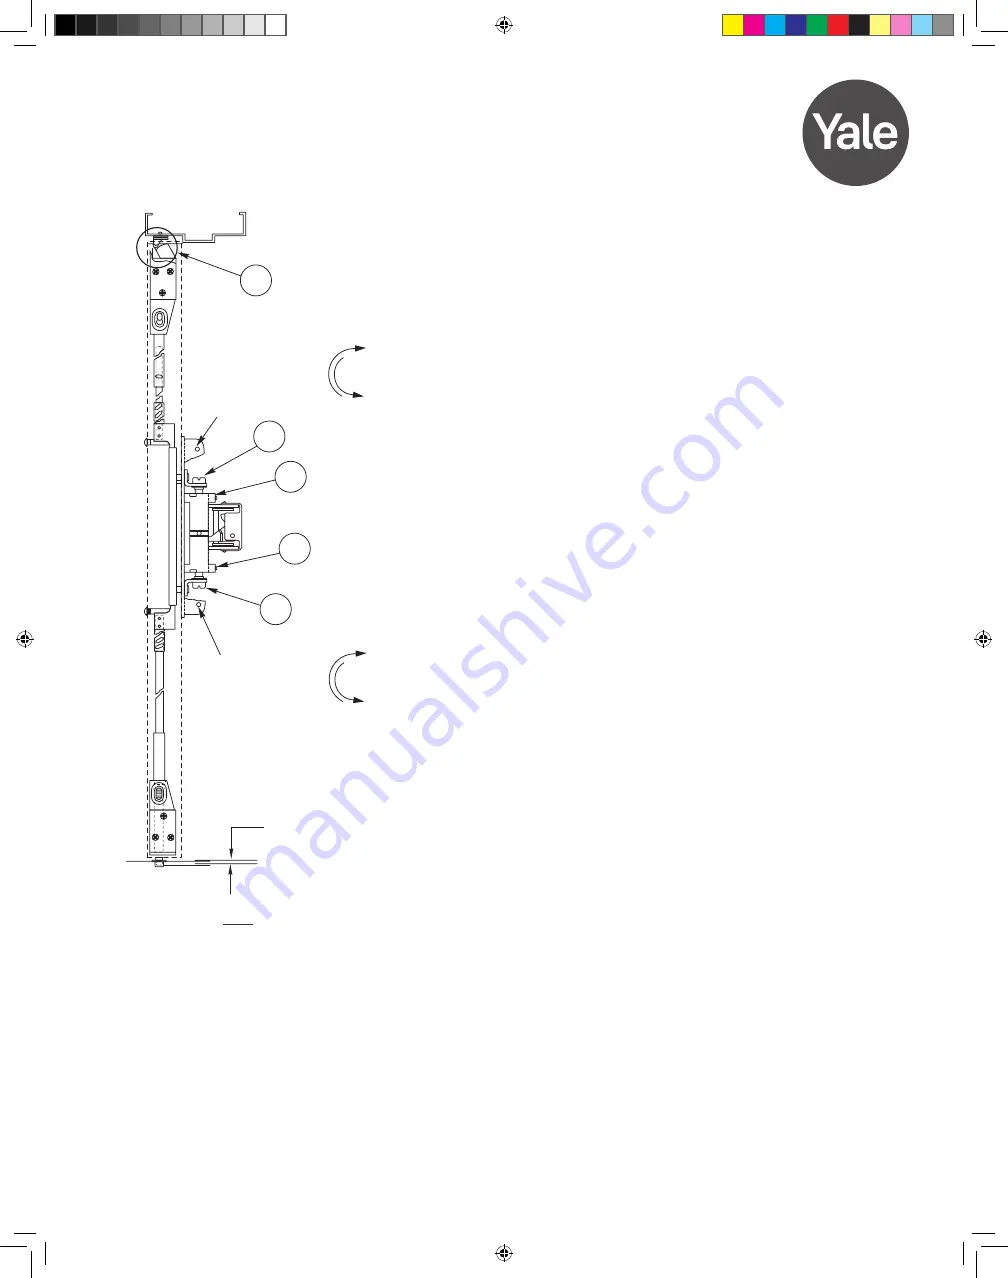
Rods should move freely inside door . Bolts extend automatically
when door closes and top strike is tripped . Top bolt should retract flat .
Bottom bolt should travel 1/2" and engage 3/8" into strike in down
position, without dragging on floor surface in up position .
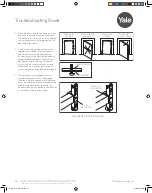
If top latch does not engage properly check alignment . When locked,
latch bolt should not be preloaded by strike (
Area A
) . Shim or
reposition strike if necessary .
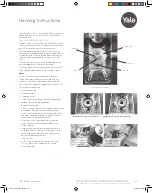
Rod Adjustment for Bolt Throw
1 . Remove Latch assembly cover screws and cover .
2 . Use 3/32" Allen wrench to loosen set screws
C
1
and
C
2
.
3 . Adjusting screws
B
1
and
B
2
only provide fine rod adjustment . If
screws bottom out before proper device operation, door and device
must be removed . Larger adjustments may then be made either by
threading rod in or out, or by moving cotter pin to different hole in
rod .
4 .
Adjust top rod first.
With device in dogged position (panic devices)
or touchbar fully depressed (fire devices), adjust top rod so that
the top latchbolt is flush and the hold back feature is engaged .
Lengthen top rod an additional 1/2 turn .
5 .
Adjust bottom rod.
With top latch retracted in hold back position,
and touch bar dogged or fully depressed, adjust bottom rod so that
the deadbolt clears the strike by 1/16" . The bottom rod should be
in position in the active case with the square head of the connector
hanging in the slide .
6 .
Check device operation
by opening and closing the door . When
present, operate the device with the outside trim . An additional
minor adjustment may be required for full retraction and correct
strike engagement .
7 . When finished, lock adjusting screws in place with Allen set
screws .
Caution:
To avoid thread damage and provide positive locking, be
sure Allen set screws engage flats on adjusting screws .
Maintenance
1 . Periodically remove covers and coat exposed mechanisms with
an appropriate lubricant . This is regularly required in corrosive
environments for proper product operation .
2 . Check mounting fasteners periodically . Retighten if found loose .
Apply screw locking compound or change part fasteners if screws
continue to back out .
3 . Periodic checks and adjustments of rods may be required to
compensate for door or frame sag .
LONGER
BOTTOM ROD
SHORTER
BOTTOM ROD
ADJUSTING SCREW
TOP ROD
ADJUSTING SCREW
LONGER
TOP ROD
SHORTER
COVER
SCREW
HOLE
COVER
SCREW
HOLE
3/8"
(10mm)
ENGAGEMENT
BOLT
B2
C2
C1
B1
A
7120
42210_Yale_7000_PM.indd 69
42210_Yale_7000_PM.indd 69
10/6/20 3:05 PM
10/6/20 3:05 PM

