background image

Содержание VX-1R

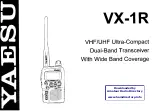
Страница 1: ...VX 1R VHF UHF Ultra Compact Dual Band Transceiver With Wide Band Coverage Downloaded by Amateur Radio Directory www hamdirectory info ...

Страница 2: ...fX LED Automatic Po1 1 er C ff APO Feature 17 17 18 20 21 22 2J 23 24 24 25 25 25 26 Control Locking Changing the Dial s Function Disabling the Keypad Beeper DTMF Operation Emergency Channel Operation Memory Operation Simple 1ernory Storage tv1cmory Recall Independent Tx Rx rrequency Storage Odd Splits Home Channel femorics Loading a Memory into the VFO Changing the Contents of a Memory Masking Me...

Страница 3: ...alking around town and its operating flexibility brings the user many avenues of operating enjoyment Besides 144 and 430 MHz transceive operation the VX R provides receive coverage of the AM and FM broad cast bands VHF and UHF TV bands the VHF AM aircraft band and a wide range of commercial and public safety frequencies We appreciate your purchase of the VX R and en courage you to read this manual...

Страница 4: ...nsmitter RF Power Output Modulation Type Maximum Deviation Spurious Emissions Microphone Impedance Receiver Circuit Type IW 6V EXT DC IN 500 mW 3 6 V DC Variable Reactance 5 kHz At least 50 dB below carrier 2kQ Double Conversion Superheterodyne VHF UHF Superheterodyne 0 5 1 7 kHz Intermediate Frequencies Ist 41 45 MHz VHF UHF 455 kHz 0 5 1 7 MHz 2nd 450 kHz Narrow FM 10 7 MHz Wide FM Sensitivity B...

Страница 5: ...adset E DC 15 Cigarette Lighter DC Power Cable CSC 71 Soft Case CN 3 BNC to SMA Adapter CT 44 Microphone Adapter Options FNB 52U FBA 20 VC 25 Availability of accessories may vary Some are sup plied as standard per local requirements while oth ers may be unavailable in some regions Consult your Yaesu Dealer for details regarding these and any newly available options Connection of any non Yaesu appr...

Страница 6: ... external antenna for transmission ensure that the SWR presented to the transceiver is 1 5 I or lower Installing the FNB 52LI Battery Pack The FNB 52LI is a high performance 3 6 V Lithium Ion battery providing 700 mAh capacity yet weighing just over an ounce 33 g The FNB 52LI recharges in 2 hours while installed in the radio Under typical use the FNB 52LI is good for approximately 300 charge cycle...

Страница 7: ...nal FBA 20 Battery Case allows receive monitoring using a single AA size alkaline battery An alkaline battery can also be used for transmission in an emergency but power output is only 100 mW and battery life is short The FBA 20 includes a DC DC converter which dou bles the voltage of the alkaline battery to approxi mately 3V To Install an Alkaline Battery in the FBA 20 Slide the battery into the ...

Страница 8: ...ng indicating that battery voltage is critically low the battery should be recharged or replaced at once or the radio turned off 1 I VX 1R Battery Life Operating Time Hours Operating Band FBA 20 FNB 52LI Alkaline Lithium Ion HAM Bandsl1 i VHF 3 14 UHF 3 5 12 AM BC Al R l2 11 21 FM incl TVP 6 11 1 Tx 6 sec Rx 6 sec and squelched 48 sec 2 Continuous signal reception The actual battery voltage is dis...

Страница 9: ...oove at the top of the Belt Clip and run the loop of the strap around the round mount ing ridge for the Belt Clip Now insert the mounting screw through the belt clip and affix it snugly to the mounting hole on the back of the transceiver being careful not to allow the Hand Strap to become misaligned ...

Страница 10: ...1 and 12 1 Power PWR Switch page 11 Function Memory Write Key MemoryNFO Search Lock key pages 31 34 __ 39 26 External DC Jack page 6 ARTS Set Enable Emergency Channel key pages 40 30 MIC EAR Jack page 44 Dial page 27 L BUSYffX LED page 25 LCD Display page 9 UP MHz Scan Key OWN MHz Scan Key Speaker Battery Case Latch page 4 ...

Страница 11: ...Area Function Mode Active Dual Watch Active page 38 Volume Level page 11 LOW Power Selected page 14 Battery Saver Active page 25 PR1 aaom1e Repeater Shift Direc tion page 18 CTCSS Encoder Active page 20 CTCSS Decoder Active page 20 Digital Code Squelch page 21 Low Battery page 6 Bell Alarm Active page 23 Key Lock Active page 26 S and Tx Power Meter Automatic Power Off page 26 ...

Страница 12: ...function becomes active unless you have disabled it page 25 O To turn the transceiver off hold the PWR switch again for one second R F Says If you ve owned a Yaesu hand _ held before you llfind that you need to hold in the PWR switch for about Mice as long as on previous units Also ifyou don t hear the two Beep tones when the radio comes on the Beeper may have been disabled via the Menu system Pag...

Страница 13: ...tion of the Dial allows manual setting of the squelch threshold on a scale of 1 to 10 Advance the Dial to the point where the background noise is just silenced Turning the Dial to a higher number reduces the sensitivity of the Squelch system to weak signals 0 About two seconds after you stop turning the Dial the transceiver automatically cancels the Squelch Setting mode and the display reverts to ...

Страница 14: ...R O Tum the Dial to tune in the pre programmed steps established for the current Operating Band R F Says If you don t move around in the pre programmed channel steps the radio may be set to the Memory mode Press the key until the channel indicator above the frequency display disappears then try rotating the Dial again 0 Press the or ekey momentarily to shift fre quency upward or downward respectiv...

Страница 15: ...ower right High Power operation 500 mW or I W is indicated by full scale deflection of the 5 p Meter while Low Power opera tion 50 mW or 200 mW is indicated by only three bars on the 5 p Meter Low power is also indicated by LOW appearing below the frequency display R F Says Ifyou re just talking to friends in the immediate area you II get much longer battery life by switching to Low power opera ti...

Страница 16: ... To delete unwanted memories refer to page 34 AM Broadcast Reception AM Broadcast reception in the 0 5 1 7 MHz range is also possible on the VX IR with 10 special memo ries just for this band page 31 However because of the very low efficiency of the 144 430 MHz antenna provided with the transceiver on this band this capa bility is only usable when the antenna is held near a large metal object or b...

Страница 17: ... until you press PWR momentarily once more Here is the procedure for setting up the Lamp mode 0 You first need to enter the SET Menu mode To do this hold the ekey for 1 second then release it All SET mode functions are summarized on page 42 0 Now press either or fS as many times as nec essary to select Menu Item 17 LAr1P 0 Next turn the Dial to select one of the three modes described above O When ...

Страница 18: ...erent frequencies However should an unusual situation arise in which you need to change the operating mode FM Narrow FM Wide or AM here is the procedure for doing so 0 Hold efor 1 second to enter the Menu mode 0 Press or f S to select Menu Item 32 FIX 11Jl 0 Tum the Dial to select the desired operating mode AM FM N or FM W O Press again to save the new setting and exit to normal operation To Disab...

Страница 19: ...ne into the designated repeater sub bands in your country These sub bands are shown in the next column If the ARS feature does not appear to be working it may have been disabled To re enable ARS hold e for I second then push or to select Menu Item ARS Repeater Subbands 2m American Version 145 1 145 5 146 0 146 4 146 6 147 0 147 4 147 6 148 I I I I I I I I I El European Versions 145 6 145 8 70cm 44...

Страница 20: ... the new setting and exit R F Says If you just have one odd split f that vou need to program don t change the dej ult repeater shifts using Menu Item 6 Enter the transmit and receive frequencies sepa rately as described on page 32 Checking the Repeater Uplink Frequency It often is helpful to be able to check the uplink input frequency of a repeater to see if the calling station is within direct Si...

Страница 21: ...gh D CTCSS en code DIE Tone SQuelch GI El Digital Code Squelch and normal no squelch icon noise squelch only Tone Squelch and DCS squelch sys terns mute your VX 1 R s receiver until it receives a call from another radio sending out a matching CTCSS tone or DCS code These systems can help keep your radio quiet until a specific call is received which may be helpful while operating in congested areas...

Страница 22: ...implex just set up the Tone Code to be the same as that used by your friend s D Press eonce momentarily to select Menu Item 24 L r JP Tum the Dial so that Im appears in the upper right hand area of the LCD This acti vates the DCS Encoder Decoder D Press eagain to save the new setting and exit to normal operation DCS Codes 023 025 026 i 031 032 036 043 047 051 053 054 065 071 072 073 074 114 115 11...

Страница 23: ...operating in the CTCSS Tone Squelch mode press or fS to select Menu Item 25 T E T and press momentarily followed by or a to start scanning for the incoming CTCSS tone 0 Ifoperating in the DCS mode use the ii or akey to select Menu Item 26 lJ and press mo mentarily followed by ii or a to start scanning for the incoming DCS tone O When the radio detects the correct tone it halts on that tone and aud...

Страница 24: ...u can tell if someone called while you were away When you press the PTT switch to respond the 1 stops flashing However the ringer does not com pletely reset for another 5 seconds so you can con duct your conversation without interruption When the other station does not respond to you within that period the ringer resets to respond to the next call Tone Calling 1750 Hz Tone Burst If the repeaters i...

Страница 25: ...ettings sepa rately in each memory so you don t waste batter po ver when using very close in repeaters 1 Transmitter Time Out Timer TOT The TOT feature provides a safety switch to limit transmission time This preserves the battery by pre venting excessively long transmissions and in the event of a stuck PTT switch perhaps if the radio or a Speaker Mic is wedged between car seats it can prevent int...

Страница 26: ...nt of sleep time between activity checks using the Menu System 0 Hold efor 1 second to enter the Menu mode 0 Press i or e to select Menu Item 12 R RI E 0 Tum the Dial to select the desired sleep duration The selections available are 200 300 and 500 ms 1 and 2 seconds or OFF no sleep The default value is 200 ms D When you have made your selection Press e again to save the new setting and exit to no...

Страница 27: ... Control Locking To prevent accidental frequency change or inadver tent transmission the VX lR s keys and switches can be locked out in various ways The possible lockout combinations are fr E J Just the front panel keys are locked out lJIRL 11 t N PTT H p Just the top panel Dial is locked out Both the Dial and Keys are locked out The PTT switch is locked TX not possible Both the keys and PTT switc...

Страница 28: ...efault D Press eagain to save the new setting and exit to normal operation O If you selected VGL 5 above turning the Dial causes the display to switch over to Volume level indication If you first press and then turn the Dial the Squelch level changes In the VOL 15 mode all frequency control is performed using the J and el keys Disabling the Keypad Beeper If you are operating in a situation where t...

Страница 29: ...er each tone is sent Turn the Dial to select another number then press e again To send a typical seven digit telephone number therefore you have to tum the Dial and press e seven times while holding the PTT Re lease the PTT switch when you are done the red TX LED remains lit for about one second before transmission ends 0 Note that the DTMF code is displayed as E and the DTMF code is displayed as ...

Страница 30: ... ries but usually use Manual DTMF transmis sion you can set the DTMF Memory to t1Rr URL Then v hen you key the transmitter and press you automatically bring up the r1RtJU 3 setting To send the telephone number 0 Hold the PTT switch to continue transmitting dur ing the following steps 0 Press emomentarily to enter the DTMF mode 0 Press either or f S if necessary to select the DTMF Memory desired Th...

Страница 31: ...is alann sound is transmitted any repeater shift or tone squelch DCS settings are ignored You can for example use this feature if you are out for a walk and want a quick way of alerting a family member to a dangerous situation The alann sound might discourage an attacker and allow you to es cape The Emergency feature is activated and deacti vated by holding the key for 2 second i R F S ys Be sure ...

Страница 32: ...orage and recall features If you prefer using the memories to store non Amateur fre quencies and need more than 52 memories using the YFO mode for Amateur operations you may wish to switch to Configuration Group 2 To change Memory Groups use this procedure O Turn the transceiver offby holding in the PWR key for 1 second O Hold the key while pressing the PWA key to turn the transceiver on When the ...

Страница 33: ...r to select the memories on that band R F Says If you turn the Dial while in the Memory mode the radio switches to the VFO mode using the current memory frequency as the starting point for tuning This may be convenient for those operating situations when you need to move to avoid interference from other users Pressing returns the radio to the Memory mode The trans ceiver remembers the frequency ex...

Страница 34: ...transmit frequency is being stored Memory storage is now complete When you recall a memory containing independent Tx Rx data per this section you will notice that the repeater offset is shown as a D indicating that the pre programmed default offset is not in use Home Channel Memories Each band includes a special Home Memory where operation initially begins These channels have been preset at the fa...

Страница 35: ...ry so you must tum the Dial to select the original channel number which will be blinking 0 Press momentarily to save the new frequency data You are still in the VFO mode and may resume normal operation R F Says When you replace memory data any Alphanumeric Label page 35 appended to that channel is erased Masking Memories There may be situations where you want to Mask memories so that they are not ...

Страница 36: ... in the second position in the Label When the choice has been made again press Repeat this step to enter the rest of the Label If you make a mistake press All digits to the right of the current position are erased and you can correct them To store a blank space select the u character When you have completed the label Press e mo mentarily to accept it R F Says Storing a label automatically switches...

Страница 37: ...nals like broadcasts the scan ner remains paused indefinitely To select the Scan Resume mode 0 Hold efor 1 second to enter the SET mode D Press or IS to select Menu Item 8 REc u 1E D Tum the Dial to select 5 c f or RRRE Carrier Drop per above description D Press e or the PTT momentarily to save the new setting and exit to normal operation R F Says The default scan resume setting is 5 _ VFO Scannin...

Страница 38: ...mber indicat ing it is to be ignored during scanning O Later to re enable the memory for scanning repeat the above three steps A memory set to be skipped is always accessible via manual memory selection using ii or S Programmable Band Limit Memory Scan This feature allows you to set sub band limits for either scanning or manual VFO operation For exam ple you might wish to set limits in North Ameri...

Страница 39: ...s next to the memory number With the Priority channel stored you can now change frequencies and bands as usual Whenever you want to monitor the Priority channel activate Dual Watch as follows 0 From any band except JI JIRriJJ press 19 and then emomentarily OW appears near the lower left and every 3 seconds the receiver jumps to the Priority channel for 200 ms to check for activity If a call comes ...

Страница 40: ...dio continues sweeping until they are all filled Setting the Smart Search Mode 0 Hold efor l second to activate the SET mode 0 Press i2 or to select Menu Item 28 r 111 111 0 The display initially indicates r INGLE as the de fault mode To change this to the Continuous mode tum the Dial one click so the display indi cates cor rI D Press emomentarily to save the new setting and exit to normal operati...

Страница 41: ...inute four polls your radio senses that no signal has been received Three beeps sound and the display reverts to OU TF JG If you move back into range your radio again beeps and the display changes back to IN RtJ j During ARTS operation your operating frequency is not displayed and you cannot change it or other settings you must first terminate ARTS to resume normal operation This is a safety featu...

Страница 42: ...escribed above D Press eagain momentarily to save the new set ting and exit to nonnal operation CW Identifier Setup The ARTS feature includes a CW identifier as men tioned previously The radio can be instructed to send DE your cal sign K in Morse code every ten minutes during ARTS operation The callsign may contain up to 8 characters from the table on page 35 Here s how to program and activate the...

Страница 43: ...igation to the desired Menu Item J When you are satisfied with the setting Press e or the PTT switch momentarily to save the new setting and exit to normal operation SET Mode Summary No Title Descriotion Default Paae 1 ITV P R J A 1 Transmitter ou1put HIGH or LOW Depends on power source HiliH 24 2 rJRt1E Frequency or Alphanumeric Label FREQ ALPHA FREQ 35 3 rm S ET Memory label entry See Character ...

Страница 44: ...Min OFF 24 u 20 11 n LLU Busy Channel Lock Out ON OFF OFF 25 21 CLH5FT Shifting of CPU Clock Frequency ON OFF OFF 47 22 W Ill ARTS CW ID ON OFF OFF 41 23 I 11 ET ARTS CW ID Programming Se e Character Set table _ 41 24 S GLT JP Tone Squelch Mode T TSQ DCS Freq dependent 20 21 25 T ET CTCSS Tone Frequency Programming Ham BBS Hz 20 Others fi 1 8 Hz 26 Tirr JIL DCS Code Number Programming 823 21 27 Tl...

Страница 45: ...y the key and the Dial as with voice operation The input level to the VX IR from the CT 44 CT 44 Adapter TNC should be adjusted at the TNC side The input impedance is 2k0 Be sure to turn the transceiver and TNC off before connecting the CT 44 cable to prevent voltage spikes from possibly damaging the transceiver R F Says Switch the Battery Saver OFF during Packet operation See page 25 SP GND MIC T...

Страница 46: ...rned off hold 1 while turning on the radio Do this for both units CL or E appear on the LCDs O On the destination radio press I tJ appears on the LCD O On the source radio press C OUT appears on the LCD and the cloning data transfers If there is a problem during the cloning process EFIFI is displayed Check your cable connections and battery voltage and try again O If cloning is successful turn bot...

Страница 47: ... contacts or some other factor which may be obstruct ing the flow of current from the battery to the radio Antenna Problems The supplied antenna is very rugged as is the SMA connector on the transceiver When using a different antenna via an adapter however a poor connection could degrade perforrnance If you suspect an antenna problem and are using an external or after market antenna try the origin...

Страница 48: ...rious Signals Birdies Any transceiver capable of such wide frequency cov erage can produce spurious receiver responses at an audible level on certain frequencies because oscilla tors inside the radio operate on sub harmonics of those frequencies within the receiving range of the transceiver Rarely will this occur on a channel on which you wish to operate but if this should happen you can shift the...

Страница 49: ...nce including interference that may cause undesired operation 3 The scanning receiver in this equipment is incapable of tuning or readily being altered by User to operate within the frequency bands allocated to the Domestic Public Cellular Telecommunications Service in Part 22 This device complies with RSS 21 Oof Industry Canada Operation is subject to the following two conditions 1 this device ma...

Страница 50: ...hester Hampsh 1re S023 OLB U K_ YAESU GERMANY GmbH Am Kronberger Hang 2 D 65824 Schwalbach Germany YAESU HK LTD 11th Floor Tsim Sha Tsu 1 Centre 66 Mody Rd Tsim Sha Tsui East Kowloon Hong Kong 9901 c FA Copyright 1997 Yaesu rv1usen l o Ltd i ll rights reser ed No portion of this rnanua rnay be reproduced ithout the permission of Yae u rv1usen Co Ltd Printed in Japan I 1111 111111 100WI1111 Ill 111...

Отзывы: