How to Update the Firmware
YAESU MUSEN CO., LTD.
NOTE:
r
While writing the firmware, do not suspend
the program running, and do not disconnect
the transceiver from the PC. If the program is
suspended or the transceiver is disconnected from
the PC, the firmware writing may not complete, and
the transceiver will not work correctly.
r
While writing the firmware, do not use the power
save mode or the screen saver in the PC.
If firmware Ver. 03.xx is incorrectly updated to the
FTA-750/FTA-550, the LCD display will not be
displayed when the transceiver is powered on. You
will need to reinstall firmware Ver. 02.xx.
The method of reinstalling is the same as “How to
update the firmware”.
1. Start the Firmware Update.exe:
a) Connect the FTA-750/FTA-550/FTA-450 to the PC
USB port by using attached USB cable.
b) Turn the transceiver on while pressing and
holding the [
MENU
]
key.
c) The transceiver will sound a short beep and show
the “
CP MODE
” in the LCD display.
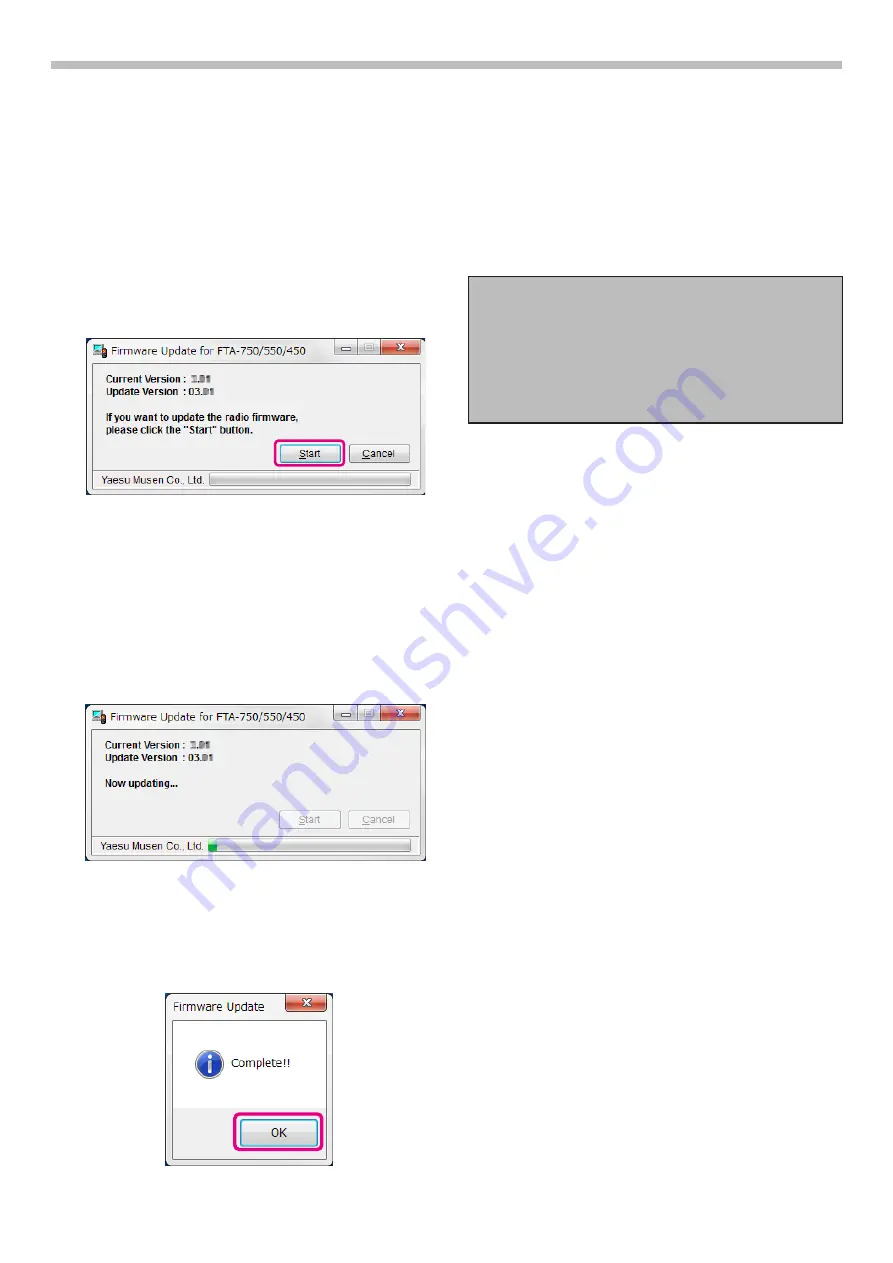
d) To start the Firmware Update program, double
click the Firmware Update FTA_750_550_450_
V3xx.exe.
e) If transceiver and programmer are connected
correctly, the update program will show on the PC
display.
f) Confirm which current version firmware is installed
in the transceiver.
If the current firmware version is the same as the
update version, you don’t need to update it.
Please click the “
Cancel
” button to close the
update program.
2. To begin the update:
a)
Click the “
Start
” button to start installing the firmware.
The program starts writing the firmware to the
transceiver.
3. Finish of the update:
Approximately 5 minutes are required to complete
the firmware writing.
After the update is finished, the program will show
the pop-up.
Click the [
OK
] button to exit the update programmer.
1709-A


