9
Alignment
m
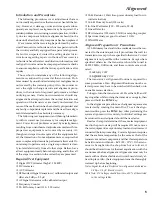
Key the transmitter with no microphone input, and ad-
just TC5003 for 0 V on the DC voltmeter.
HF/ 50 MHz Band Over-Current ALC Adjustment
m
Connect the 50-
W
dummy load to the HF/50 MHz an-
tenna jack. Set the transceiver to 50.1000 MHz, and se-
lect the CW mode. Use Menu #22 to set the 50 MHz RF
power to maximum.
m
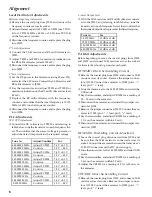
Select “Alignment” menu item F-11 [HF IC ALC] and
adjust the main
DIAL
for a 1-segment ALC meter de-
flection.
VHF/UHF Band Over-Current ALC Adjustment
m
Connect the 50-
W
dummy load to the VHF/UHF anten-
na jack. Set the transceiver to 145.0000 MHz, and select
CW mode. Use Menu #23 to set the 144 MHz RF power
to maximum.
m
Select “Alignment” menu item F-12 [V/UHF IC ALC].
Key the transmitter, and adjust the main
DIAL
for a 1-
segment ALC meter deflection.
HF band Output Power Adjustment
m
With the 50-
W
dummy load and inline wattmeter con-
nected to the HF/50 MHz antenna jack, set the trans-
ceiver to 1.8400 MHz (for the “Belgium” version) or
14.2000 MHz (other versions), and select the CW mode.
Use Menu #21 to preset the HF RF power to maximum.
m
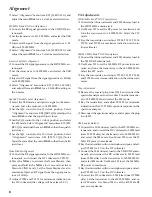
Select “Alignment” menu item F-15 [HF PO 100W]. Key
the transmitter, and adjust the main
DIAL
for 100 W
on the inline wattmeter.
m
Select “Alignment” menu item F-14 [HF PO 50W]. Key
the transmitter, and adjust the main
DIAL
for 50 W on
the inline wattmeter.
m
Select “Alignment” menu item F-13 [HF PO 10W]. Key
the transmitter, and adjust the main
DIAL
for 10 W on
the inline wattmeter.
50 MHz band Output Power Adjustment
m
Leave the 50-
W
dummy load and inline wattmeter con-
nected to the HF/50 MHz antenna jack. Set the trans-
ceiver to the 53.5000 MHz, and select the CW mode. Use
Menu #22 to preset the 50 MHz RF power to maximum.
m
Select “Alignment” menu item F-19 [50 PO 100W]. Key
the transmitter, and adjust the main
DIAL
for 100 W
on the inline wattmeter.
m
Select “Alignment” menu item F-18 [50 PO 50W]. Key
the transmitter, and adjust the main
DIAL
for 50 W on
the inline wattmeter.
m
Select “Alignment” menu F-17 [50 PO 10W]. Key the
transmitter, and adjust the main
DIAL
for 10 W on the
inline wattmeter.
144 MHz band Output Power Adjustment
m
Connect the 50-
W
dummy load and inline wattmeter to
the VHF/UHF antenna jack. Set the transceiver to
145.5000 MHz, and select the CW mode. Use Menu #23
to preset the 144 MHz RF power to maximum.
m
Select “Alignment” menu item F-22 [144 PO 50W]. Key
the transmitter, and adjust the main
DIAL
for 50 W on
the inline wattmeter.
430 MHz band Output Power Adjustment
m
Leave the 50-
W
dummy load and inline wattmeter con-
nected to the VHF/UHF antenna jack. Set the transceiv-
er to the 435.0000 MHz (TYP B1, B2, C1, C2) or 440.0000
MHz (TYP A1, A2, H1, H2), and select the CW mode.
Use Menu #24 to preset the 430 MHz RF power to maxi-
mum.
m
Select “Alignment” menu F-23 [430 PO 20W]. Key the
transmitter, and adjust the main
DIAL
for 20 W on the
inline wattmeter.
TX Gain Adjustment
m
As you step through the procedures below, connect the
50-
W
dummy load and inline wattmeter to the HF/50
MHz or VHF/UHF antenna jack, as appropriate. Con-
nect the AF generator to the MIC jack.
m
Use Menu #25 to set the MIC gain for maximum. Use
Menu items #21-24, as appropriate, for setting the RF
power to maximum on the band (below) being adjusted.
m
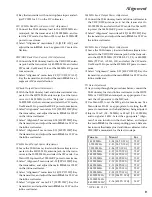
Inject a 1.5 mV (1.8 ~ 28 MHz) or 2.0 mV (50 ~ 430 MHz)
audio signal at 1 kHz. Select the appropriate “Align-
ment” menu function in the chart below, and adjust
the main
DIAL
for the corresponding power. Remem-
ber to move the dummy load and inline wattmeter to the
VHF/UHF antenna jack for the last two steps.
Tune to
:
Menu #
For
1.9100 MHz
F-24 [1.8 TX IF G]
75 W
3.7500 MHz
F-25 [3.5 TX IF G]
75 W
7.0500 MHz
F-26 [7 TX IF G]
75 W
10.1000 MHz
F-27 [10 TX IF G]
75 W
14.2000 MHz
F-28 [14 TX IF G]
75 W
18.1100 MHz
F-29 [18 TX IF G]
75 W
21.2500 MHz
F-30 [21 TX IF G]
75 W
24.9000 MHz
F-31 [24 TX IF G]
75 W
28.8500 MHz
F-32 [28 TX IF G]
75 W
52.0000 MHz
F-33 [50 TX IF G]
75 W
145.5000 MHz
F-35 [144 TX IF G]
40 W
435.0000 MHz
F-36 [430 TX IF G]
16 W
440.0000 MHz*
* TYP B1, B2, C1, C2
Содержание FT-100 Micro Mobile
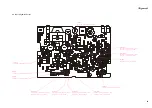
Страница 12: ...12 Alignment Note ...
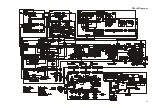
Страница 17: ...17 Block Diagram ...
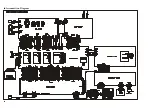
Страница 18: ...18 Interconnection Diagram ...
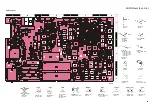
Страница 19: ...19 Circuit Diagram MAIN Unit Lot 1 4 ...
Страница 20: ...20 MAIN Unit Lot 1 4 Note ...
Страница 23: ...23 MAIN Unit Lot 5 Circuit Diagram ...
Страница 24: ...24 MAIN Unit Lot 5 Note ...
Страница 51: ...51 Circuit Diagram Parts Layout Side A Side B DAN235U M D1801 1802 1803 1804 BPF Unit ...
Страница 52: ...52 BPF Unit Lot 9 Circuit Diagram Parts Layout Side A Side B DAN235U M D1801 1802 1803 1804 ...
Страница 54: ...54 BPF Unit Note ...
Страница 55: ...55 Circuit Diagram Parts Layout Side A Side B 2SC4047 ZY Q1901 1902 HPF Unit ...
Страница 56: ...56 HPF Unit Lot 6 Circuit Diagram Parts Layout Side A Side B DTC114EU 24 Q1901 1902 1903 ...
Страница 58: ...58 HPF Unit Note ...
Страница 59: ...59 Circuit Diagram Parts Layout NJM2904V Q1951 1952 Audio Filter Unit Side A Side B ...
Страница 60: ...60 Audio Filter Lot 6 Circuit Diagram Parts Layout Side A Side B NJM2904V Q1951 1952 ...
Страница 62: ...62 Audio Filter Unit Note ...
Страница 63: ...63 Local Unit Circuit Diagram ...
Страница 74: ...74 Local Unit Note ...
Страница 75: ...75 REF Unit Circuit Diagram Parts Layout Side A Side B 2SC2714Y QY Q2801 2802 ...
Страница 77: ...77 PA Unit Circuit Diagram ...
Страница 78: ...78 PA Unit Note ...
Страница 88: ...88 PA Unit Note ...
Страница 89: ...89 Circuit Diagram LPF Unit ...
Страница 91: ...91 Circuit Diagram LPF Unit Lot 9 ...
Страница 98: ...98 LPF Unit Note ...
Страница 99: ...99 Circuit Diagram Display Unit Lot 1 ...
Страница 101: ...101 Circuit Diagram Display Unit Lot 34 ...
Страница 106: ...106 Display Unit Note ...
Страница 107: ...107 Circuit Diagram CNTL Unit Lot 1 3 ...
Страница 109: ...109 CNTL Unit Lot 4 Circuit Diagram ...
Страница 116: ...116 CNTL Unit Note ...
Страница 121: ...121 FTS 27 CTCSS Tone Squelch Unit option Circuit Diagram Parts Layout Side A Side B 1SS184 B3 D0001 MX165CTN TR Q0001 ...

