background image

CARE AND MAINTENANCE 

1.

Maintain the tool with care. A tool in good condition is more efficient, easier to control and will have fewer

problems.

2.

Inspect  the  tool  components  periodically.  Repair  or  replace  damaged  or  worn  components.  Only  use

identical replacement parts when servicing.

3. Maintain the tool's labels and name plates.  These carry  important information.  If  unreadable or missing,

contact customer service for replacement. 

WARNING: 

ONLY 

qualified service personnel should repair the tool. An improperly  repaired the tool. 

An improperly repaired tool may present a hazard to the user and/or others. 

CLEANING 

Wipe clean as needed.  Use mild upholstery cleaner (not caustic) to clean the chest deck pad as needed. 

LUBRICATION 

DO  NOT 

lubricate the casters. This can damage the mechanism. 

STORAGE 

1. Remove the leg lock pins from each leg. Hold the ladder when removing the second pin as the base frame

will fall to the floor. Store the pins in the creeper's pouch.

2. Push the ladder's angle support arms back towards the ladder. 

3. Lift each leg up until it rests next to the ladder assembly.

4. 

Store the creeper vertically. Make sure the rear casters are locked once in place. 

REMOVAL  FROM STORAGE 

1. Lower each leg.

2. 

Pull the ladder's angle support arms forward to settle in a height adjustment notch.

3. Remove the leg lock pins from the pouch.

4. 

Lift the base frame and push the leg down until the bolt holes align. Push the leg lock pin through and turn

the end down. Repeat with the other leg.

5.

Unlock the rear casters and it is ready for use. 

Содержание 26508

Страница 1: ...UAL FOR SAFETY WARNINGS PRECAUTIONS ASSEMBLY OPERATING INSPECTION MAINTENANCE AND CLEANING PROCEDURES WRITE THE PRODUCT S SERIAL NUMBER ON THE BACK OF THE MANUAL NEAR THE ASSEMBLYDIAGRAM OR MONTH AND...

Страница 2: ...bject to fainting spells or disorientation DO NOT USE THE PRODUCT if you are taking medication that could impair judgement or are under the influence of drugs or alcohol DO NOT overload the product Th...

Страница 3: ...all items in the contents are included A BASE FRAME I POUCH BRACKET Q HEIGHT ADJUSTMENT PLATEX2 B LADDER ASSEMBLY J FRONT CASTER WITH NUTX2 R HEIGHT ADJUSTMENT PLATEBOLTX4 C CHEST DECK FRAME K REARCA...

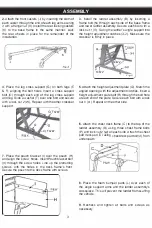
Страница 4: ...with screws H 3 3 Install the ladder assembly B by inserting a frame bolt N through each side of the base frame and lower ladder assembly Secure each bolt with a lock nut 1 V Swing the ladder s angle...

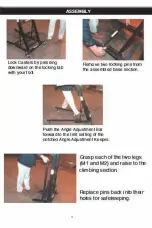
Страница 5: ...Remove two looking pins from the assembled base section Push the Angle Adjustment Bar forward to the first setting of the notched Angle Adjustment Keeper 4 Grasp each of the two legs M1 and M2 and rai...

Страница 6: ...stic to clean the chest deck pad as needed LUBRICATION DO NOT lubricate the casters This can damage the mechanism STORAGE 1 Remove the leg lock pins from each leg Hold the ladder when removing the sec...

Страница 7: ...R DISTRIBUTOR EXPRESSLYSTATES THAT ALL REPAIRS AND PARTS REPLACEMENTS SHOULD BE UNDERTAKENBYCERTIFIEDAND LICENSED TECHNICIANS AND NOT BY THE BUYER THE BUYER ASSUMES ALL RISK AND LIABILITY ARISING OUT...

Отзывы: