VESDA-E VEP-A00-P Product Guide
www.xtralis.com
47
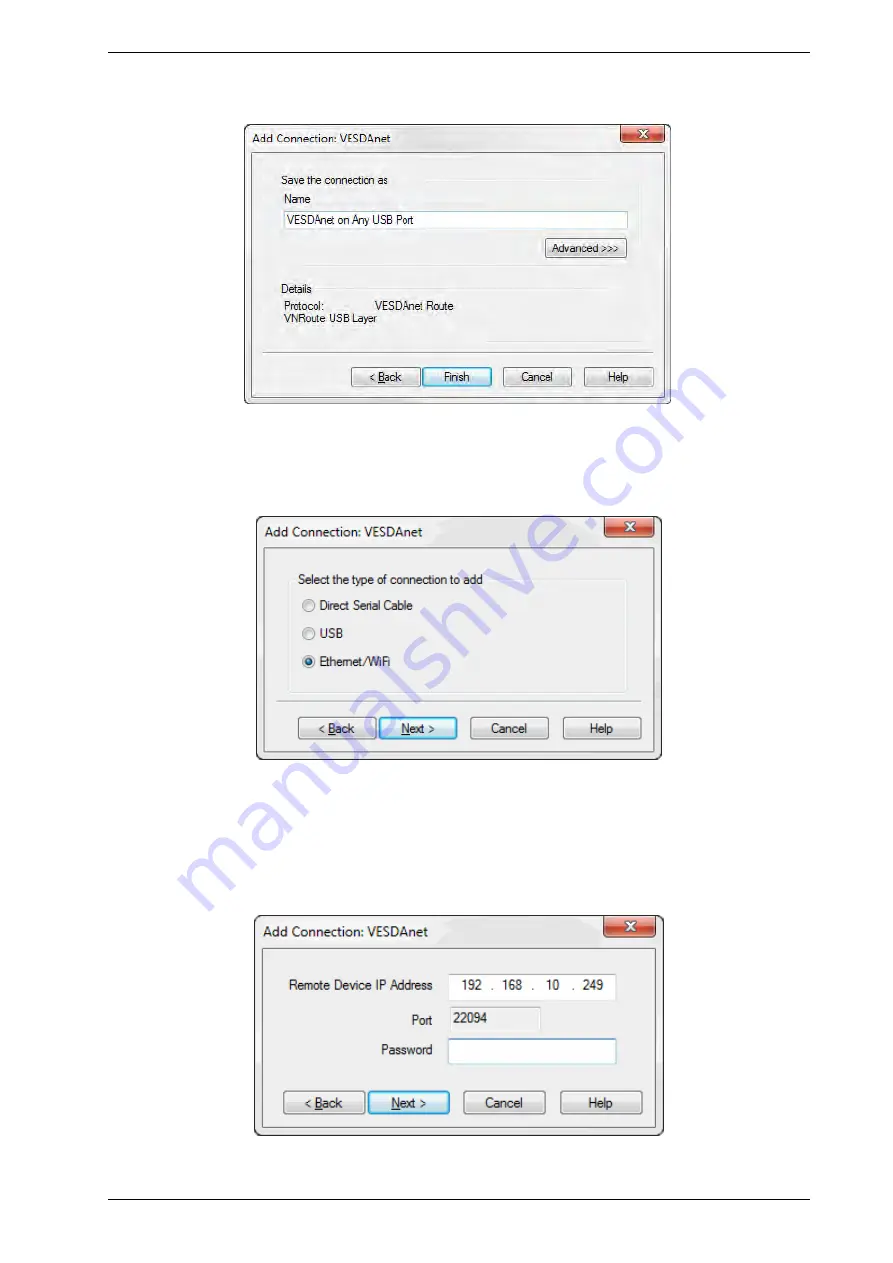
2. Enter a unique name for the Connection or accept the pre-generated name, then select
Finish
Figure 5-4: Enter a Connection Name
Adding an Ethernet connection
1. Select
Ethernet
, then select
Next
Figure 5-5: Select Ethernet
2. Enter the IP address of the detector. Enter the password that has been set for Ethernet authentication.
Select
Next
Note:
The IP address and password of the detector is configured in the Ethernet options section
during initial setup with a USB connection. Refer to Section 5.5.3 on page 56 or 1.0.1 on page
1 for further information.
Figure 5-6: Enter IP Address
Содержание VESDA-E VEP-A00
Страница 2: ......
Страница 8: ...VESDA E VEP A00 P Product Guide vi www xtralis com This page is intentionally left blank ...
Страница 10: ...VESDA E VEP A00 P Product Guide 2 www xtralis com A 4 Air Sampling Test Results 93 B Glossary 95 Index 97 ...
Страница 12: ...VESDA E VEP A00 P Product Guide 4 www xtralis com This page is intentionally left blank ...
Страница 22: ...VESDA E VEP A00 P Product Guide 14 www xtralis com This page is intentionally left blank ...
Страница 94: ...VESDA E VEP A00 P Product Guide 86 www xtralis com 1 2 3 Figure 7 21 Undo Sampling Module screws ...
Страница 102: ...VESDA E VEP A00 P Product Guide 94 www xtralis com This page is intentionally left blank ...
Страница 108: ...VESDA E VEP A00 P Product Guide 100 www xtralis com This page is intentionally left blank ...


