11
KEY CUTTING MENU
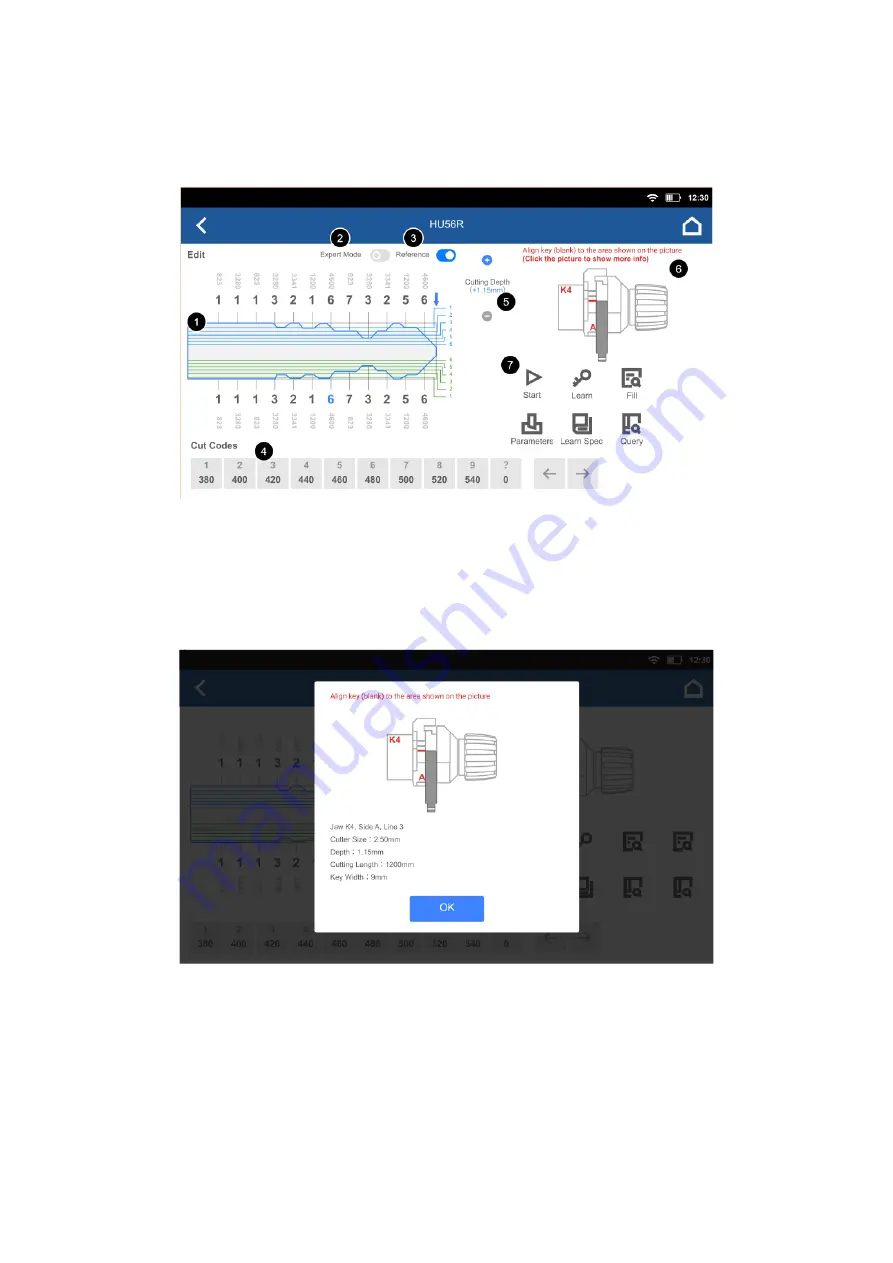
After selecting the key, for most of the times, this menu will show up:
1) Shows the current key shape based on the codes that you entered or decoded by learning.
2) By turning on expert mode, you can do minor adjustments to each biting.
3) Turn this switch on to show reference line on the key profile.
4) Enter code to manage the bitings on the key. Press the arrows on the right to change different positions.
5) Adjust cutting depth (thickness) of the key.
6) Show which jaw and which side of the jaw should be used, and how the key (or key blank) should be installed on the
jaw. Click the picture to show more detailed information, like the default key thickness, cutter size, etc.
7) Here are some commands that you can do with the machine:
a. Start:
Cut keys by the bitings that shown on the left. Usually this button is divided into 2 parts
– Initial processing
and Secondary processing.
When you cut this key for the first time, please select initial processing. If not,
please select secondary processing for accuracy.
b. Learn:
This function lets the machine read the key bitings of the original key by putting the key inside the jaw. The
learning process will detect all the bitings on the key and show them on the left.
c. Fill (Cut Progressioning):
Use this menu in some situations when there are some bitings on the key are unknown.
Leave a “?” on the missing bitings first and click this button so the machine will search and show all possible results
Содержание AnyCut KNC91
Страница 31: ...29...


