XtendLan XL-ICA-106M3 Скачать руководство пользователя страница 21

21 


4  Web Operation 


This series XL-ICA-106M3 product support the Web access and management via PC. 

Web includes several modules: monitor channel list, record search, alarm setup, system 

configuration, PTZ control, monitor window and etc. 

IP camera factory default setup: 

IP  address:  192.168.1.108. 

User name: admin 

Password: admin 

4.1  Network Connection 


Please follow the steps listed below for network connection. 

Make sure the XL-ICA-106M3 has connected to the network properly. 

XL-ICA-106M3 IP address and PC IP address shall be in the same network segment. 

XL-ICA-106M3 default IP address is 192.168.1.108. If there is router, please set the 

corresponding gateway and subnet mask. 

Use order ping ***.***.***.***(* IP camera address) to check connection is OK or not. 

4.2  Login and Logout 


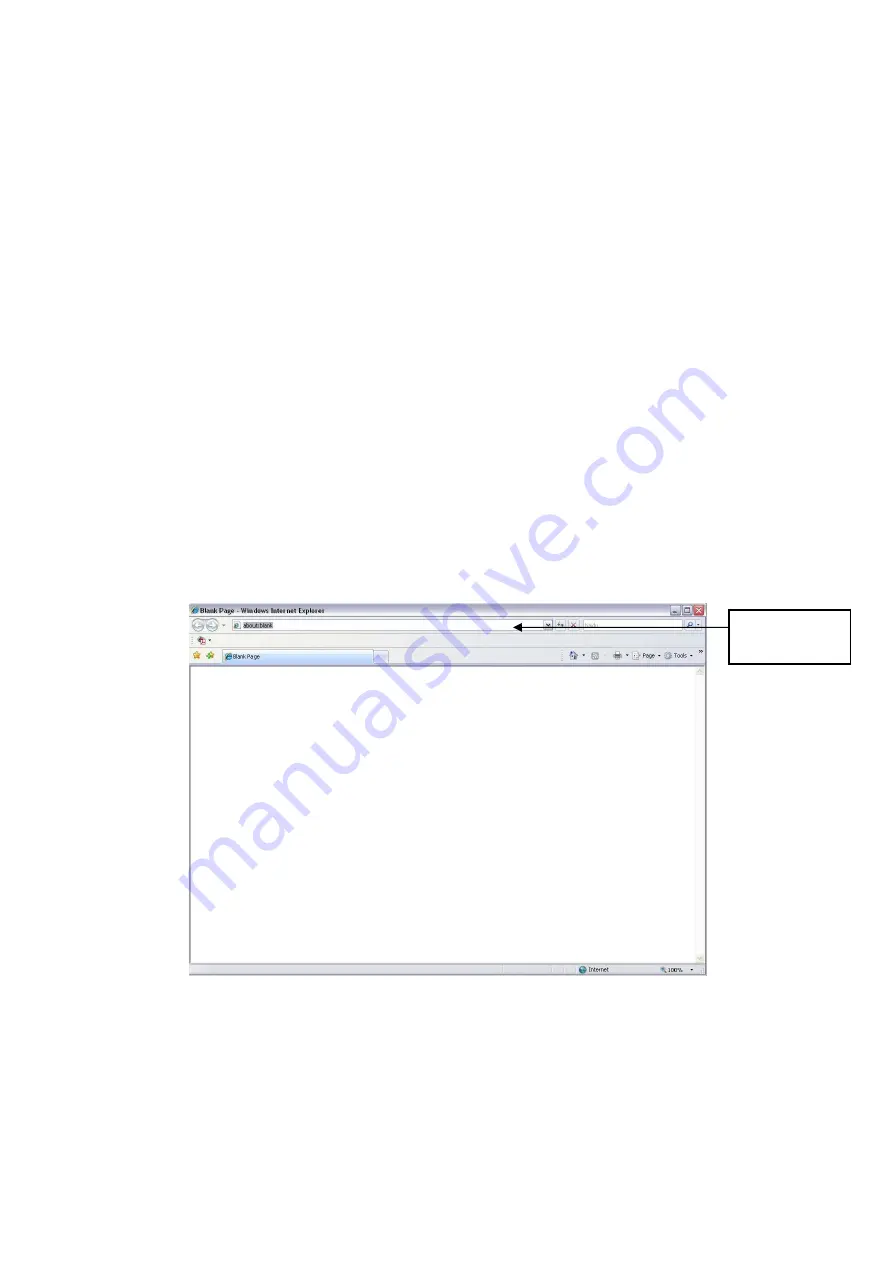
Open IE and input IP camera address in the address bar. 

For example, if your camera IP is 192.168.1.108, then please input http:// 192.168.1.108 in IE 

address bar. See Figure 4-1. 


Input your IP 

address here 


Figure 4-1 


System pops up warning information to ask you whether install control webrec.cab  or not. 

Please click OK button, system can automatically install the control. When system is upgrading, it 

can overwrite the previous Web too. 

If you 

can’t download the ActiveX file, please check whether you have installed the plug-in to 

disable the control download. Or you can lower the IE security level. See Figure 4-2. 

Содержание XL-ICA-106M3

Страница 1: ...XL ICA 106M3 Megapixel Indoor Quick Start Guide...

Страница 2: ...installed in a cool dry place away from direct sunlight inflammable explosive substances and etc The working temperature ranges from 10 C to 60 C Please keep it away from the electromagnetic radiatio...

Страница 3: ...C CS adapter 1 Quick Start Guide 1 CD 1...

Страница 4: ...ve Lens 12 2 2 SD Card 12 2 2 1 Installation 12 2 2 2 Remove 13 2 3 3G Card 14 2 3 1 Installation 14 2 3 2 Remove 14 2 4 3G WIFI Antenna 15 2 4 1 Installation 15 2 4 2 Remove 16 2 5 I O Port 17 3 Quic...

Страница 5: ...elow See Figure 1 1 The rear panel with the network port The rear panel with the 100M fiber port Figure 1 1 Please refer to the following sheet for detail information Interface Name Connector Function...

Страница 6: ...ight flashes System resets red light flashes Green light Normal working status green light is on Display record status Record green light flashes Yellow light Wireless status light Wireless data trans...

Страница 7: ...NO 1 ch alarm output Alarm output port To output alarm signal to the alarm device NO Normal open alarm output end C Alarm output public end C G GND Alarm input ground end A RS485 port RS485_A port co...

Страница 8: ...ACK port Input audio signal Receive signals from devices such as pick up LAN Network port Ethernet port Connect to standard Ethernet cable Support PoE function OPT 100M fiber port 155M single fiber du...

Страница 9: ...D Please make sure the device is securely earthed to prevent the thunderstorm strike 1 2 Side Panel Please refer to the following interface for side panel dimension information The unit is mm See Figu...

Страница 10: ...10 Figure 1 3...

Страница 11: ...focal circle Then please turn counter clockwise to move the focal circle out for several millimeters Now you can focus manually Then please use the cross head screwdriver to fix the screw back firmly...

Страница 12: ...CCD protection cap back to protect the CCD Figure 2 3 2 2 SD Card 2 2 1 Installation Please follow the steps listed below to install SD card The interface is shown as in Figure 2 4 and Figure 2 5 Use...

Страница 13: ...ace is shown as Figure 2 6 Use the screwdriver to loosen the screw of SD card protection cap in the rear panel Remove the cap from the camera Follow the SD card direction to remove the SD card Insert...

Страница 14: ...ording to the proper installation position Put the 3G card protection cap back Use the screwdriver to fix the 3G card protection cap screw firmly to secure the 3G card protection cap Figure 2 7 2 3 2...

Страница 15: ...llation Line up the thread of the screw of the 3G WIFI antenna to the thread of the rear panel See Figure 2 10 Please turn according to the direction in the following figure until antenna is secure fi...

Страница 16: ...can adjust the antenna direction See Figure 2 12 2 4 2 Remove Figure 2 12 Use your hands to hold the 3G WIFI thread end and then turn according to the following figure See Figure 2 13 Now you can see...

Страница 17: ...16 Use the small slotted screwdriver to press the corresponding button of cable groove Insert the cable into the groove and then release the screwdriver Remove Cable Please follow the steps listed be...

Страница 18: ...y applies to the IP addresses in the same segment 3 2 Operation Double click the ConfigTools exe icon you can see an interface is shown as in Figure 3 1 In the device list interface you can view devic...

Страница 19: ...terface Or you can select an IP address and then click the Login button to go to the login interface See Figure 3 4 In Figure 3 4 you can view device IP address user name password and port Please modi...

Страница 20: ...20 Figure 3 5 For detailed information and operation instruction of the quick configuration tool please refer to the Quick Configuration Tool User s Manual included in the resources CD...

Страница 21: ...192 168 1 108 If there is router please set the corresponding gateway and subnet mask Use order ping IP camera address to check connection is OK or not 4 2 Login and Logout Open IE and input IP camera...

Страница 22: ...ease input your user name and password Default factory name is admin and password is admin The login type includes TCP UDP Multicast Note For security reasons please modify your password after you fir...

Страница 23: ...23 Figure 4 4 Please refer to the Web Operation Manual included in the resource CD for detailed operation instruction...

Страница 24: ...ental friendly use period EFUP period the toxic or hazardous substance or elements contained in products will not leak or mutate so that the use of these substances or elements will not result in any...

Отзывы: