background image


19 


Figure 2-14 

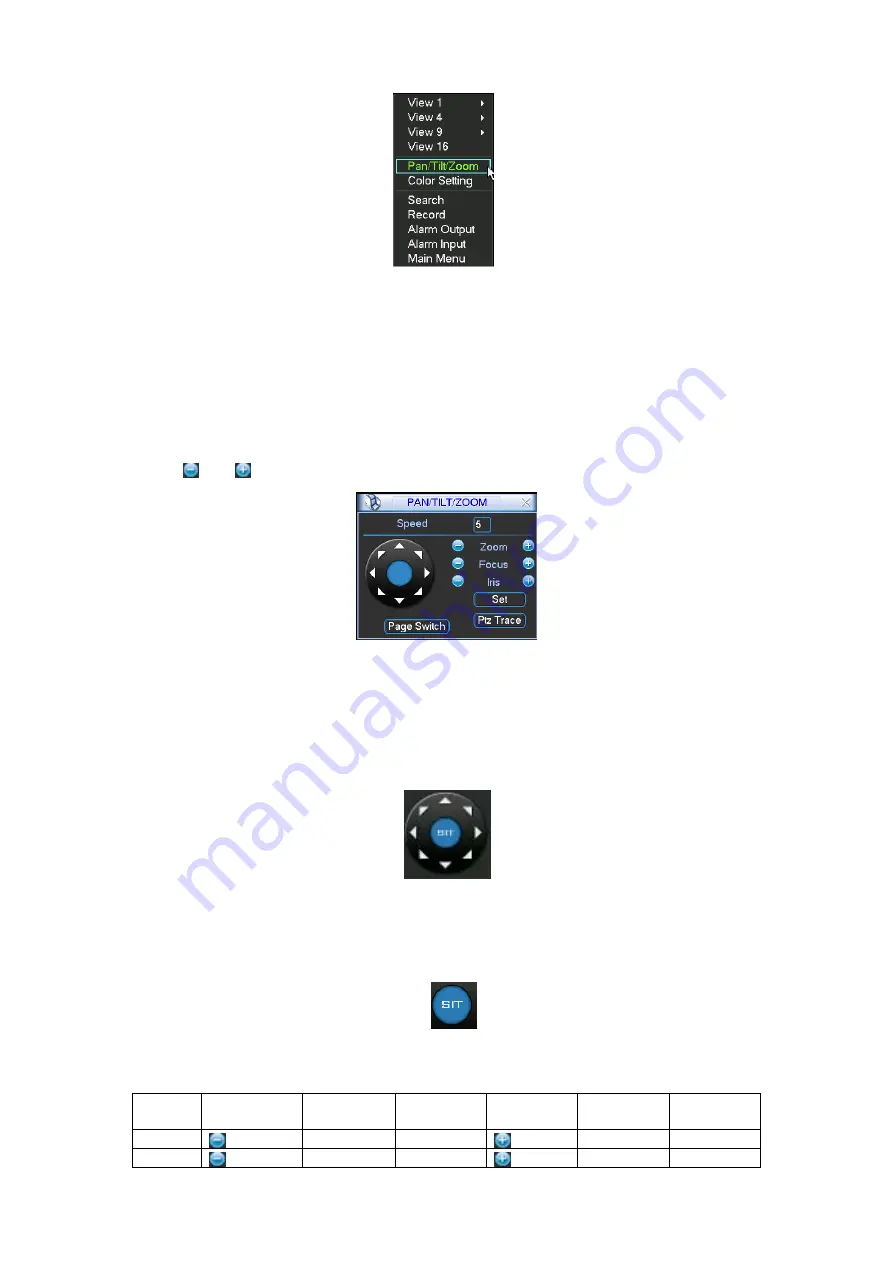
Click Pan/Tilt/Zoom, the interface is shown as below. See Figure 2-15. 

Here you can set the following items: 


Step: value ranges from 1 to 8. 


Zoom  


Focus  


Iris 

Click icon 

 and 

 to adjust zoom, focus and iris. 


Figure 2-15 

In Figure 2-15, please click direction arrows (See Figure 2-16) to adjust PTZ position. There are 

total 8 direction arrows. Please note if you use remote control, you can use just four directions 

(Up/down/left/right). 

The speed value ranges from 1 to 8. 


Figure 2-16 

2.5.3  3D Intelligent Positioning 

Key 

In the middle of the eight direction arrows, there is a 3D intelligent positioning key. See Figure 

2-17. Please note, this function needs protocol supported and can only be operated by mouse. 

Click this key, system goes back to the single screen mode. Drag the mouse in the screen to 

adjust section size. It can realize PTZ automatically. 


Figure 2-17 

Here is a sheet for you reference. 

Name  

Function 
key  

function 

Shortcut 
key  

Function 
 key 

function 

Shortcut 
 Key 

Zoom 


Near  


Far  


Focus 


Near  


Far  


Содержание DVR-470J

Страница 1: ...1 DVR 470J DVR 870J DVR 1670J 1U Series DVR Quick Start Guide...

Страница 2: ...put and Output Details 9 1 8 2 Alarm Input Port 10 1 8 3 Alarm Output Port 10 2 Overview of Navigation and Controls 11 2 1 Login Logout Main Menu 11 2 1 1 Login 11 2 1 2 Main Menu 11 2 1 3 Logout 11 2...

Страница 3: ...3 2 5 Pan Tilt Zoom 18 2 5 1 PTZ Setup 18 2 5 2 PTZ Operation 18 2 5 3 3D Intelligent Positioning Key 19 3 Web Client Operation 21 3 1 Network Connection 21 3 2 Login 21 3 3 Main Window 21...

Страница 4: ...handling or installation 2 Transportation security Heavy stress violent vibration or water splash are not allowed during transportation storage and installation 3 Installation Keep upwards Handle wit...

Страница 5: ...se refer to the User s Manual included in the resource CD The model in the front panel is very important please check according to your purchase order The label in the rear panel is very important too...

Страница 6: ...ish Small Capitalized donation and etc Up 1 Down 4 Activate current control modify setup and then move up and down Increase decrease numeral Assistant function such as PTZ menu In text mode input numb...

Страница 7: ...l playback In text mode input number 7 Play previous 0 In playback mode playback the previous video In text mode input number 0 Reverse Pau se 6 In normal playback or pause mode click this button to r...

Страница 8: ...fer to the following sheet for detail information 1 Video input 2 Audio input 3 Video CVBS output 4 Audio output 5 Network port 6 USB port 7 HDMI port 8 RS232 port 9 Video VGA output 10 Alarm input al...

Страница 9: ...larm input types for you to select normal open NO and normal close NC 1 8 1 Alarm Input and Output Details Figure 1 6 You can refer to the following sheet and Figure 1 6 for alarm input and output inf...

Страница 10: ...m inputs Normal open or Normal close type Please parallel connect COM end and GND end of the alarm detector Provide external power to the alarm detector Please parallel connect the Ground of the DVR a...

Страница 11: ...tor playback backup and etc Username default Password default hidden user You can use USB mouse front panel remote controller or keyboard to input About input method Click to switch between numeral En...

Страница 12: ...rking status after power failure 2 2 Recording Operation 2 2 1 Live Viewing After you logged in the system is in live viewing mode by default You can see system date time and channel name If you want...

Страница 13: ...ion to snapshoot image when alarm occurs Record types There are three types regular motion detection MD and Alarm Please highlight icon to select the corresponding function After completing all the se...

Страница 14: ...AL mode Video audio you can enable or disable the video audio Please note the video is enabled for main stream by default For extra stream please enable video first and then enable audio Snapshot Clic...

Страница 15: ...he schedule snapshot 2 3 5 Image FTP In Network interface you can set FTP server information Please enable FTP function and then click save button See Figure 2 10 Please refer to the User s Manual inc...

Страница 16: ...annel number or time The system can max display 128 files in one screen You can use page up down button to view if there are more than one page Select the file name and double click mouse or click ent...

Страница 17: ...kward play button system begins backward playback Double click backward play button again system goes to pause mode When system is in backward play or frame by frame playback mode you can click play b...

Страница 18: ...urrent window 2 5 1 PTZ Setup The pan tilt zoom setup includes the following items Please select channel first See Figure 2 13 Protocol Select corresponding PTZ protocol such as PELCOD Address Input c...

Страница 19: ...our directions Up down left right The speed value ranges from 1 to 8 Figure 2 16 2 5 3 3D Intelligent Positioning Key In the middle of the eight direction arrows there is a 3D intelligent positioning...

Страница 20: ...You can click set button in Figure 2 15 or click REC button in the front panel to set preset tour and pattern You can click page switch button in Figure 2 15 or click Fn button in the front panel to...

Страница 21: ...to delete Single folder 3 2 Login Open IE and input DVR address in the address column For example if your DVR IP is 10 10 3 16 then please input http 10 10 3 16 in IE address column System pops up wa...

Страница 22: ...to our resource CD included in your package for electronic version of the User s Manual Slight difference may be found in user interface All the designs and software here are subject to change without...

Отзывы: