background image

18

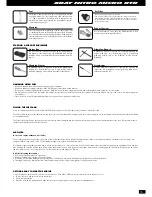
STAGE 1: SETTING THE MAIN NEEDLE SLIGHTLY RICH

Take the truck off the ground, and open the throttle fully. The engine should run cleanly until it reaches 80% of top RPM, after which it should start 
to run slightly rich (4-stroking):

•  If the engine runs cleanly all the way up to top RPM, richen the main needle (counter-clockwise) until it starts to 4-stroke at approximately 

80% of its top RPM

•  If the engine runs too rich (4-stroking all the way) lean the main needle (clockwise) until it only starts to 4-stroke at approximately 80% of its 

top RPM


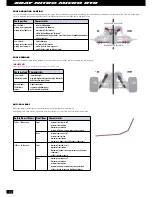
Adjust main 
needle valve

When the main needle is properly adjusted, the engine immediately responds to the throttle operation with clean, hard acceleration without hesitation.
To check if the engine is running at a proper setting, pinch the fuel line to the carburetor and observe the results:


•  At a proper setting, the engine RPM increases instantly then the engine dies out.


•  If engine dies out immediately without increasing RPM, the main needle setting is too lean.

MAIN NEEDLE ADJUSTMENT

The most difficult thing to adjust is the low-speed adjustment.  Keep the following principles in mind when doing this:
•  Use the idle adjustment screw to adjust the idle RPM immediately after closing the carburetor.
•  Use the low-speed needle to adjust the fuel mixture 2-5 seconds after closing the carburetor.
•  Use only a ½ turn each way.
 

The low-end needle of each individual engine is precisely adjusted at the factory. The low-end needle adjusts the performance of the engine between idle up to approximately ¼ 

throttle. Above ¼ throttle the main needle has the most effect on engine performance.

LOW-END NEEDLE ADJUSTMENT

CARBURETOR ADJUSTMENT - BEFORE PUTTING THE TRUCK ON THE TRACK

After the engine is running and has come up to operating temperature (within 15-20 seconds) proceed as follows:

STAGE 3: SETTING THE LOW-SPEED NEEDLE

Open the carburetor for 2-3 seconds and let the engine clean out. Close the carburetor and let the engine idle.

•  If the engine idles for 2-5 seconds and then the idle RPM decreases, the engine is running too rich during idle. Lean the low speed needle 

(clockwise) to remedy this condition. Repeat this step until the engine idles reliably at a constant RPM for at least 20-30 seconds after the 
carburetor has been opened for 2-3 seconds.

•  If the engine idles for 2-5 seconds and then the idle RPM increases, the engine is running too lean during idle. Richen the low speed needle 

(counter-clockwise) to remedy this situation.

•  If the engine will not idle at all, rich the low speed needle (counter-clockwise), or turn the idle adjustment screw clockwise to increase the 

idle RPM.

NOTE

: Because adjusting the low speed needle affects the idle RPM, use the idle adjustment screw to get the engine to idle at the right RPM.

Once you are satisfied that you have achieved reliable carburetor settings, you are ready to put your truck on the track.

STAGE 2: SETTING THE IDLE SPEED

Take the truck off the ground, and open the throttle fully for 2-3 seconds. Close the carburetor and check the idle speed that occurs immediately after.

•  If the engine stops almost immediately, turn the idle adjustment screw clockwise to increase the idle RPM.
•  If the idle RPM is too high, turn the idle adjustment screw counter-clockwise to reduce the idle RPM. 

Adjust idle speed RPM

Adjust low-speed needle

You can only fine-tune the main needle setting at the track. Initially, the main needle should still be set a little rich. Fill the fuel tank, run the truck up to maximum speed for a few 
laps, and check if it reaches top RPM without running rich towards the end (4-stroking). Lean the main needle by small increments (1/12 of a turn, like 1 hour on a clock) and run 
the truck again. Repeat these small adjustments until the engine accelerates well and reaches maximum speed without running rich. It is advised to then richen the main needle 
1/8 of a turn (counter-clockwise).

Running the engine too lean will cause the engine to overheat, resulting in excessive engine wear and possibly breakdown. A fast, simple way to check the engine temperature is 
to apply a few drops of water to the cylinder head. The drops should evaporate only after 3-5 seconds. If they evaporate immediately the engine is too hot; richen the main needle 
1/8 of a turn (counter-clockwise). Check engine temperature regularly and often.

The idle RPM and low-speed needle settings may require a little fine tuning after the main needle has been set properly. Once properly adjusted, the engine should produce a 
strong, high-pitched sound at maximum speed, and a thin trail of smoke should be visible from the exhaust tailpipe.

For more information about setting the idle and low-speed needle settings, see section Carburetor Adjustment – Before Putting the Truck on the Track.

NOTE:

 The carburetor settings may change with changes in weather conditions, fuel, glowplug, or exhaust system. After changing any of these, always richen the main needle 

(counter-clockwise) ¼ to ½-turn and then re-adjust the main needle again on the track.

CARBURETOR ADJUSTMENT - AT THE TRACK

After your engine has been properly broken in and tuned at the track, be aware that changes in weather (temperature, humidity, barometric pressure), altitude, and fuel nitro 
content will affect the performance of the engine. See the table below for guidelines on how to adjust your engine’s carburetor settings to compensate for these various changes.

FINE-TUNING THE CARBURETOR

WHEN…

DOES THIS…

CHANGE MAIN NEEDLE SETTING…

Temperature

decreases

richer

increases

leaner

Humidity

decreases

slightly richer

increases

slightly leaner

Barometric pressure

decreases

leaner

increases

richer

Altitude

lower

richer

higher

leaner

Fuel nitro content (%)

lower

leaner

higher

richer

Содержание Nitro Micro NT18MT

Страница 1: ...M I C R O...

Страница 2: ...cts inside rotating and moving parts as this may cause damage or serious injury as your nger hair clothes etc may get caught Be sure that your operating frequency is clear before turning on or running...

Страница 3: ...c oil nitro methane etc The flammability and volatility of these elements is very high so be very careful during handling and storage of nitro fuel Keep nitro fuel away from open flame sources of heat...

Страница 4: ...are subject to wear If a piston liner has worn out or if the big end conrod connection has worn you must replace these parts If the engine has broken you must check that all other moving parts are sti...

Страница 5: ...e onboard electronics Battery pack high quality XRAY receiver battery pack provides power to the onboard electronics Engine high performance NT18 0 8cc micro nitro engine with 2 shoe clutch provides p...

Страница 6: ...AL CHARGING CYCLING THE BATTERY PACKS The receiver battery pack and starterbox battery pack must be cycled before rst time use When cycling the receiver battery pack for the rst time carefully follow...

Страница 7: ...responsible for the proper use of this battery pack and any damage that may occur due to its use or misuse XRAY is not liable for any injury damage or harm caused to any person or property arising fr...

Страница 8: ...CKS INSTALL ALL SHOCKS front and rear INITIAL POSITIONS Re install shock collar and spring from each shock front and rear Unthread the shock cap from the shock body and remove the shock membrane Threa...

Страница 9: ...n battery pack in the truck Use only fresh alkaline or rechargeable batteries all of the same brand Make sure that rechargeable batteries are fully charged according to the manufacturer s instructions...

Страница 10: ...ing Wheel Controls the left right steering of the truck XRAY RADIO SYSTEM Power Switch Turns the transmitter on or off Steering D R Dual Rate Adjusts the steering sensitivity External Charging Jack Re...

Страница 11: ...tteries Receiver The radio receiver inside your truck that receives signals from the transmitter and relays them to the steering servo and throttle servo Servo Small electronic motor unit in your truc...

Страница 12: ...tune the steering position if the truck does not drive straight with the steering wheel in the neutral position centered 5 Adjust the Steering Trim optional Use the throttle trim knob on the transmit...

Страница 13: ...while battery is still warm After use battery retains heat Wait until it cools down before charging Disconnect and remove the battery pack if you plan to not use the start box for a period of time e...

Страница 14: ...all times Follow the instructions carefully The information in this manual will help to prevent injuries to users and other as well as protecting objects from damage GRAPHIC INDICATIONS The following...

Страница 15: ...wdriver A small flat blade screwdriver is required for adjusting the carburetor We recommend using high quality tools such as those offered by HUDY HANDLING NITRO FUEL Use a fuel bottle to put fuel in...

Страница 16: ...er and with the carburetor in idle position this primes the fuel lines and allows the fuel to reach the engine Then apply the glowplug starter and start the engine The engine should fire up immediatel...

Страница 17: ...the flywheel to move the piston to the bottom of the cylinder BDC 7 Run the engine for several more heat cycles 5 8 minutes up to 2 3 throttle then complete cool down 5 8 minutes up to 3 4 throttle th...

Страница 18: ...he right RPM Once you are satisfied that you have achieved reliable carburetor settings you are ready to put your truck on the track STAGE 2 SETTING THE IDLE SPEED Take the truck off the ground and op...

Страница 19: ...onds 2 Tighten both front and rear diffs slightly by 1 16 turn 3 Run the truck again for 2 minutes at throttle 4 Tighten both front and rear diffs slightly by 1 16 turn The differential should still t...

Страница 20: ...the engine running Idling Adjustment Screw Use to adjust the idle setting of the carburetor Do not allow carburetor to close to less than 1mm Adjust the servo horn mounting position for the carbureto...

Страница 21: ...ou should use piston hole sizes to suit the track conditions rather than alter the oil viscosity Use only the genuine premium quality silicone shock oils The shock oils are availabe in 50ml size in th...

Страница 22: ...s Less preload thinner less spacers lower ride height may give higher corner speed on high bite tracks better suited to smooth tracks More preload thicker more spacers higher ride height less prone to...

Страница 23: ...r engine unnecessarily as this may upset precision fits such as piston cylinder and crank pin connecting rod assembly If it is necessary to clean your engine completely such as after a crash remove on...

Страница 24: ...l with Bearings 385001 Alu Adj Ball Differential Hard Coated Set 940610 High Speed Ball Bearing 6x10x3 Rubber Sealed 2 Rear Alu Oil Shock Absorbers 2 389622 Micro Monster Truck Tire Insert Skew 4 4 38...

Страница 25: ...st the carburetor settings if the weather has significantly changed since the last time you ran the engine The engine s compression may be low due to wear This will make the engine difficult to start...

Страница 26: ...387542 382650 382250 930610 930610 905214 386205 382500 382090 905260 386210 906258 389170 386410 906208 906258 389103 389170 905262 389150 386400 901303 907258 386400 356400 386400 901303 388950 9610...

Страница 27: ...6 388820 388840 610001 681801 388710 901304 681201 681401 681851 960025 907257 910255 970024 906258 964053 964054 388540 388531 388550 388560 388580 388516 930407 965032 930812 385002 383090 385062 93...

Страница 28: ...O Box 103 911 50 Tren n Slovakia Europe Phone 421 32 7440180 info teamxray com XRAY MODEL RACING CARS P O Box 103 911 50 Tren n Slovakia Europe Phone 421 32 7440180 info teamxray com XRAY MODEL RACING...

Отзывы: