Installation Instructions
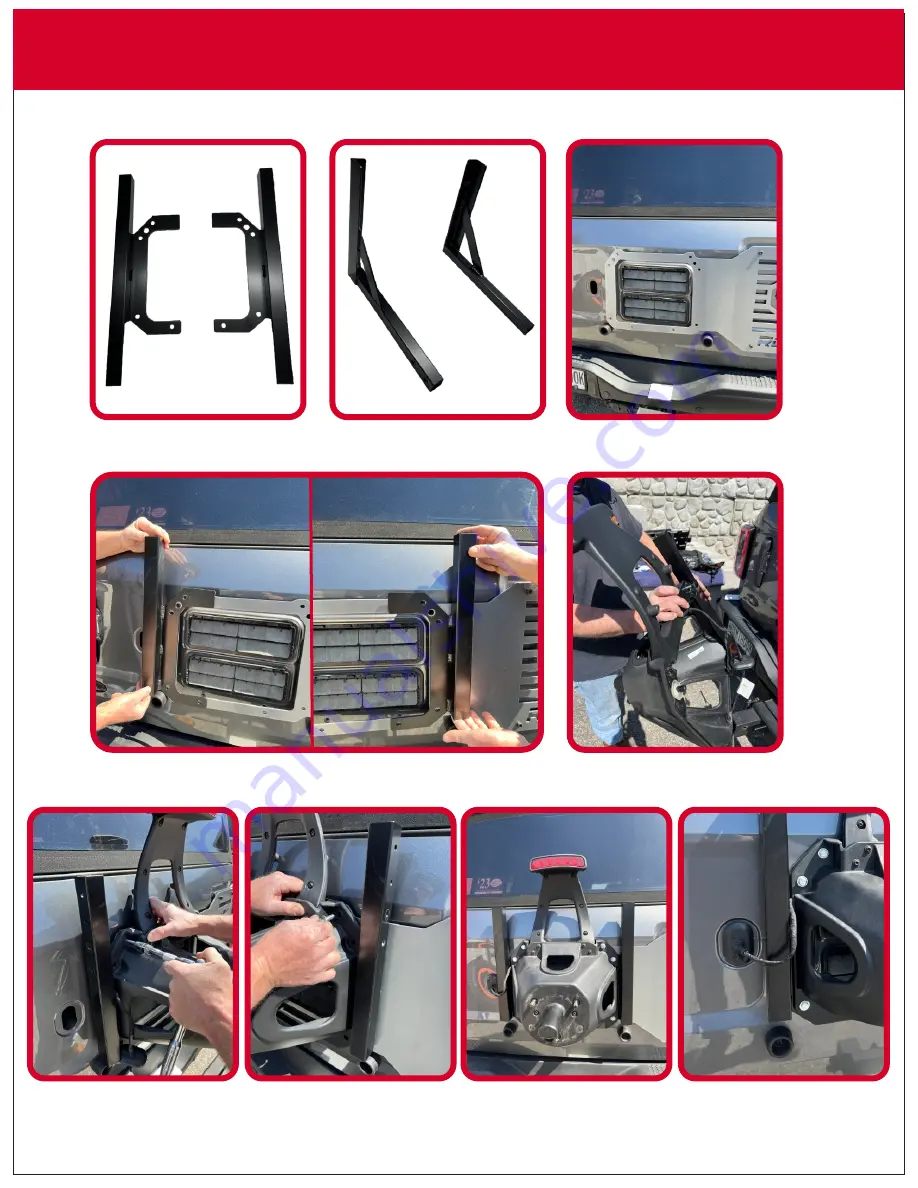
(Fig. 3)
(Fig. 4)
(Fig. 8)
(Fig. 9)
(Fig. 7)
(Fig. 6)
(Fig. 5)
(Fig. 1)
(Fig. 2)
Страница 1: ...avec des charges instables Ne chargez pas au del de la capacit nominale Toujours attacher la charge en toute s curit DISTRIBUER charge uniform ment Ne pas s asseoir se tenir ou monter sur Ne d passez...
Страница 2: ...pt loose 11 Add the remaining bolts on the left side and keep them loose Repeat the same steps to install the lower bracket on the right side Fig 7 12 Once all bolts are loosely threaded ensure the br...
Страница 3: ...Installation Instructions Fig 3 Fig 4 Fig 8 Fig 9 Fig 7 Fig 6 Fig 5 Fig 1 Fig 2...
Страница 4: ...ays check your load and connections after going over any large bumps or dips in the road 10 Check tension on bolts periodically 11 Know clearance height when with cargo installed Low clearance bridges...
Страница 5: ...ontrollers switches and cylinders It also covers defects in original parts that wear under normal usage conditions wearing parts such as bearings hoses wheels seals brushes and batteries How long is t...