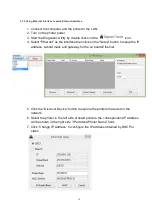
The default IP address is obtained by DHCP. To change the setting to static IP
address, click “Static IP” radio button then enter the IP address, subnet mask
and gateway. Click “Set IP” to take effect the settings.
Users can also change the “Printer Name” by another model name in this fields
then click “Set Printer Name” to take effect this change.
Note: After clicking the “Set Printer Name” or “Set IP” button, printer will
reset to take effect the settings.
4.
Click “Exit” button to exit the Ethernet interface setup and go back to Diagnostic Tool
main screen.
Factory Default button
This function will reset the IP, subnet mask, gateway parameters obtained by
DHCP and reset the printer name.
Web setup button
Except to use the Diagnostic Utility to setup the printer, you can also explore
and configure the printer settings and status or update the firmware with the IE
or Firefox web browser. This feature provides a user friendly setup interface and
the capability to manage the printer remotely over a network.
20
Содержание XP-425B Series
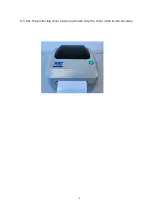
Страница 11: ...6 Close the printer top cover slowly and make sure the cover locks levers securely 8...
Страница 14: ...11...
Страница 16: ...13...
Страница 39: ...Date Content Editor 2016 12 02 Release V1 00 Austin Bill Revise History 36...

