Xpelair WX6EC - 071422 Скачать руководство пользователя страница 4

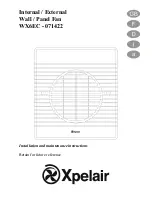
Xpelair WX6EC


Installation and Operating Instructions 
 

This appliance can be used by children aged from 8 years and 
above and persons with reduced physical, sensory or mental 
capabilities or lack of experience and knowledge if they have 
been given supervision or instruction concerning the use of the 
appliance in a safe way and understand the hazards involved.  
Children shall not play with the appliance.  
Cleaning and user maintenance of the appliance shall not be 
made by children.  


Before  any  cleaning  or  maintenance,  isolate  the  fan 
completely from the mains supply.


This  appliance  is  intended  for  connection  to  fixed 
wiring.  
Check  that  the  electrical  rating  shown  on  the  fan 
matches the mains supply - Fig. F (9). 
THIS  APPLIANCE  IS  DOUBLE  INSULATED  AND 
DOES NOT REQUIRE AN EARTH. 
All  installations  must  be  supervised  by  a  qualified 
electrician. 
Installations and wiring must conform to current IEE 
Regulations  (UK),  local  or  appropriate  regulations 
(other countries). 

It is the installer’s responsibility to 

ensure  that  the  appropriate  Building  Codes  of 
Practice are adhered to. 


The WX6EC fan has the following features: 

 Wall/Panel mounting options. 

 Trickle ventilation setting. 

 Fitted with silent operation back draught shutters. 

 For remote switch operation. 

 Single speed extract operation. 


• A  means  for  disconnection  in  all  poles  must  be 

incorporated in the fixed wiring in accordance with the 
wiring regulations. 

• 

If  metal  switch  boxes  are  used,  earthing 
regulations must be followed.


• Circular  2-core  cable  of  a  minimum  0.75mm²  with  a 

diameter  not  less  than  5.5mm  (Product  is  double 
insulated and does not require an Earth).  

• 6mm blade large screwdriver, 3mm blade electrician’s 

screwdriver and No. 1 & 2 Pozidriv screwdrivers. 

• Masonry drill, hammer & chisel. 


• Extendible  wall  tube,  WK6  for  walls  deeper  than 

11”/290mm. Available in 300mm or 450mm length. 


If installing the fan with an on/off switch: 
• On/Off switch 


 Locate it as high as possible.  

 At least 200mm from the edge of the wall to the centre 

of the hole. 

 As far away as possible from and opposite to the main 

source of air replacement to ensure airflow across the 
room (e.g. opposite the internal doorway).  

 Near the source of steam or odours.  


Not  where  ambient  temperatures  are  likely  to 
exceed 50

°

C.  


If installed in a kitchen, fans must not be mounted 
immediately above a cooker hob or eye level grill. 


When the fan is installed in a room containing a fuel 
burning  appliance,  precautions  must  be  taken  to 
avoid  the  backflow  of  gasses  into  the  room  from 
the open flue of the burning appliance.  


When  intended  for  use  in  possible  chemical 
corrosive  atmospheres,  consult  our  Technical 
Service Department. (For overseas market contact 
your local Xpelair distributor). 


This  electrical  product,  if  installed  in  a  shower 
room  or  bathroom  must  be  situated  so  that  it 
cannot  be  touched  by  persons  making  use  of  the 
bath or shower.   


1.  Description 

2.  What the installer will need 

3.  Where to locate the fan 


Содержание WX6EC - 071422

Страница 1: ...Internal External Wall Panel Fan WX6EC 071422 Installation and maintenance instructions Retain for future reference ...

Страница 2: ...B C A E D ...

Страница 3: ...G H1 H3 H4 H2 F ...

Страница 4: ...ring in accordance with the wiring regulations If metal switch boxes are used earthing regulations must be followed Circular 2 core cable of a minimum 0 75mm with a diameter not less than 5 5mm Product is double insulated and does not require an Earth 6mm blade large screwdriver 3mm blade electrician s screwdriver and No 1 2 Pozidriv screwdrivers Masonry drill hammer chisel Extendible wall tube WK...

Страница 5: ... wall ensuring the ladder strips protrude through to the interior 4 Offer up the fan mounting box to the inner wall face and locate ladder strips into their location fixings Fig D 5 Pull the ladder strips through locate the wall box in the wall and screw worm screws into position Do not overtighten the screws Cut away any excess ladder strip remaining If necessary apply a sealing mastic not suppli...

Страница 6: ... Before cleaning isolate the fan completely from the mains supply Allow 3 minutes for the impeller to stop and the powered shutter to close 2 Remove the inner grille and back draught shutter by removing the two screw covers and the screws securing the inner grille assembly to the fan mounting box Fig F 10 To remove the backdraft shutter lay the inner grille face down and pull shutter assembly upwa...

Страница 7: ... fonctionnement à interrupteur à distance Fonctionnement à vitesse unique d extraction Un moyen de déconnection à tous les pôles doit être incorporé au câblage fixe conformément aux règlements de câblage Si des boîtes de commutation métalliques sont utilisées les règlements de mise à la terre doivent être respectés Câble circulaire à 2 conducteurs d un minimum de 0 75 mm avec un diamètre d au moin...

Страница 8: ... veillant à ce qu il soit aligné 1 Retirez l ensemble de la grille intérieure en retirant les deux vis figure F 10 en attachant l ensemble de la grille intérieure au boîtier de montage du ventilateur 2 Retirez les deux vis retenant l ensemble du ventilateur au boîtier de montage du ventilateur Si vous travaillez au dessus du niveau du sol vous devez prendre des précautions de sécurité appropriées ...

Страница 9: ...l obturateur voir la figure G Pour complètement fermer les obturateurs et arrêter tout tirage arrière 4 Tirez le loquet d évent à faible écoulement d air vers vous jusqu à ce qu il s enclenche en place 5 Remettez la grille intérieure et l obturateur de tirage arrière en veillant à ce que le levier d actionnement soit à la position complètement vers le bas UN ÉLECTRICIEN QUALIFIÉ DOIT EFFECTUER TOU...

Страница 10: ...verschlüsse Für Fernschalterbetrieb Eingeschwindigkeits Extraktionsbetrieb In der festen Verdrahtung ist eine allpolige Trennmöglichkeit nach den Verdrahtungsregeln einzubauen Bei Verwendung von Metallschaltkästen sind die Erdungsvorschriften zu beachten Rundes 2 adriges Kabel mit einem Durchmesser von mindestens 0 75 mm und einem Durchmesser von mindestens 5 5 mm Produkt ist doppelt isoliert und ...

Страница 11: ...auben Abb F 10 entfernen mit denen die Innengitterbaugruppe am Lüftermontagekasten befestigt ist 2 Entfernen Sie die beiden Schrauben mit denen die Lüfterbaugruppe am Lüftermontagekasten befestigt ist Bei Arbeiten über Grund sind angemessene Sicherheitsmaßnahmen zu befolgen 1 Setzen Sie die beiden farblich passenden Schraubenabdeckungen separat verpackt in die Befestigungslöcher des Außengitters e...

Страница 12: ... Rückzug 4 Ziehen Sie die Rieselbelüftungssperre zu sich bis sie einrastet 5 Setzen Sie das Innengitter und den Rückzugverschluss wieder ein und stellen Sie sicher dass sich der Betätigungshebel in der Position vollständig unten befindet SÄMTLICHE REINIGUNGSARBEITEN SIND VON EINER ELEKTROFACHKRAFT DURCHZUFÜHREN HINWEIS DER LÜFTER ARBEITET BEI ABGENOMMENER INNENGITTERBAUGRUPPE WEITER DAHER MUSS ER ...

Страница 13: ...vengono utilizzate scatole per interruttori metalliche devono essere seguite le normative sulla messa a terra Cavo bipolare circolare di un minimo di 0 75mm con un diametro non inferiore a 5 5mm il Prodotto ha un doppio isolamento e non richiede una messa a terra Cacciavite a taglio svasato 6mm cacciavite per elettricisti a taglio svasato 3mm e cacciaviti a croce Pozidriv 1 e 2 Trapano per muratur...

Страница 14: ... livello del suolo devono essere osservate le precauzioni di sicurezza adeguate 1 Inserire i due cappucci per viti dello stesso colore in una confezione separata nei fori di fissaggio della Griglia esterna i fori di fissaggio non sono utilizzati sulla griglia esterna 2 Fissare le due fascette metalliche alla griglia esterna posizionandole negli alloggiamenti in confezione separata e incastrandole ...

Страница 15: ...udere completamente le alette e impedire qualsiasi riflusso dell aria 4 Tirare il fermo di microventilazione verso di sé fino a che non clicchi in posizione 5 Riposizionare la griglia interna e la serranda anti ritorno assicurandosi che la leva di azionamento sia in posizione completamente abbassata UN ELETTRICISTA QUALIFICATO DEVE EFFETTUARE TUTTE LE OPERAZIONI DI PULIZIA NOTA LA VENTOLA CONTINUE...

Страница 16: ...ن الحفر عمليات كافة أثناء العينين واقي ارتداء يجب تحذير الحائط على للتركيب 1 أو الحائط داخل مدفونة كابالت أو أنابيب هناك توجد ال أنه تأكد المياه أو الغاز أو الكهرباء بأعمال خاص بالخارج عوائق 2 الفتح مركز بأن تحقق مسافة على يقع ة 200 من األقل على مم الحائط حافة الثابتة باألسالك للتوصيل مخصص الجهاز هذا مع يتطابق المروحة على الموضح الكهربائي التصنيف أن تأكد الكهربائي التيار و الشكل 9 أرضية يتطلب وال ...

Страница 17: ...ية فتحات بحفر قم 5 مطرقة باستخدام المعجون خالل من بالقص قم وإزميل 6 حامل أو بارد إزميل باستخدام الداخلي الحائط خالل من بالقص قم مستقيم خط في القص تجنب الطوب قوالب 7 ً ا ضمان الخارجي الحائط في فتحة بقص وقم الخارج إلى اذهب للمحاذاة 1 في كما البرغين بنزع وذلك الداخلية الشبكة مجموعة بفك قم و الشكل 10 مجموع لتأمين بصندوق الخاصة الداخلية الشبكة ة المروحة تثبيت 2 تثبيت بصندوق الخاصة المروحة لتأمين البرغي...

Страница 18: ...ء يعمل الذي المصراع وينغلق 2 غطائي بنزع الخلفي التيار ومصراع الداخلية الشبكة بفك قم الشبكة مجموعة بتأمين الخاصة والبراغي البرغين بصندوق الداخلية و شكل المروحة تركيب 10 ضع الهواء تيار مصراع إلزالة األعلى نحو المصراع مجموعة واسحب األسفل نحو الداخلية الشبكة ح شكل 1 وح 2 3 الوبر من خالية رطبة قماش بقطعة امسحه المحفز لتنظيف الكيميائية والمنظفات القوية المطهرات استخدام تجنب 4 بت قم في بغمرهما الداخلية و...

Страница 19: ...This page has been left blank for the addition any notes you may wish to make ...

Страница 20: ...erations to your Xpelair product not carried out by Xpelair service personnel or its authorised dealer s Caused by use of any consumables or spare parts for your Xpelair product which are not Xpelair specified Terms and Conditions The Xpelair Warranty is valid for Xpelair from the date of purchase of your Xpelair product from a recognised retailer in the country of purchase and use or the date of ...

Отзывы: