background image

14 

HRT 7000


Engl

ish 


First steps 

First Time Installation 

After all connections have been made properly, switch on TV and make sure the receiver is 
connected to the Main Power. Press 

POWER

 button to switch receiver on.  

 
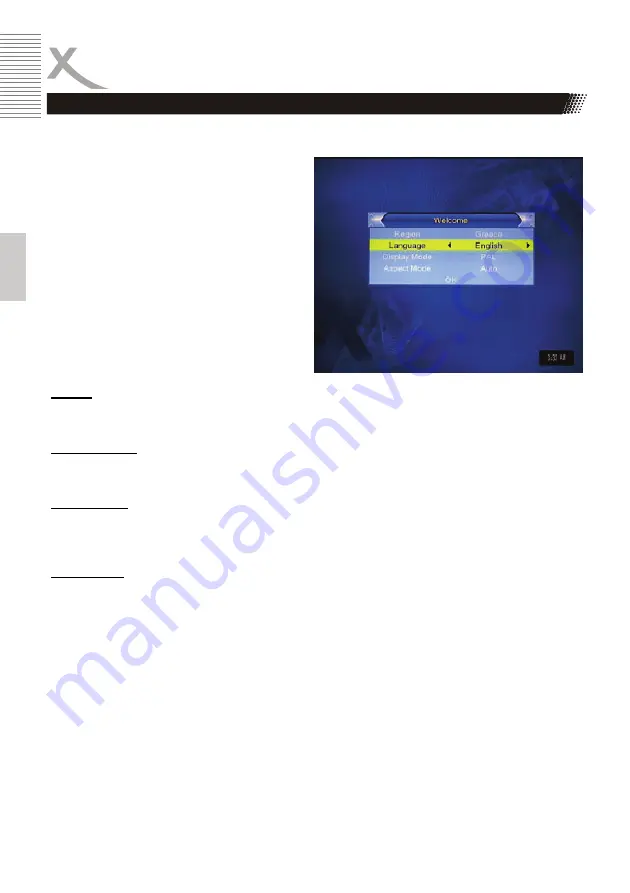
If you are using the receiver for the first time 
or restored to Factory Default, the Main 
Menu will appear on your TV screen.


1. Region 
2. 

OSD Language 


3. Display 

Mode 

4. Aspect 

Mode 


Navigate with the arrow keys 

UP

 and 

DOWN

 to 

each settings and change the options by 
pressing the 

 and 

 button. Press the  

EXIT


button to leave the setup menu. 


Region 

Choose the country by using the 

 and 

 button.  


OSD Language 

Choose a language by using the 

 and 

 button.  


Display Mode 

Choose a display mode by using the 

 and 

 button.  

 
Recommended: PAL 
 

Aspect Ratio 

Choose a aspect ratio by using the 

 and 

 button.  

 
Recommended: AUTO 


Once the setting is over, move to 

OK

 field with 

/

 button and press the 

OK

 button to start 

automatically scan. All founded TV channel are stored into the channel list. 
 

Note: 

Please pay attention on the Region setting. If the setting is wrong, than maybe no channel can be 
find during the scan. 

Содержание HRT 7000

Страница 1: ...User Manual Uporabniški priroènik MPEG 4 SD DVB T Receiver with PVR Ready Time Shift Media Player HRT 7000 ...

Страница 2: ......

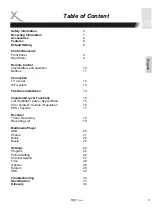
Страница 3: ...1 Connection TV Aerial 12 HiFi system 13 First time installation 14 Important Keys Functions 15 List Subtitles Audio Aspect Ratio 15 Info Teletext Volume Resolution 16 EPG Favorite 17 Recorder Timer Recording 18 Recording List 19 Multimedia Player USB 20 Photos 21 Music 22 Movie 23 Settings 24 Program 24 Picture Setting 26 Channel Search 27 Time 28 Options 28 System 29 USB 30 Troubleshooting 32 Sp...

Страница 4: ...followed Power Supply 1 Never touch the plug with wet hands 2 If you want to pull the plug out of the plug socket always pull directly on the plug Never pull on the cable as it could tear 3 Make sure that the power cable is not bent caught or run over and that it does not come into contact with heat sources 4 Make sure that the power cable is not wound around the device while in operation 5 Never ...

Страница 5: ...sable to activate the screen saver Or switch the player off if the device is not in use 5 Do not use the device permanent in the 4 3 mode This can cause damage to the TV screen 6 Do not increase the volume when the player is just playing very quiet sections This cold damage the speaker if very loud passages starts all of a sudden after the quiet section 7 Switch the player off by the Off On switch...

Страница 6: ... not operate normally by following the operating instructions Adjust only those controls that are covered by the operating instructions as an improper adjustment of other controls may result in damage and will often require extensive work by a qualified technician to restore the product to its normal operation e If the product has been dropped or damaged in any way and 3 When the product exhibits ...

Страница 7: ...he European Union there are separate collection systems for used electrical and electronic product Please help us to conserve the environment we live in Recycling of paper and carton The material recycling symbol on the carton and user manual denotes that they are recyclable Dispose them not with the normal household waste Recycling of plastic parts The material recycling symbol on the plastic par...

Страница 8: ...erials you may need them to transport your player in the future Always transport or send the player in its original packing Do not change or modify any components of the device or accessories Standard Definition DVB T Receiver Supports DVB T for MPEG 4 H 264 and MPEG 2 Electronic program guide EPG and teletext USB 2 0 High Speed connection Supporting multiple audio containers MP3 Supporting image ...

Страница 9: ...eceiver Note The unit is automatically ready to work as soon as the power supply is applied Description of the elements 1 Aerial Input 2 Loop Out Aerial output 3 SCART output TV 4 Digital audio output coaxial 5 Audio out for Stereo 6 CVBS Video out 7 Audio out for Stereo Front Panel Rear Panel 1 2 3 5 4 7 6 5 4 3 2 1 ...

Страница 10: ...e for a long time Notes 1 Remove and exchange old batteries Leaking out battery acid can damage your health and the remote control 2 Clean leaking out battery acid with a cloth 3 In case of skin contact immediately wash the affected area 4 Please contact a medic after swallowing the battery or battery acid immediately 5 Seek medical advice if battery acid has been swallowed In case of contact with...

Страница 11: ...n AUDIO 11 Subtitle button SUB T 12 PLAY button 13 PAUSE button 14 Fast Rewind button 15 Fast Forward button 16 POWER button 17 MUTE button 18 RECALL button 19 Exit button 20 Increase Volume button X VOL 21 Page Down button PgDn 22 Favorite Button FAV 23 EPG button 24 Videotext TTX 25 Record button REC 26 STOP button 27 PVR button 28 Yellow button Note The same buttons on the remote control and th...

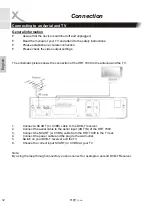
Страница 12: ...RT 7000 to the antenna and the TV 1 Connect a SCART or CVBS cable to the DVB T receiver 2 Connect the aerial cable to the aerial input ANT IN of the HRT 7000 3 Connect the SCART or CVBS cable from the HRT 7000 to the TV set 4 Connect the power cable and the plug to the wall outlet 5 Switch on your DVB T receiver and the TV 6 Choose the correct input SCART or CVBS at your TV Note By using the loop ...

Страница 13: ...ables are not part of the accessories There a just a few channels which use digital audio You can gain information about the audio signal by pressing the AUDIO key on your remote control Insert one end of the audio Cinch RCA cable into the white red Cinch RCA socket L R AUDIO OUT at the back of the device and the other end into the audio input socket usually white red on the amplifier set or TV se...

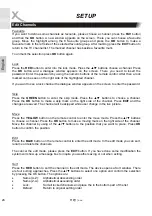
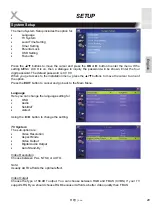
Страница 14: ...ettings and change the options by pressing the and button Press the EXIT button to leave the setup menu Region Choose the country by using the and button OSD Language Choose a language by using the and button Display Mode Choose a display mode by using the and button Recommended PAL Aspect Ratio Choose a aspect ratio by using the and button Recommended AUTO Once the setting is over move to OK fiel...

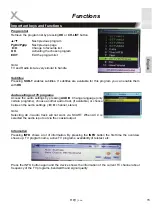
Страница 15: ...dio settings by pressing AUDIO Change language only certain programs choose another audio track if available or choose between the audio settings channel stereo Note Selecting AC 3 audio track will not work via SCART When AC 3 is selected the audio is put out via the coaxial output Information Pressing INFO shows a lot of information By pressing the INFO button the first time the overview shows up...

Страница 16: ...igation cross Numeric buttons You can change during the live picture the channel by pressing the numeric buttons Press 2 to change to the second channel in the list or press 13 to change to thirteen channel in the list Please confirm every channel input with the OK button Favourite Press the FAV button during the live picture and the favourite group window appears on the screen Select a favourite ...

Страница 17: ...mer Bar Use the buttons to select one of the option for quick navigation in the time bar You see the different option in the bottom line of the EGP windows The symbols are in order left to right side Back Current Time Last Program Next Program 2 hours backward 2 hours forward Last day Next day Choose a symbol and press the OK button to action the operation Timer programming from EPG If you chosen ...

Страница 18: ... STOP button and the recording stops completely Time Shift To use the time shift function the option have to be activate in the setup settings How to control the setting 1 Plug an USB storage to the USB port 2 Press MENU button and the setup settings appears on the screen 3 Navigate to the last symbol REC by using the buttons 4 Switch with the button to the right side 5 Choose the option DVR confi...

Страница 19: ... the playback of picture files in JPEG and Bitmap JPEG JPG BMP and MP3 music files The Media Player menu will be shown The picture can be previewed at the top right corner if the highlight is on the picture file The previewed picture will be replaced by a music logo when the highlight is on MP3 files Pressing the buttons moves the highlight by one file to another and PgUp PgDn moves one page insid...

Страница 20: ...iles into the play list If you want to add all MP3 files or images into the file list than press the 0 button for MP3 files or 1 button for images A message Wait please appears on the screen and after closing this message the file is inside the play list Select play list type If you press the YELLOW button during the browser overview a message Please select play list type appears on the screen Now...

Страница 21: ...e you sure to save After confirmation the operation is execute and the play list will be closed Image playback If you want to playback image files with the HRT 7000 you can define some operations of them Press the INFO button on the remote control and you can access to settings Image Size Show Time and Repetition Mode After changing the setting you shall store them by pressing the OK button on the...

Страница 22: ... control to start the playback of the play list Delete one file If you want to delete one file from the play list lease select them by using the buttons If the file is highlighted press the YELLOW button and the selected file will be deleted from the play list Delete all files If you want to delete all files from the play list press the BLUE button on the remote control All files from the list wil...

Страница 23: ... for TV Channel list Radio Channel list Delete All When you enter into the TV channel or Radio Channel list a dialogue inquires the password The standard password is 0 0 0 0 Enter the password and than you get access to these options TV Channel List When you get access to the menu TV Channel list than you see the channel list Here you can define favourites can lock skip move and edit the channels ...

Страница 24: ... a channel Press the OK button to make a skip mark on the right side of the channel Press EXIT and the changes are saved The channel will be skipped while user change in the live picture Move Press the YELLOW button on the remote control to enter the move mode Press the buttons to choose a channel Press the OK button to make a moving mark on the right side of the channel Move the channel by using ...

Страница 25: ...de Press the buttons to choose a channel Press the OK button to mark the selected channel with a delete mark on the right side After saving and exit the Edit Channel menu the marked channel will be deleted Radio Channels Basically the operation in Radio Channel List are the same as those of the TV Channel List except there is no video information So the Radio logo will always be displayed in the r...

Страница 26: ...default password is 0 0 0 0 When you get access to the installation menu press the buttons to move the cursor to one of the option Press the EXIT button to cancel and go back to the Main Menu AUTO SCAN When you enter to AUTO SCAN menu there you can find two sub options FTA Only Search FTA Only Here you can choose to search only Free to Air FTA or including the PAY TV encrypted channels Change the ...

Страница 27: ... by Scan mode the option Scan Band disappears and can not changed Channel Number CH No Here you can choose one of 56 channels If you choose a channel number than automatically based on the country selection the parameters for frequency and bandwidth are given In case of the setting Frequency by Scan mode the option CH NO disappears and can not changed Frequency This option are only than available ...

Страница 28: ...is option you can control the Signal Intensity and Signal quality of each Channel Number If one channel has a too low strength you may adjust the aerial new and can try also to switch on the Tuner Power With this option you can activate voltage at the antenna output on or off LCN With this option you can display the logical channel numbers LCN Using the button to activate the option on or off SETU...

Страница 29: ...llation menu press the buttons to move the cursor to one of the option Press the EXIT button to cancel and go back to the Main Menu Language Here you can change the language setting for OSD Audio SubtitleT eletext Using the button to change the setting TV System The sub option are Video Resolution Aspect Mode Video Output Digital Audio Output Auto Stand By Video Resolution Choose between PAL NTSC ...

Страница 30: ...imal effect Digital Audio Here you can switch on off the digital audio output and choose the type of digital audio LPCM Digital audio output PCM format BS Out All types digital audio Auto Stand By The device will be automatically switched into standby mode after three hours in active mode following the last user interaction and or a channel change An alert message will show 2 minutes before going ...

Страница 31: ... the GMT Usage is switched on Using the buttons to change the values from 11 30 to 12 00 with the increment unit by half a hour Summer Time This option is only valid when the GMT Usage is switched on Using the buttons to activate or deactivate the summer time If on than the current time will be added by one hour Date and Time This option is only valid when the GMT Usage is switched off Using the b...

Страница 32: ...p Time Duration Timer Mode There are several modes for the Timer Off Once Daily ect Off No activation for the Timer Once Starts the schedule only one time in order to the programmed time Daily Repeats daily to the same time the schedule Timer Service There are two modes for the Service to set Channel Record Channel Starts the schedule to the programmed option and display the channel Record Starts ...

Страница 33: ... press the OK button to save the programming Select the Cancel field or press the EXIT button to abort the operation Parental Lock By pressing the OK button on the option Parental Lock item a dialogue will be popup on the screen Now you need to insert the password The default password is 0 0 0 0 Once the user mane the password correct a new window appears on the screen The options are Menu Lock Ch...

Страница 34: ...enu OSD Setting The OSD Setting includes the options for OSD Timeout OSD Transparency Load Default OSD Setting OSD Timeout To set the duration of showing up for the program banner which contains some information about the channel and show up once the channel is changed Using the buttons to set the time ranging from 1 second to 10 seconds OSD Transparency To set the transparency of OSD Using the bu...

Страница 35: ...ou can rename the description by pressing the OK button on a Favgroup An On Screen Keyboard appears on the screen Move the highlight with the buttons to the character and press the OK button to set them To make capitals press the YELLOW button on the remote control To delete the character on the cursor press the RED button To save the modification press the BLUE button ...

Страница 36: ...tion Press the EXIT button to cancel and go back to the Main Menu Information When entering the Information menu a new window appears on the screen There you can find different information s about the device Press the EXIT button to cancel into the Tools menu Load Factory Setting With this option you can restore all settings A warning inquiry will be shown with the message This operation will load...

Страница 37: ...on is fading out because no upgrade are supported by OTA Upgrade by USB This function is only valid when the USB device has been plugged in and attached to the device All detailed information about the progress will be given when an upgrade is necessary The HRT 7000 includes three games Tetris Othello and Soduko SETUP Tools Game ...

Страница 38: ...t Here you can start the playback of them can lock the content can delete the recording or rename them Playback Press the buttons to move the cursor on a recorded file and press the PLAY button The playback starts Lock Press the buttons to move the cursor on a recorded file and press the GREEN button to lock them If you want to cancel the lock mark for a program press the GREEN button again It wil...

Страница 39: ...HDD Information Move the highlight to HDD Information and press the OK button on the remote control It will display the information about the connected storage HDD Format Move the highlight to HDD Format and press the OK button on the remote control The HDD Format menu appears on the screen When you press OK button again there are three choices listed as FAT NTFS Cancel If you select FAT or NTFS t...

Страница 40: ...V set Control the video output mode in the setup Press DTV VCR button Maybe you sets the second SCART VCR into the input mode TV channel or program is scrambled Remote control does not work Change the batteries Operate within normal range max 5 meters 30 The sensor is pointed to by b light No sound Cancel Mute Press MUTE button Increase volume Press VOL button Pay attention to connection to TV set...

Страница 41: ...EG2 MP ML MPEG 4 H 264 High Profile Level 3 Video Resolution 576i 480i 576p 480p Aspect Ratio 4 3 PS LB 16 9 Teletext Support DVB ETS300472 Audio Standard ISO IEC 11172 Layer I II Audio Sample rate 32 44 1 48 KHz Power Input AC 220 240 Volt 50 60 Hz Consumption 5 Watt Consumption in Stand By 1 Watt without in waiting for recording Ambient condition Temperature 0 40 Celsius Humidity 90 Connector US...

Страница 42: ...s delivers worst quality of all available interfaces please also refer to YUV S Video SCART and RGB The CVBS interface can easily be identified from the yellow colour of the RCA jack Dolby Digital 5 1 Dolby Digital 5 1 is a system for transmission and storage of 5 1 channel sound on digital media as DVD digital TV and satellite transmission Different from the codecs Dolby Surround and Pro Logic wh...

Страница 43: ...he way the video information b ness colour refresh rate etc is transmitted PID The PID code Packed Identification is the identification number of audio and video signals in the digital data flow stream of DVB MPEG 2 signals With this code the receiver transmits audio and video signals to a specific address RGB Red Green Blue Describes the way of transmission and display of video signals The three ...

Страница 44: ...44 HRT 7000 English ...

Страница 45: ......

Отзывы: