background image

25

XM-DTSBN929

XOMAX

EN

Thema: 

Settings

Settings

Time Setting

Touch 

 icon can enter time setting 

interface.
Up and down sliding Year/Month/Date/
Hour/Minute standard' number can set 
time needed.
Touch Time zone setting icon can enter 
time zone setting interface.

Sound setting

Touch 

 icon can enter below 

menu:

Touch 

 icon can set function's 

switch.

Touch 


Š > 


icon can set BT default 

volume/unit start default volume.

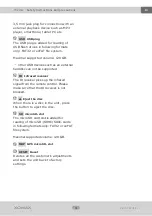
Equalizer

Touch 

 EQ 


 icon can enter 

below menu: 

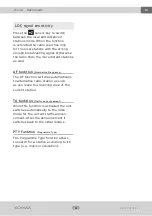
Preset Equalizer 

Up and down Slide the icon to switch 

Содержание XM-DTSBN929

Страница 1: ...User s Manual XM DTSBN929 XOMAX ENGLISH...

Страница 2: ...tion or if something should be unclear please visit our homepage www xomax de download for a current version of user s manual or contact our customer service i Version 1 0 Last update 04 08 2016 Manua...

Страница 3: ...tallation 15 Connection schedule ISO plug 17 ISO plug configuration 18 Socket A power supply 18 Socket B loud speakers 18 ISO cable connections 19 Connection schedule Cinch multicore 20 Startup operat...

Страница 4: ...k 34 FF Rewind 34 Repeat track 34 Random playback 34 Video playback 35 Display the OSD Video menu 35 Start DVD playback 35 Play Pause 35 Previous next track 35 FF Rewind 35 Select track directly GOTO...

Страница 5: ...rmation 40 Start Bluetooth music 40 Rear view camera optional 41 Common information 41 Connection 41 Start the rear view camera mode 41 AV IN Mode 42 Common information 42 Start the AUX mode 42 Common...

Страница 6: ...y yourself exists the danger to be electrocuted Do not use the unit any further since you detect any kind of technical problems Leave all the repair operations to professional technicians Due to flawe...

Страница 7: ...uchscreen with your finger or with the appropriate stylus Moisture To avoid the danger of fire or the electric shock do not put the unit in to the moist environment e g adverse weather conditions inap...

Страница 8: ...ing voltage 12V DC Fuse 15 A Button illumination color blue Installation size 1DIN Single DIN Audio Output power 4 x 60 Watt Loudspeaker impedance 4 Ohm TFT LCD Bildschirm Diagonal 7 Zoll ca 17 6 cm I...

Страница 9: ...ard D installation manual E 1DIN cage and bezel F GPS aerial G ISO cable H Audio Video Cable I Mounting material J miniUSB adapter cable Please check the accessories on completeness The images serve a...

Страница 10: ...10 XM DTSBN929 XOMAX EN Thema Safety instructions and precautions Operating elements of the unit...

Страница 11: ...ockwise to boost the loudness and reverse to reduce the loudness brief press in telephone mode to accept or end a call 7 Next and previous track Frequency band scan in play mode skip to the next previ...

Страница 12: ...rnal harddisc can not be supported G IR Infrared receiver The IR receiver picks up the infrared signal from the remote control Please make sure that the IR receiver is not blocked H 1 Eject the disc W...

Страница 13: ...und feature 9 LOUD Press this button to startup LOUD function 10 BAND In radio mode press this button to choose band In VCD DVD mode press this button to choose AUTO PAL or NTSC system 11 LOC RDM In r...

Страница 14: ...lay all song menus work with number button to choose songs 22 When playing MP3 USB SD returns to song menu up down selections can be up button or down key to select up and down select and press ENTER...

Страница 15: ...ies These could be provided from your local specialist supplier The connection cables may not be cutted or short circuited Otherwise the warranty becomes invalid Before the installation please make su...

Страница 16: ...rcuit please isolate all cable junctions and endings of the unused cables with the electrical tape All the cables should be layed and fixated tidy and properly The cables should not contact any movabl...

Страница 17: ...17 XM DTSBN929 XOMAX EN Thema Connection schedule ISO plug Connection schedule ISO plug A8 A7 A5 A4 12V 1 2 3 4 5 6 7 8 1 2 3 4 5 6 7 8 1 2 3 4 5 6 7 8 1 2 3 4 5 6 7 8 B B A A permanent current 12V...

Страница 18: ...ned on if the ignition is off and all the saved settings are lost as soon as the unit will be turned off If these problems appear the connections A4 and A7 should be interchanged Socket B loud speaker...

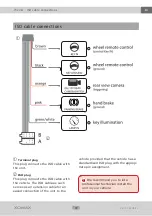
Страница 19: ...ISO plug This plug connects the ISO cable with the vehicle The ISO cable as such serves as an extension cable for an eased connection of the unit to the 1 2 vehicle provided that the vehicle has a sta...

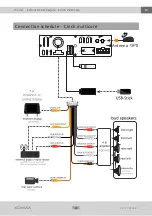
Страница 20: ...20 XM DTSBN929 XOMAX EN Thema Connection schedule Cinch multicore Connection schedule Cinch multicore Antenna...

Страница 21: ...mote control at the IR receiver on the front operating panel The IR receiver should not be blocked As soon as the remote control does not work proper the battery should be replaced Do not expose the r...

Страница 22: ...ar by not leaving inside the vehicle any expensive or otherwise attractive objects The XOMAX car radio unit is provided with a detachable control panel Each time you leave the car for a rela tive long...

Страница 23: ...devices no external harddics i Insert a CD DVD Insert the disc with the mirror surface downwards The playback will start automatically Make sure that the disc is intact and dirt free Using the 1 butt...

Страница 24: ...en Volume Use the Rotary button on the front panel or the VOL VOL on the remote to adjust the volume Mute Press the MUTE on the front panel or the MUTE button on the remote to mute the playback or to...

Страница 25: ...te standard number can set time needed Touch Time zone setting icon can enter time zone setting interface Sound setting Touch icon can enter below menu Touch icon can set function s switch Touch icon...

Страница 26: ...h icon can set SUB Sub Phase Sub Freq FAD LOUD BAL Touch icon can make all sound effect setting as initialization the EQ modes among POP Rock Metal Dancemusik Electro User Equalizer Fader und Balance...

Страница 27: ...ce If need reset function click icon then the functions set before will be deleted Then repeat the above steps can reset corresponding functions 1 Click the function button that need to be set 2 When...

Страница 28: ...ed Please note you have to TIP only the CROSSES do not fondle through the touchscreen Language setting Touch Language icon can enter Language setting interface set the language needed Brightness Left...

Страница 29: ...29 XM DTSBN929 XOMAX EN Thema Set the GPS Path executive file Once you found it tip it as well and then confirm the selection with the key Regular software path for CAR NAVIGATOR XROAD XROAD exe i...

Страница 30: ...flaw and are not covered by warranty Please note that some files can have diverse characteristics codings resolutions It may lead to disfunctions during the playback i Storage media Supported media DV...

Страница 31: ...and P1 P6 for AM1 AM2 frequency band To store the current station in one of the memory cells hold the corresponding sensor key for a couple of seconds pressed Switch AM FM Press the icon can switch b...

Страница 32: ...ell AF funktion Alternative Frequency The AF function switches automatically to alternative radio station as soon as you leave the receiving area of the current station TA funktion Traffic Announcemen...

Страница 33: ...matically to the corresponding mode starting the playback You can also switch to the required mode pressing the correspon ding sensor key in the main menu Files list Press the sensor key to switch to...

Страница 34: ...ack mode Play Pause The sensor key pauses the play back the key resumes it Previous next track Press the sensor keys on the touchscreen FF Rewind Put your finger on the cursor of the playback progress...

Страница 35: ...layback tip the touchscreen to display the control panel menus and additional information After 5 seconds being not used the OSD disappears Start DVD playback The playback starts automatically as soon...

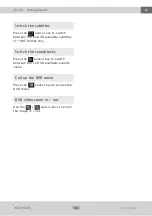
Страница 36: ...witch between the on DVD available subtitles in SRT format only Switch the soundtracks Press the sensor key to switch between the on DVD available soundt racks Call up the DVD menu Press the sensor ke...

Страница 37: ...ically the slide show of all available images of the current folder Display the options Tip the touchscreen during the slide show The OSD menu with the control panel appears on the screen disappea rin...

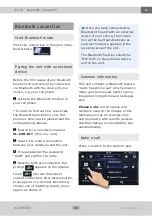
Страница 38: ...Now the both are connected the prompt appears on the display Touch icon can disconnect current connection after disconnection press again to re connect last device choose one of matching record press...

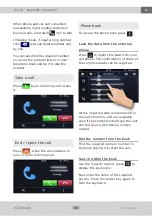
Страница 39: ...ion is over or by an incoming call Phone book To access the phone book press Load the data from the external phone Press to import the data from your cell phone The confirmation of share of the cell p...

Страница 40: ...y the lists Bluetooth music Common information The Bluetooth music feature allows to play the music from the external device of your choice cellphone smartphone tablet PC via car radio speakers The de...

Страница 41: ...ame ra s picture only while reversing A rear view camera serves as an additional assistance it can not sub stitude your full attention driving Connection The camera port REAR CAMERA IN is located on t...

Страница 42: ...on unit s sound system It could be an MP4 Player Smartphone Cellphone Tablet Video Player DVB T Receiver etc The AUX port has 3 regular channel Video yellow Audio Left white or black and Audio Right r...

Страница 43: ...phone camera and press any button on the remote control If the remote control is operative you can see the infrared signal on the display of the used camera device Radio stations are lost As soon as t...

Страница 44: ...th the external power supply Type 3 active antenna with diversity system The unit provides no current for the active antenna and has no diversity support For this type of antenna is required the phant...

Страница 45: ...products contributes to environment protection To find the nearest collection point or recycling yard please consult your municipal administration According to the battery decree we make you aware of...

Отзывы: