background image

18

VW-CN

CAR NAVIGATION SYSTEM

DE

Topic: 

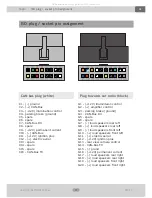
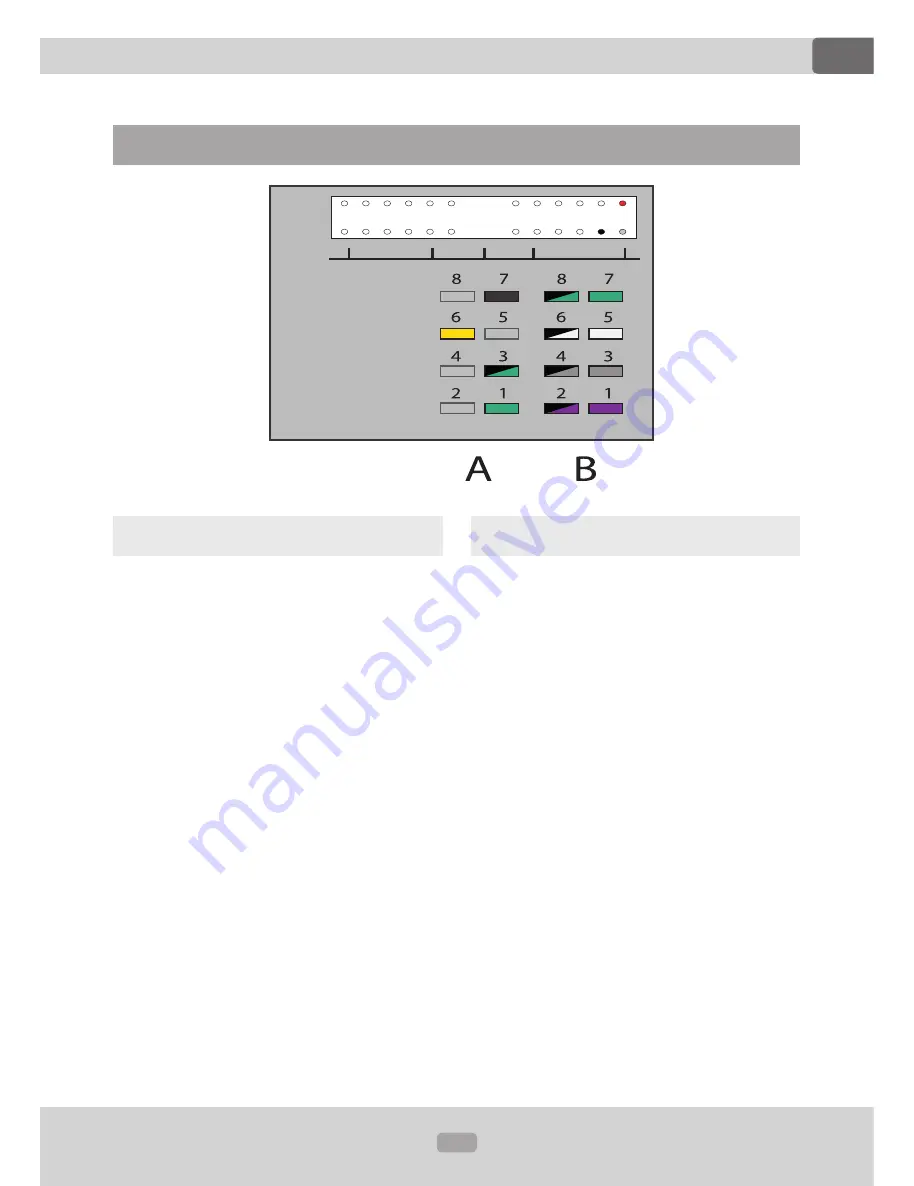
Quadlock-socket pin assignment

Quadlock-socket pin assignment

Socket A (power supply)

On the A side you can find the port for 

power supply. 

QA1 – (+) CAN-Bus (green) 
QA2 – spare 
QA3 – (-) CAN-Bus (green/black) 
QA4 - spare 
QA5 – spare 
QA6 – (+) 12Volt battery* (yellow) 
QA7 - (-) minus / ground (black) 
QA8 – spare

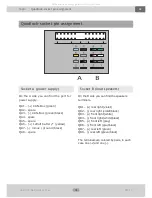
Socket B (loud speakers)

On the B side you can find the speakers 

terminals. 
 
QB1 – (+) rear right (violet) 
QB2 – (-) rear right (violet/black) 
QB3 – (+) front right (white) 
QB4 – (-) front right (white/black) 
QB5 – (+) front left (gray) 
QB6 – (-) front left (gray/black) 
QB7 – (+) rear left (green) 
QB8 – (-) rear left (green/black) 
 
The terminals are colored by pairs, in each 
case one (+) and one (-).

All manuals and user guides at all-guides.com

Содержание VW-CN

Страница 1: ...User s Manual VW CN Version 1 0 ENGLISH CD USB Micro SD HC EUROPA NAVI GPS 18cm Zoll 7 CAR NAVIGATION SYSTEM All manuals and user guides at all guides com a l l g u i d e s c o m ...

Страница 2: ...omething should be unclear please visit our homepage www xomax de for a current version of user s manual or contact our customer service Users Manual VW CN Version 1 0 Last update 25 09 2015 Manual s version We appreciate our environment so to keep it safe and clean we do not print our manuals on paper but provide our products with manuals in digital version created in pdf format You can find and ...

Страница 3: ...in assign ment 18 Socket A power supply 18 Socket B loud speakers 18 Startup operations 19 Usage of the remote control 19 Replacement of the battery 19 Unit on off 20 Insert a microSD card 20 Insert a USB flash drive 20 Insert a CD DVD 20 Factory settings 20 Sart the navigation 20 Basic functions 21 Main menu 21 Back to the current mode 21 Select the mode 21 Volume 21 Mute 21 Scroll the pages 21 S...

Страница 4: ...racks 30 Call up the DVD menu 30 DVD video zoom in out 30 Picture viewer mode 31 Picture viewer interface 31 Open the picture 31 Display the options 31 Zoom in out 31 Previous next picture 31 Pause resume the slide show 31 AUX IN Mode 32 Common information 32 Start the AUX mode 32 Rear view camera optional 33 Common information 33 Connection 33 Start the rear view camera mode 33 Wheel remote contr...

Страница 5: ...7 Search within the book 37 Bluetooth music 38 Common information 38 Start Bluetooth music 38 Background Image 39 Call up the menu 39 Select the image 39 Set the clock 39 Set the time zone 39 Set the GPS time 39 Set the GPS Path 40 Audio settings 41 Call up audio settings 41 Quick equalizer 41 Fader Balance 41 Subwoofer volume 41 Loudness 42 Other settings 42 Call up the settings menu 42 Common in...

Страница 6: ...anger to be electrocuted Do not use the unit any further since you detect any kind of technical problems Leave all the repair opera tions to professional technicians Due to flawed warranty seal the warranty becomes invalid Power supply Use the unit connected only to 12 Volt on board power supply The minus should be connected with the ground GND negative Due to the wrong grounding exists the danger...

Страница 7: ...void the damage of the unit s varnish Handling the touchscreen Do not press the touch keys or other symbols too hard it may lead to image distortions unit malfunctions and touchscreen damages Do not use any sharp articles to use the touchscreen Please handle the touchscreen with your finger or with the appropriate stylus Moisture To avoid the danger of fire or the electric shock do not put the uni...

Страница 8: ...ta Operating voltage 12V DC Fuse 15 A Installation size 2 DIN standard Audio Output power 4 x 60 Watt Loudspeaker impedance 4 8 Ohm TFT LCD Display Diagonal 7 Inches 18cm Image ratio 16 9 wide screen Resolution 800 x 480 Pixel FM Radio Receiver Frequency range 87 5 108 MHz AM Radio Receiver Frequency range 522 1620 KHz USB port Plug type Type A normal Max supported volume 64 GB SD card slot Slot t...

Страница 9: ...ehör enthalten A remote control with battery B installation manual C GPS aerial D CAN bus E ISO port adapter cable F Navigation software on the micro SD memory card G USB extension cable Please note the package content may vary due to technical updates C D A E B G F The images serve as example Optically the may vary from the original All manuals and user guides at all guides com ...

Страница 10: ... mode 4 MODE mode selection Switches between diverse modes Radio DVD SD AV IN Blue tooth Tuner USB If there is no storage medium inside the correspon ding mode will be ignored 5 BAND Radio band switch 6 NAVI navigation mode Switches to navigation mode 7 left rotary button rotate Volume press Mute 8 SD microSD slot The indicated with SD card slot is reserved for the user s own micro SD SDHC memory ...

Страница 11: ... DVD DVD CD mode Switches to DVD CD mode D DIM Dimmer Switches between display brightness presets Day Night Off E F RES reset Deletes all the customer s adjustments and sets the unit back to factory settings G right rotary button rotate Playback previous next track Skips to the previous next track Radio Fine tuning Scans the frequency band stepwise H GPS GPS microSD Slot All manuals and user guide...

Страница 12: ...yback previous track Radio previous track 11 Š arrow keys 12 phone take a call images zoom 13 0 9 numeric pad Radio stations presets 1 6 Playback go to track 0 9 14 AUDIO star key DVD switch between soundtracks 15 OPEN spare 16 MENU main menu 17 MUTE mute on off 18 SEL audiosettings 19 SRC switch between modes 20 UP spare 21 VOL boost the volume 22 Enter confirm the entry 23 T end a call file list...

Страница 13: ...ries These could be provided from your local specialist supplier The connection cables may not be cutted or short circuited Otherwise the warranty becomes invalid Before the installation please make sure that your vehicle has the 12 Volt on board power supply The minus should be connected with the ground GND negative Please tag the polarity of the avai lable speakers before you disconnect the vehi...

Страница 14: ...circuit please isolate all cable junctions and endings of the unused cables with the electrical tape All the cables should be layed and fixated tidy and properly The cables should not contact any movable or hot objects If your vehicle doesn t have an ACC ignition position please connect the red cable with the ignition switch Other wise the unit will not turn off automati cally causing the discharg...

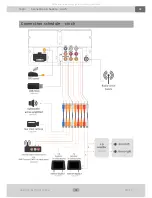
Страница 15: ...15 VW CN CAR NAVIGATION SYSTEM DE Topic Connection schedule cinch Connection schedule cinch All manuals and user guides at all guides com ...

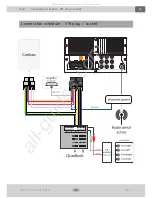
Страница 16: ...16 VW CN CAR NAVIGATION SYSTEM DE Topic Connection schedule VW plug socket Connection schedule VW plug socket All manuals and user guides at all guides com a l l g u i d e s c o m ...

Страница 17: ...13 spare C14 spare C15 spare C16 CAN Bus TX G1 12V illumintaion control G2 amplifier control G3 parking brake ground G4 CAN Bus RX G5 spare G6 spare G7 loud speakers rear left G8 loud speakers rear left G9 loud speakers front left G10 loud speakers front left G11 elektric aerial G12 12V ignition plus G13 rear view camera control G14 CAN Bus TX G15 grund G16 12V permanent current G17 loud speakers ...

Страница 18: ... QA5 spare QA6 12Volt battery yellow QA7 minus ground black QA8 spare Socket B loud speakers On the B side you can find the speakers terminals QB1 rear right violet QB2 rear right violet black QB3 front right white QB4 front right white black QB5 front left gray QB6 front left gray black QB7 rear left green QB8 rear left green black The terminals are colored by pairs in each case one and one All m...

Страница 19: ...e remote control Before the first usage please remove the isolation plate Aim the remote control at the IR receiver on the front operating panel The IR receiver should not be blocked As soon as the remote control does not work proper the battery should be replaced Do not expose the remote control to direct sunlight or air heater Replacement of the battery The remote control is operated by CR 2025 ...

Страница 20: ...cro SD card into the slot with the label side upwards and the pin side downwards Make sure that the card is intact and dirt free Insert a USB flash drive Insert an USB flash drive proper into a USB plug Do not insert any heavy or big USB flash drives in order not to hit it accidently it could cause damages of the USB plug or USB flash drive Insert a CD DVD Insert the disc with the mirror surface d...

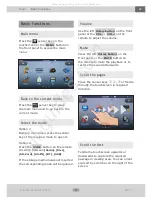
Страница 21: ... the required passage in viewing area You can orient yourself by scroll bar on the right of the screen Basic functions Main menu Press the sensor key on the touchscreen or the MENU button on the front panel to access the main menu Back to the current mode Press the sensor key to leave the main menu and to go back to the current mode Select the mode Option 1 Being in main menu press the sensor key ...

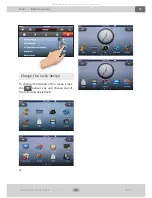
Страница 22: ...R NAVIGATION SYSTEM DE Topic Basic functions Change the menu design To change the design of the menu press the sensor key and choose one of the following depictions or All manuals and user guides at all guides com ...

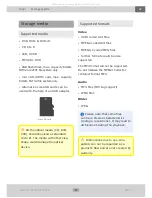
Страница 23: ...ia with other size shape could damage the optical device Supported formats Video XVID coded AVI files MPEG4 coded AVI files MPEG1 2 coded MPG files further formats could be also supported The MP4 format will not be supported Do not mistake the MPEG4 Codec for container format MP4 Audio MP3 files ID3 tag support WMA files Bilder JPEG Please note that some files can have diverse characteristics codi...

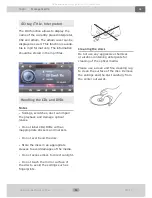
Страница 24: ...ical lenses Do not label CDs DVDs with an inappropriate stickers and markers Do not ever bend the disc Store the discs in an appropriate sleeves to avoid damages of the media Do not expose discs to direct sunlight Do not touch the mirror surface of the disc to avoid the soilings such as fingerprints Cleaning the discs Do not use any aggressive chemical or alcohol containing detergents for cleaning...

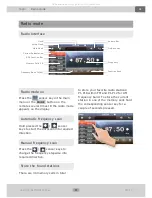
Страница 25: ...ote several times till the radio mode appears on the display Automatic frequency scan Hold pressed the sensor keys to start the autoscan into required direction Manual frequency scan Press the sensor keys to change the frequency stepwise into required direction Store the found stations There are 30 memory cells in total Radio mode Radio interface Volume Bar Setup Menü Frequency Function Keys RDS F...

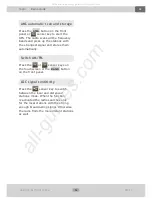
Страница 26: ...m automatically Switch AM FM Press the or sensor keys on the touchscreen or the BAND button on the front panel LOC signal sensitivity Press the sensor key to switch between the local and distanced stations mode When the function is activated the radio searches only for the local stations with the strong enough broadcasting signal Otherwise the radio finds the more distant stations as well All manu...

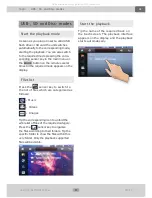
Страница 27: ...n also switch to the required mode pressing the corre sponding sensor key in the main menu or the MODE button on the remote several times till the required mode appears on the display Files list Press the sensor key to switch to the list of files which are categorized as follows Music Videos Images Tip the corresponding icon to unfold the whole list of files of the required category Press the sens...

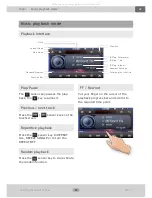
Страница 28: ...k Press the sensor keys on the touchscreen Repetitive playback Press the sensor key to REPEAT ALL REPEAT SINGLE or to turn the REPEAT OFF Random playback Press the sensor key to de activate the random function Music playback mode Playback interface Total length of the title ID3Tag Album ID3Tag Interpreter ID3Tag Title Equalizer Settings Playback Progress Files list Function Bar Current Mode Clock ...

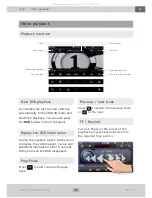
Страница 29: ...l panel menus and additional information After 5 seconds being not used the OSD disappears Play Pause Press to hold resume the play back Video playback Playback interface Function bar Files list Total running time Playback progress Title number Main menu Clock Unfold the function bar Previous next track Press to skip to the previous track or to the next FF Rewind Put your finger on the cursor of t...

Страница 30: ... on DVD available subtitles in SRT format only Switch the soundtracks Press the sensor key to switch between the on DVD available soundt racks Call up the DVD menu Press the sensor key to access the DVD menu DVD video zoom in out Use the sensor keys to zoom the image in out All manuals and user guides at all guides com ...

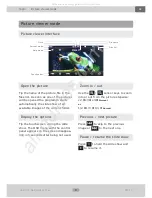
Страница 31: ...ure Tip the name of the picture file in the files list As soon as one of the pictures will be opened the programm starts automatically the slide show of all available images of the current folder Display the options Tip the touchscreen during the slide show The OSD menu with the control panel appears on the screen disappea ring in 5 seconds after being not used Picture viewer mode Picture viewer i...

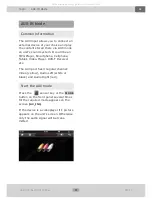
Страница 32: ...e Cellphone Tablet Video Player DVB T Receiver etc The AUX port has 3 regular channel Video yellow Audio Left white or black and Audio Right red Start the AUX mode Press the sensor key or the MODE button on the front panel several times till the required mode appears on the screen AV_IN1 If the device is a videoplayer it s picture appears on the unit s screen Otherwise only the audio signal will b...

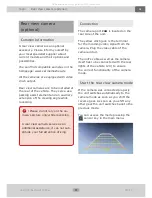
Страница 33: ...r the unit switches back to the previous mode You can access the mode pressing the sensor key in the main menu Rear view camera optional Common information A rear view camera is an optional accessory Please inform yourself by your local specialist supplier about current models and their options and possibilities You can find compatible cameras on the homepage www carmediashop de All the cameras ar...

Страница 34: ...ss to erase all the previous customer settings and to start the configuration Configuration Press the function key on the screen and then the button on the remote which you want to assign The selected function appears on the screen Please let a professional technici an install the wheel remote control in your vehicle The incorrect installation may cause serious defects of the unit and of the vehic...

Страница 35: ...ooth the unit with an external device of your choice the connec tion will be built automatically as soon as the device appears in the receiving area of the unit The Bluetooth function should be ON both on the external device and on the unit Bluetooth connection Start Bluetooth mode Press the sensor key in the main menu Pairing the unit with an external device Before the first usage of any Bluetoot...

Страница 36: ...pty the lists Protocol dial the number Find the required number or name and tip it to dial the number Now dial the required number and press the key to start a call To correct your entry use the to erase the last dialed symbol You can also find the required number on one of the protocol lists or in your telephone book and tip it to dial the number End reject the call Press when the conversation is...

Страница 37: ... if the connection between the unit and the source cell phone is inter rupted Overwriting the data As soon as the data from other cell phone will be imported into the unit s memory the previous data will be overwritten Dial the number from the book Find the required name or number in the book and tip it to start the call Search within the book Use the search option press to display the keyboard No...

Страница 38: ... your choice cellphone smartphone tablet PC via car radio speakers The device should support the A2DP service Start Bluetooth music Press the Bluetooth music inter face appears on the screen Now load the playback program on the external device and start the playback Operating elements skip to next skip to previous play pause All manuals and user guides at all guides com ...

Страница 39: ...ntry from the list Set the GPS time Tip the GPS Automatik to activate the GPS synchronization of the current time Background Image Call up the menu Press the MENU button on the front panel to access the menu Choose the Background Image mode in the menu Select the image There are 18 factory stored images in total Fondle through the touchscreen to scroll between the images Tip the one you want to se...

Страница 40: ...gramm properly Please tip the NAVI key on the front control panel Now tip the correspon ding folder in the file manager and then confirm your selection tipping the key on the screen Perhaps you will have to scroll the file list to find the executive file Once you found it tip it as well and then confirm the selection with the key Regular software path for CAR NAVIGATOR XROAD XROAD exe All manuals ...

Страница 41: ... To compare the new sound with the old one use the EQ OFF key to turn the EQ down and to listen to the sound attentive without before your adjustmens Using the USER key you can make ex tended changes on sound Using the DELETE key you can reset the sound back to standard Fader Balance You can adjust the Balance and Fader parameters using the arrow keys or tipping with the finger at the position to ...

Страница 42: ...settings menu Common information Anykey Power The function allows to turn the unit on pressing any key Video Warning The warning appears as soon as you trying to start a video or a slide show without using the hand brake It is not allowed to view movies or images while driving instead only when the car is parked in a safe place BT Phone Book Auto Deleted This function deletes restless the data imp...

Страница 43: ...calibration mode and then tip the arrow key Procedure As soon as the calibration starts on the screen appear 5 crosses You have to tip the very middle of each following the numeration 1 2 3 4 5 In ideal case use the specially designed stylus As soon as you tipped each of the crosses the touchscreen is calibrated Please note you have to TIP only the CROSSES do not fondle through the touchscreen Ser...

Страница 44: ...press any button on the remote control If the remote control is operative you can see the infrared signal on the display of the used camera device Radio stations are lost As soon as the unit will be turned off all the stored stations and user s settings will be lost This problem is caused due to a wrong connection of the ISO cable Please interchange the cables for ignition plus and for steady plus...

Страница 45: ...ower supply Type 3 active antenna with diversity system The unit provides no current for the active antenna and has no diversity support For this type of antenna is required the phantom power with an integrated diversity system Note A phantom power is not to be confused with an antenna amplifier which is far less efficient The unit does not turn on This problem is in most cases caused due to a wro...

Страница 46: ...onment protection To find the nearest collection point or recycling yard please consult your municipal administration According to the battery decree we make you aware of your obligation to dispose of empty batteries at municipal collection points Batteries that contain pollutants e g Hg mercury Pb lead Cd cadmium are labelled with the symbol pictured above At our place you can free dispose of the...

Отзывы: