background image

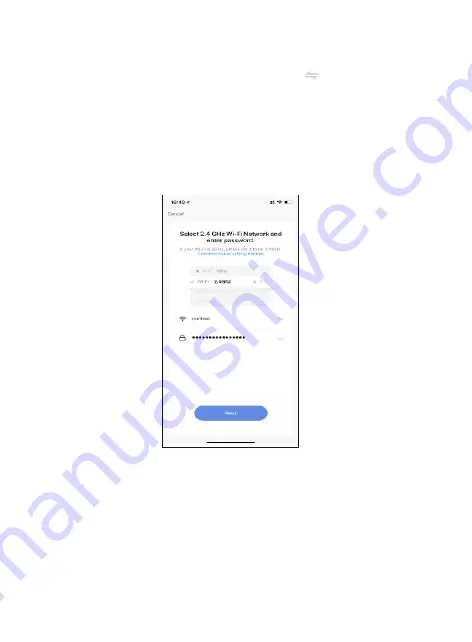
Now you want to connect the smart device to a local WiFi network. If the 

proper network is not listed on this page, click the "       " bu�on to 

see a list of available networks. 

Your router may broadcast both 2.4Ghz and 5.0Ghz broadband frequency. 

Make sure to select the 2.4Ghz Wifi. 

Enter your Internet Password and connect to the network.

This step is crea�ng the login creden�als for your camera to find and access 

the local network, and will store the info in the QR code in the next step.

Connect to a WiFi network

8

Содержание VD1

Страница 1: ...Smart Doorbell Security Camera VD1 User Manual...

Страница 2: ...udio and be monitored from a smart phone with the free app Welcome Smart Doorbell Introduc on Installa on of Smart Doorbell Con gure The Doorbell Se ngs Table of Contents Welcome 1 Package Contents 2...

Страница 3: ...You will nd the following contents included to help you get started Smart Doorbell Security Camera External Ringer Quick Start Guidelines Screw Package USB Cable What s included in the box 2...

Страница 4: ...uA Working 170 mA Speci ca ons 3 An external ringer has been provided and can be setup to hear the doorbell ring This is useful in the event if no smartphone that has been con gured is available othe...

Страница 5: ...on Setup and con gura on bu on Micro USB Port Power supply SD Card Port Memory storage of saved photo and video clips Light sensor Microphone Infra Red LED Reset bu on Micro USB Port SD Card Port Vid...

Страница 6: ...1 Remove the moun ng bracket Remove oblique upper 2 Mount the bracket to the wall Installa on of Smart Doorbell 5 3 Install the doorbell to the bracket 4 Install the moun ng screws under the bracket...

Страница 7: ...for IOS or Google Play Store for Android The welcome screen will appear and then you will be asked to login or register a pro le Register an account by entering your email address and se ng up a pro...

Страница 8: ...you hear the prompt The Con xo doorbell is now ready to pair Hold the reset bu on for 5 seconds Once you con rm the smart device is ready press the nest step bu on then click the Next bu on Con nue on...

Страница 9: ...lable networks Your router may broadcast both 2 4Ghz and 5 0Ghz broadband frequency Make sure to select the 2 4Ghz Wi Enter your Internet Password and connect to the network This step is crea ng the l...

Страница 10: ...rompt Press the I Heard a Prompt bu on to con nue Pressing the No Prompts will provide some trouble shoo ng steps to help get doorbell to scan the QR barcode Scan with Camera Screens A er you hear the...

Страница 11: ...rt Products Now you are all set Home Screen Updated 10 The smart device is added once they are communica ng on the same network You can rename the smart device by clicking on the pencil icon You can s...

Страница 12: ...e there is movement 6 Power Management Se ngs allows to check the power status of the doorbell 7 Purchase VAS allows to purchase cloud storage 8 O ine reminder allows remind you when the device is o i...

Страница 13: ...h others 11 Add to Home Screen allows to add the wi doorbell to the home screen of your smartphone 12 Device Update allows to check so ware or install updates to device 12 Remove device will remove th...

Страница 14: ...ur feedback Xodo is a subdivision of the Con xo Inc group and the respec ve logos are registered trademarks of Con xo Inc and may not be used reproduced or altered without wri en Permission All other...

Отзывы: