XNET NGE2055F Скачать руководство пользователя страница 8

8 / 

17


XNET Network Box Camera Installation Manual 


LINK : Yellow light indicates that he network is properly connected.   


ACT : Green light indicates that the XNET system connected to 100Mbps LAN. This green lamp will 
blink if the system receives data. 


  STATUS LED

 : Indicates the operation status 


EVENT LED : Green light indicates that Alarm Out signal is turned on. 


POWER LED : Red light indicates that 12V DC power or 24V AC power is connected. 


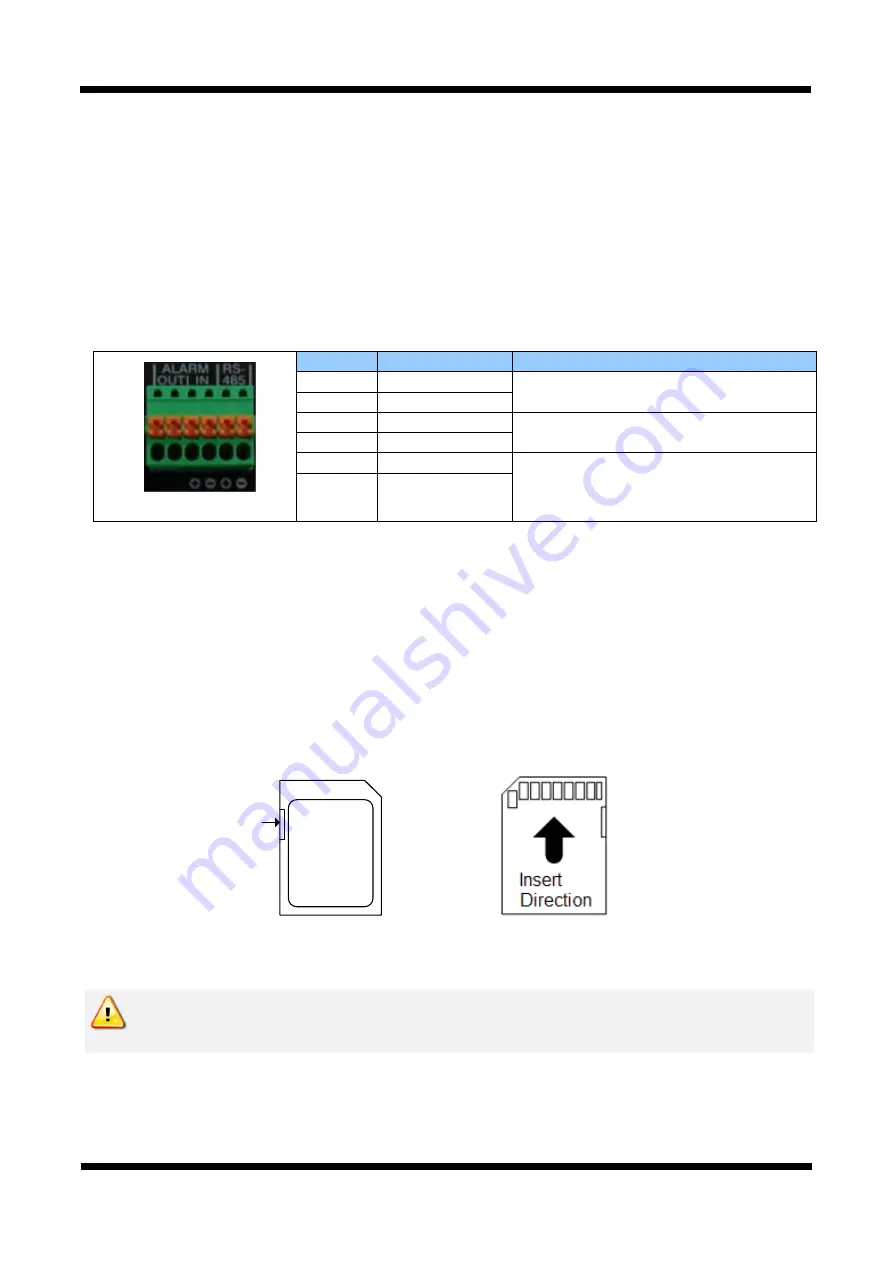
  RS-485 and ALARM In/Output Terminal   


Pin 

Description 

Set up 

Alarm Out(+) 

Select NC/NO at menu screen 

Alarm Out(-) 

Alarm In(+) 

Select NC/NO at menu screen 

Alarm In(-) 

RS485 + 


RS485 - 


RS-485

:  When  properly  connected,  you  can  remotely  control  Pan/Tilt  device  with  RS-485  control 

interface. 


Alarm In

: This connects to an Alarm Sensor signal. Only one sensor can be connected.   


Alarm Out

: This connects to an external Alarm device that operates by a relay such as Siren       

Lamp or Alarm Light. Only one Alarm device can be connected.   


    SD CARD SLOT

 : Enables recording of video data to an external memory device upon occurrence of an 

event. Please use less than 32 GB SD Memory. 

Labeling

position

Write-protect

tab


Figure 2-4. SD CARD 

Power Terminal: 

Connect Power to this terminal.(DC12V, AC24V)


Do not use the other power connector when powering up the product through PoE. 
The product is not covered under warranty when it is damaged by connecting both 
Ethernet power and 12V DC power(or 24V AC power) to this terminal.


1                    6 

Содержание NGE2055F

Страница 1: ...XNET Network Box Camera Installation Manual Ver 1 2 XNET Network Box Camera NGE2055F Installation Manual...

Страница 2: ...y problem with the product Contact the store or the manufacturer before disassembling the product for alteration or repair XNET is a trademark of CNB Technology Inc This product complies for CE Europe...

Страница 3: ...on 5 2 3 Functions and Designations 6 2 3 1 Side View 6 2 3 2 Front Rear View 7 2 3 3 Connecting to Alarm devices 9 3 Software Installation 10 3 1 Connecting XNET to network 10 3 2 Installing IP Insta...

Страница 4: ...ommunication between Client s PC and XNET Smart Event feature On the top of motion detection and sensor alarm feature pre and post alarm feature allows automated surveillance without an attendant s mo...

Страница 5: ...ntrol signal Power adapter and AC power cord Input 100 240VAC 50 60Hz Output 12VDC 2A Terminal Plug 2P 1ea 6P 1ea Power Jack 2P Terminal plug connect the power CD Software and User s manual 2 2 2 2 P...

Страница 6: ...e Focus on ESC mode Auto Iris Control Plug Plug for Auto Iris control The following shows each pin connection Strip 8mm of outer jacket of the lens cable and then strip 2 mm of inner wires to solder t...

Страница 7: ...LINE INPUT and Audio LINE OUT LINE OUT Audio signal output to a Power Amplified device or Speaker This can be used to listen to the audio signal sent from a remote PC for Bi directional Audio communi...

Страница 8: ...85 When properly connected you can remotely control Pan Tilt device with RS 485 control interface Alarm In This connects to an Alarm Sensor signal Only one sensor can be connected Alarm Out This conne...

Страница 9: ...hown in figure 2 5 NC or NO of sensor input can be selected at Menu screen Alarm Sensor device requires a separate power source Figure 2 5 Connecting to Alarm Input Alarm Output This terminal can only...

Страница 10: ...ired to set up an IP address Compatible operating system Windows 2000 Windows XP Windows Vista Windows 7 Since the default IP address of the device is 192 168 123 100 set up the IP address of the comp...

Страница 11: ...staller software provided in the Installation CD included in the package and also available to download from our website http www cnbtec com will configure IP address easily If your network have a DHC...

Страница 12: ...Installler Menu Set IP Address button to bring up the following box in Figure 3 2 Figure 3 2 IP Address box 3 When you enter the IP address and click Set button the box shown in Figure 3 3 will appear...

Страница 13: ...spectively If you want to use a different HTTP port number from the default value simply put a colon and port number at the end of the IP address For example enter the following address when changing...

Страница 14: ...14 17 XNET Network Box Camera Installation Manual 4 4 2 2 W We eb b V Vi ie ew we er r P Pa ag ge e Web viewer page consists of Video monitor screen and menu option buttons Figure 4 2 Web Viewer Page...

Страница 15: ...and control of PTZ movement Please refer to XNET Owner s Manual for detail Triple Stream Service Main Stream When this box is checked Main Stream Video is displayed Dual Stream When this box is checke...

Страница 16: ...NR BLC EXPOSURE Audio Two way full duplex G 711 Network Protocol IPv4 IPv6 HTTP TCP RTSP RTP UDP SMTP FTP ICMP DHCP UPnP Bonjour ARP DNS DynDNS NTP Multicast HTTPs onvif SNNP Supported DDNS CNB DDNS D...

Страница 17: ...17 17 XNET Network Box Camera Installation Manual...

Отзывы: