background image

XLC DUO KIDS TRAILER BS-C10

Manual / 3092000705 / - 06

XLC DUO KIDS TRAILER BS-C10

Manual / 3092000705 / - 06

11

10

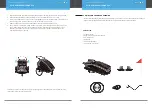
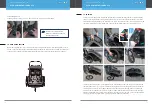
6. INSTALLING TOW ARM

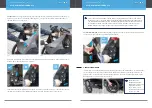
Locate the tow/hitch arm, and position on the left side of the trailer, as shown.  The hitch arm is held in place by 

a spring pin and a quick release pin. 

Depress the spring pin and insert the hitch arm in the bracket on the frame as shown. 

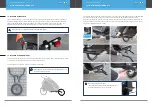
Once the spring pin locks in place in the hole in the bracket. Locate the quick release pin, attached by nylon 

strap to the trailer frame, then insert the pin through the bracket and into the hole in the tow arm.  The pin 

should go completely through the tow arm and bracket.  Once the pin is through, flip the safety clasp over and 
onto the pin.  Give the pin a tug to be sure it is secure.

Check this pin periodically during and before each use to be sure it has not become loose.  Failure 
to do so could result in serious injury to you or your child.

!

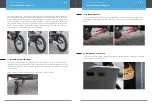
7. USING PARKING BRAKE

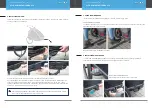
The trailer has a foot-operated parking brake for use when in stroller/jogger mode.

PARKING BRAKE OPERATION
To operate brake, simply put your foot on link brake and push down, then it locked, and put your foot under link 
brake and raise up to unlock your brake.

Make certain link brake is released prior to riding. 

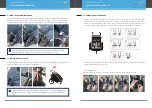
8. INSTALLING WHEEL GUARD

Your XLC DUO KIDS TRAILER is equipped with a wheel guard for added safety. The wheel guard helps to 
deflect the tire from obstructions that might stop the trailer and result in an accident.

INSTALLING THE WHEEL GUARD 

Slide wheel guard over fixation until you here a click. 

Содержание BS-C10

Страница 1: ...88 2 2018 Safety Performance Specifications for Carriages and Strollers Owner s Manual Please keep this Owner s Manual for future reference PRIOR TO ASSEMBLY Please read this Owner s Manual completely...

Страница 2: ...ght fit Child weight max 20kg max 2 Children Total weight 60kg Trailer weight Loading Loading 41kg 2 Children Luggage Do not use the trailer if it is damaged This seat unit is not suitable for childre...

Страница 3: ...njury to the occupants Check the condition of the bicycle and trailer before each use If you discover defective components incorrect settings or missing parts rectify the problem before use Please obs...

Страница 4: ...over When fully loaded the drawbar load measured on the hitch should be between 3 8 kg Do not attempt to install other seating systems in this trailer It is not designed for car seats pram seats cots...

Страница 5: ...ur child Make sure the spring latches are engaged on both sides prior to use Both latches are necessary for safe operation Press forward on the rear frame tube to make sure the frame is locked If the...

Страница 6: ...safety clasp over and onto the pin Give the pin a tug to be sure it is secure Check this pin periodically during and before each use to be sure it has not become loose Failure to do so could result in...

Страница 7: ...his warning could result in serious injury of your child 10 INSTALLING SAFETY FLAG Assemble the flag and insert the end into the small button hole on the top of the trailer skin Feed through to the sl...

Страница 8: ...e tubes To operate the latches simply grab the handles on both sides and squeeze simultaneously to unlock frame While holding the latches push forward to fold TIP A quick forward snap of the wrist wil...

Страница 9: ...ide Check all fasteners to make sure they are tight Tighten or replace if needed Check to make sure wheels are fully secure in the frame Wheels must be fully inserted to lock in place Attempt to pull...

Страница 10: ...f you plan to ride at night you should install an approved lightset The lightset should mount to the frame of the trailer and be visible from front and rear sides Your bicycle dealer can recommend the...

Страница 11: ...slide into the slots Fit the hook of the safety tab in the hole in the fork tip then close the QR lever making sure it is tight If the wheel is still loose in the frame open the release lever tighten...

Отзывы: