ML628 IBERT Getting Started Guide
13
UG806 (v1.0) May 20, 2011
Running the GTH IBERT Demonstration
Setting Up the ChipScope Pro Software
1.
Start the ChipScope Pro analyzer tool on the host computer and select
File
→
Open Project
.
2.
When the Project window opens, navigate to the directory where the ChipScope
software project files (
.cpj
) were extracted. Select
ml628_gth.cpj
and click
Open
.
The
.cpj
file loads pre-saved project settings for the demonstration including MGT/
IBERT and clock module control parameters. For more information regarding MGT/
IBERT settings, refer to
www.xilinx.com/support/documentation/sw_manuals/
xilinx13_1/chipscope_pro_sw_cores_ug029.pdf
, UG029 -
ChipScope Pro Software Cores
.
3.
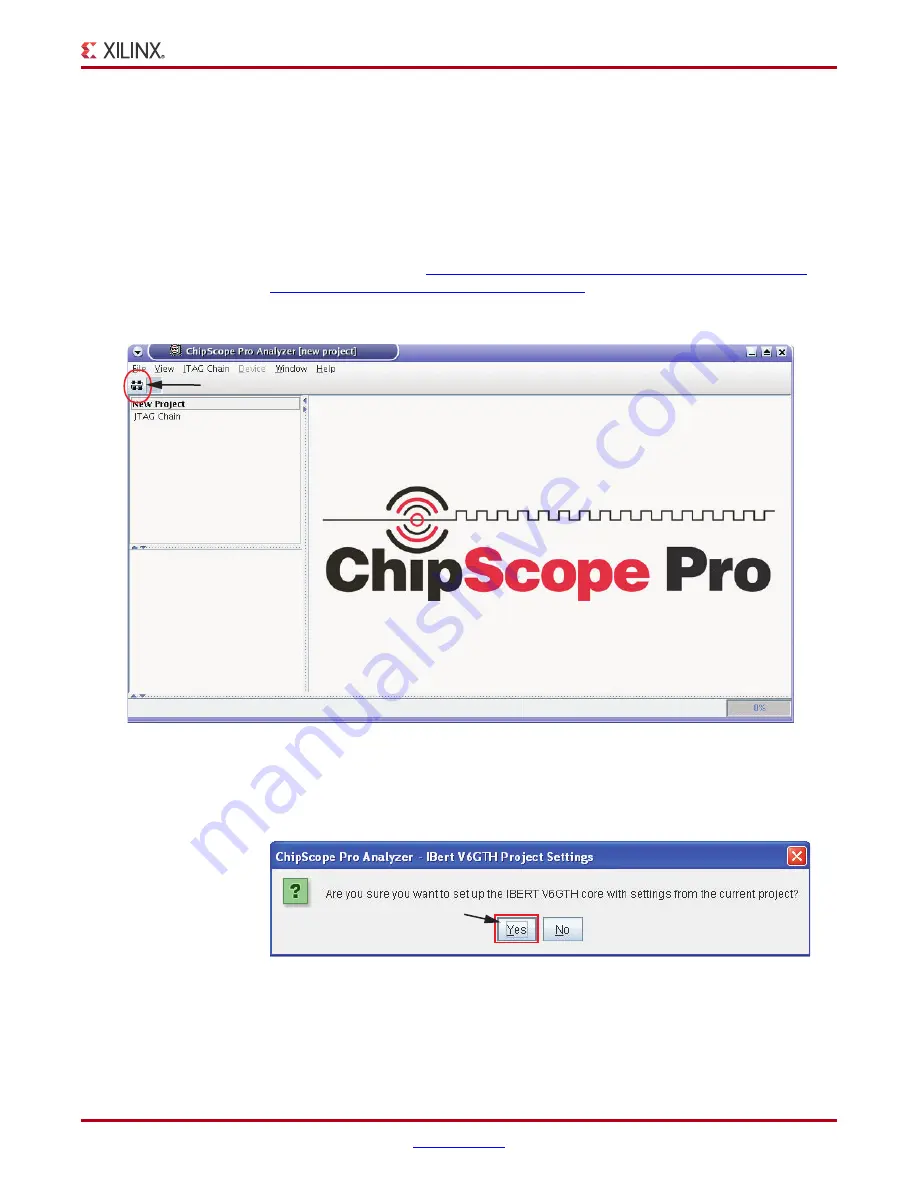
Click the
Open Cable
button (
4.
When the dialog opens asking to set up the core with the settings from the current
project, click
Yes
Note:
After completing
, the IBERT Console will open and display
No Link
on all four
) and error messages will begin scrolling in the status panel at the bottom of
the GUI (
). This is due to a limitation in this revision of the GTH IBERT core. At this
point the IBERT core is loaded and running, but the outputs of the Si5368 on the SuperClock-2
X-Ref Target - Figure 1-9
Figure 1-9:
Open Cable Button
UG
8
06_c1_09_022511
Open Ca
b
le B
u
tton
X-Ref Target - Figure 1-10
Figure 1-10:
Core Settings Dialog
u
g
8
06_c1_10_030311


