background image

2.14

U s e r   G u i d e

C O P Y I N G   F R O M   T H E   S I N G L E   P A S S   F E E D E R

Copying from the Single Pass Feeder

Place originals face down in the Single 
Pass Feeder.  (Maximum of 30.)

Adjust the side guide within 1/32 in.

Press the 

Start

 button on the Control 

Panel.

The copy will exit to the paper output 
support tray.

Two-Sided Copying  

Place one original face down on the 
Document Glass, with the TOP toward the 
LEFT. Lower the document cover.

Select the quantity of 1. To maintain copy 
quality run one copy at a time.

Press 

Start

 to make side 1 copy.

1

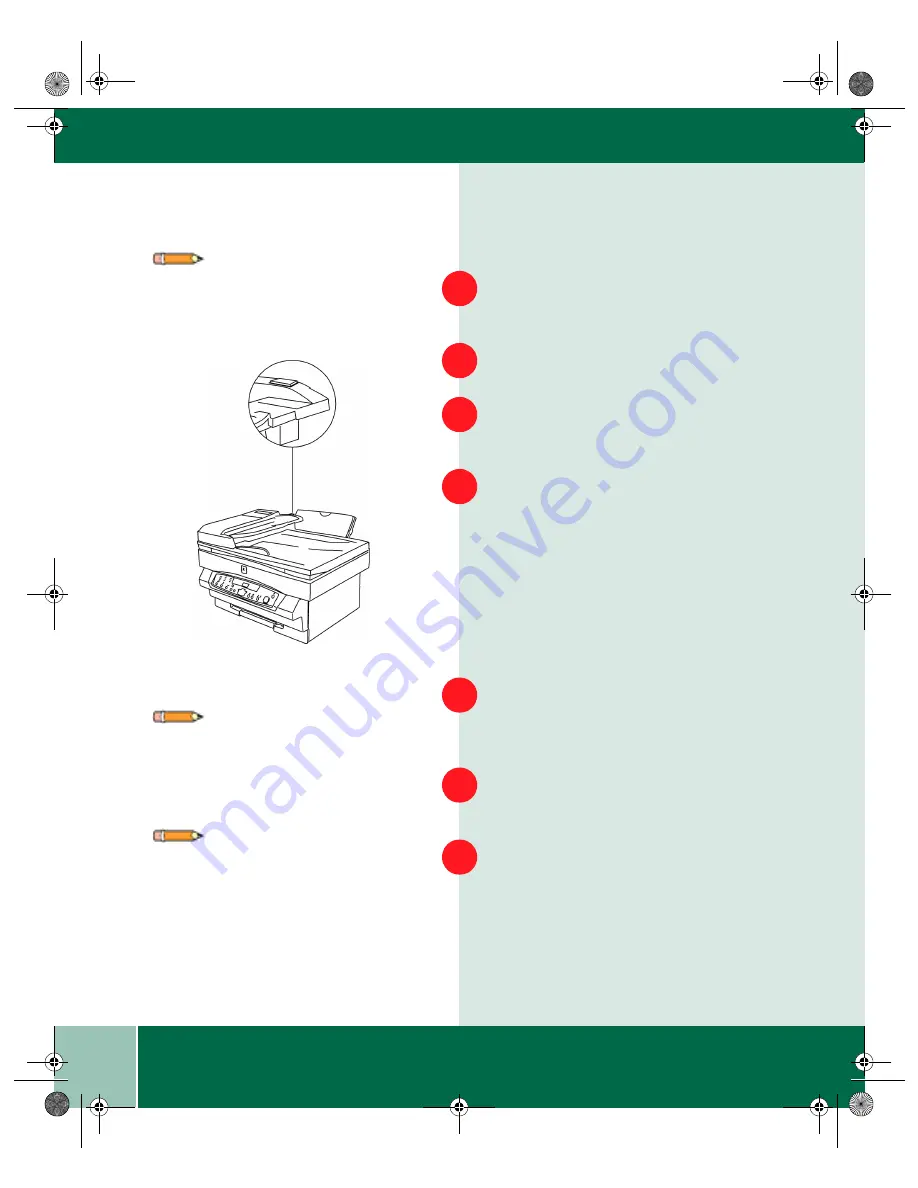
Note: Use the Release Button on the 
Single Pass Feeder  (located in top rear 
of the SPF) to remove jams.

2

3

4

Note: Although not designed for this 
purpose, you may use the XE90fx for 
two-sided copying. 

Note: 16 lb/60 g/m

2

 paper is not 

recommended for two-sided copying.

1

2

3

XE90QRG.BK  Page 14  Wednesday, January 5, 2000  9:55 AM

Содержание WorkCentre XE90

Страница 1: ...es 1 2 2 COPIER FEATURES 2 1 Paper Specifications 2 1 Loading Media 2 3 Control Panel 2 5 Copy Quality 2 5 Copy Contrast 2 5 Reduction Enlargement Presets 2 6 Reduction Enlargement 2 6 Indicators 2 6...

Страница 2: ...en using the document glass 3 3 Sending a Fax 3 4 Faxing from the Glass 3 5 Storing Numbers for Rapid Key Dialing 3 6 Storing Numbers for Speed Dialing 3 7 Broadcast Dialing 3 7 Generating a Cover She...

Страница 3: ...Problems and Solutions 6 6 7 CLEANING AND MAINTENANCE 7 1 Cleaning the Outside 7 1 Cleaning the Glass and Cover 7 2 Cleaning the Drum Cartridge 7 3 To clean the drum surface 7 3 Service 7 4 8 CONSUMA...

Страница 4: ...U s e r G u i d e vi XE90QRG BK Page vi Wednesday January 5 2000 9 55 AM...

Страница 5: ...Card If you do not see what you are looking for in this User Guide check below to find where you can locate the information Install Guide Getting Started Setup Installation Connections Quick Procedure...

Страница 6: ...U s e r G u i d e viii XE90QRG BK Page viii Wednesday January 5 2000 9 55 AM...

Страница 7: ...d All In One is compact and easy to use It is specially designed to provide you with high quality and high performance copying printing faxing and black and white scanning This guide tells you how to...

Страница 8: ...easy loading of paper envelopes label sheets and transparency film Some of the other advanced features which can be selected from the control panel of this WorkCentre include Copy ratio two reduction...

Страница 9: ...tion and good copy print quality Xerox recommends that paper be stored appropriately on a flat surface in a closed container in a low humidity area tightly wrapped if the ream is partially used Note P...

Страница 10: ...et stuck in the paper feeding mechanism and will scratch the drum and damage other parts of the WorkCentre mechanism P a p e r I n p u t P a p e r T r a y Sizes 3 7 8 x 5 7 8 to 8 x 14 in 98 to 216 x...

Страница 11: ...e paper tray with the side to be printed facing toward you Adjust the position of the paper so that its right edge is up against the right paper guide Move the left paper guide until it is resting gen...

Страница 12: ...printer Do not reuse the misfed paper Do not use materials that are composed with glues inks and adhesive that could discolor scorch or melt when heat is applied have cellophane windows peel off adhe...

Страница 13: ...cost of copying by decreasing overall copy density on each page Use this feature when making draft copies Copy Contrast Adjust the exposure from lighter to darker for Text Photo and Toner Saver The in...

Страница 14: ...ercent chosen when pressed Indicators The paper tray indicator blinks when the paper tray is out of paper The indicator light is green The jam indicators blink when a jam occurs and a fault code will...

Страница 15: ...de or the machine will revert to print mode automatically after 1 minute When the light is on the XE90fx is ready When the light is off there is no communication to or from the PC When the light is bl...

Страница 16: ...Saver Press again and hold the Copy Quality button for approximately 4 to 6 seconds The light next to Auto will light The lights within the WorkCentre Diagram will flash From the Programmable Feature...

Страница 17: ...you to set a specific preset reduction or enlargement between 50 200 Select the Toner Saver by using the Copy Quality button Press again and hold the Copy Quality button for approximately 4 to 6 secon...

Страница 18: ...ess the Variable Percentage buttons until the desired percentage is displayed Press Start to store the selection Press the Clear button to continue making other changes Press the Copy Quality button t...

Страница 19: ...0 Off 1 45 seconds 2 90 seconds 3 2 minutes 4 5 minutes 3 Time out to Power Shut off Part of Power Saver 0 2 minutes 1 5 minutes 2 15 minutes 3 30 minutes 4 60 minutes 5 120 minutes 6 Off 4 Default M...

Страница 20: ...ly too light or too dark 0 Lightest 4 1 3 2 2 3 1 4 Nominal 5 1 6 2 7 3 8 Darkest 4 7 Paper Trail Edge Void 4 mm The trail edge void can be turned off to accommodate originals that have print to the v...

Страница 21: ...wer shut off the Ready Indicator will flash and the other indicators will turn off To copy from the power shut off press the Start button then select the desired features and press Start again Auto Cl...

Страница 22: ...ng Place one original face down on the Document Glass with the TOP toward the LEFT Lower the document cover Select the quantity of 1 To maintain copy quality run one copy at a time Press Start to make...

Страница 23: ...ER TRAY Press Start Copying While Printing To perform a copy job while the machine is printing Set up the copy job while the machine is printing Press Start The current page will finish printing then...

Страница 24: ...U s e r G u i d e 2 16 XE90QRG BK Page 16 Wednesday January 5 2000 9 55 AM...

Страница 25: ...ment This includes choosing suitable media setting the document including a cover sheet setting the resolution and contrast and dialing and transmitting Choosing Suitable Media Make sure that the docu...

Страница 26: ...smaller than the actual document original size Any text or graphics outside this area will not be scanned All clips staples and pins should be removed from originals before they are used If these are...

Страница 27: ...low yellowish green or light blue cannot be transmitted Copy the original onto white paper first Originals having the following properties should be used on the document glass only a glossy coating st...

Страница 28: ...tinue with step 4 If using direct send press the Direct Send key Enter the fax number Press the Start Fax key If necessary use the Stop Exit key to cancel 1 2 Note There are two ways to fax scanning t...

Страница 29: ...r more than one document place the next page and press the Fax From Glass key twice Enter the fax number Check the Fax Display If the number of the receiving machine is shown correctly press the Start...

Страница 30: ...id key without chain dialing Press 1 to save as a chain dial Press Stop Exit four times Rapid Keys Speed Dial 1 2 3 4 5 6 Note You may need to add a pause between certain digits in the number to allow...

Страница 31: ...er keys Press the Start Fax key Broadcast Dialing Confirm that you have loaded the documents into the Single Pass Feeder or scanned the documents into memory from the document glass Press the Broadcas...

Страница 32: ...begin Generating a Cover Sheet You can have your fax generate a cover sheet and send it as the last page of the transmission The cover sheet includes sending date and time receiver s name a rapid key...

Страница 33: ...over sheet with a fax follow these steps Press Menu then the 7 button Select and press the 1 button Select one of the following options 1 No message 2 Urgent 3 Important 4 Confidential 5 Please distri...

Страница 34: ...mes Note Use this procedure to select cover sheetasadefault TheAutoCoverSheet function will send a cover sheet with every fax transmission unless you turn it off No message is included on the cover sh...

Страница 35: ...hat are larger than the paper you have loaded and printing a footer showing the sending fax machine ID information Selecting the Reception Mode Your XE90fx has three modes for receiving incoming calls...

Страница 36: ...n set the number of rings before the machine answers in Auto mode using the procedure below Press Menu then 4 Press 0 then 3 Select the number of rings you would like to use default 2 Press Enter Pres...

Страница 37: ...calls must first be answered by picking up the receiver on the external phone or telephone connected to the same line Setting the Number of Rings for Manual Reception The number of rings before the m...

Страница 38: ...is allows you to receive both voice messages and faxes while you are out If you are using distinctive ringing as described in your Online User Guide you must set the reception mode to Auto This is als...

Страница 39: ...WAIN Scanner Driver may be used with any TWAIN compliant application software The scanner program software will operate the WorkCentre XE90fx black and white scanner The printer driver software is the...

Страница 40: ...8 0 On your computer begin at the Start menu Start Programs Textbridge Pro 8 0 Select TextBridge Pro 8 0 Select TextBridge Pro 8 0 again Printing From your open application choose Printer Setup Select...

Страница 41: ...O U B L E S H O O T I N G This section describes Troubleshooting procedures for Clearing jams Error Messages Refer to the specific subsection for a description of problems and associated solutions XE...

Страница 42: ...per tray Straighten the edges of the paper and then reinsert it into the paper tray Push the paper release lever back again to secure the paper Caution If the jammed paper will not come out easily do...

Страница 43: ...f the front door and pulling towards you Lift the toner cartridge handle Remove the toner cartridge Caution Do not touch the shiny green surface of the drum Remove the drum cartridge Remove any paper...

Страница 44: ...paper open the front door by pushing in the latches on both sides of the front door With the front door partially open remove any paper that may be in the paper exit area A1 A2 Errors at the Single P...

Страница 45: ...ont door CH The toner cartridge is not installed in the machine Install the toner cartridge Toner indicator light When the toner cartridge replacement indicator appears the toner cartridge will need t...

Страница 46: ...t position to lighten the background of the copies If the original is not light but copies come out too light you may be out of toner or the paper may be too humid Try fresh paper Smears lines marks o...

Страница 47: ...the machine and shaking it from side to side to redistribute the toner Make sure that the originals are face down on the document glass The WorkCentre does not print Try to make a copy If copying doe...

Страница 48: ...lem is fixed LINE ERROR Fax transmission or reception was not successful Press the Stop key to clear the message and then try again MEMORY FULL The memory is full See Memory in the Fax Special Feature...

Страница 49: ...ping them with a soft clean lint free cloth Keep the front cover closed when cleaning the outside of the WorkCentre You can dampen the cloth slightly with water but be careful not to let any water dri...

Страница 50: ...o not pour or spray water directly onto any part of the WorkCentre Slightly dampen a soft lint free cloth or paper towel with water Lift the document cover Wipe the surface of the document glass until...

Страница 51: ...is very sensitive you must take extreme care when cleaning it Do not let the drum surface come into contact with fingerprints water alcohol or other solvents that will damage the drum surface Do not...

Страница 52: ...eplace the drum cartridge Replace the toner cartridge Service It is important that you speak with a service representative to resolve any persistent problem The service representative will direct you...

Страница 53: ...eriod of use these parts will need to be replaced The part numbers for these parts are as follows Toner Cartridge Part Number 6R916 Drum Cartridge Part Number 13R553 Note Replacement of drum cartridge...

Страница 54: ...equates to 14 356 copies prints Toner Cartridge Yield The graph shows how the number of copies prints per cartridge decreases as the printed area increases Factors which can affect the toner cartridg...

Страница 55: ...and the drum cartridge should be stored at temperatures between 0 C 32 F and 40 C 104 F Caution Do not store the toner cartridge and drum cartridge in the following places Direct sunlight Dusty places...

Страница 56: ...r it is probably time to replace the toner cartridge The order number for the toner cartridge is 6R916 Open the front door by pushing in on the front door latches on each side of the front door Gently...

Страница 57: ...h 14 it is essential that you complete all 14 steps in order for the WorkCentre to operate If you have a J2 fault code and the drum indicator is blinking the drum cartridge has reached end of life The...

Страница 58: ...all the way out of the WorkCentre Hold the handle to support the toner cartridge and then pull it clear of the WorkCentre Place the toner cartridge on the scrap paper prepared in step 2 1 2 3 4 Warni...

Страница 59: ...to shield the drum from light To prevent damage to the drum surface do not remove the protective paper until you have inserted the cartridge into the WorkCentre Remove the new drum cartridge from the...

Страница 60: ...ustration until the toner cartridge is fully inside the WorkCentre and the handle springs back Ensure that the WorkCentre power is on You must hold in the button indicated and close the cover at the s...

Отзывы: