background image

Step 5: 

Web User Interface Instructions 

A PC client connected to the network is required to complete the printer network setup. 
Follow this procedure if you want to make any other changes to the printer configuration. 

1. 

Open a Web Browser (Internet Explorer). 

2. 

Verify Proxy Servers are being bypassed for local web addresses. 

3. 

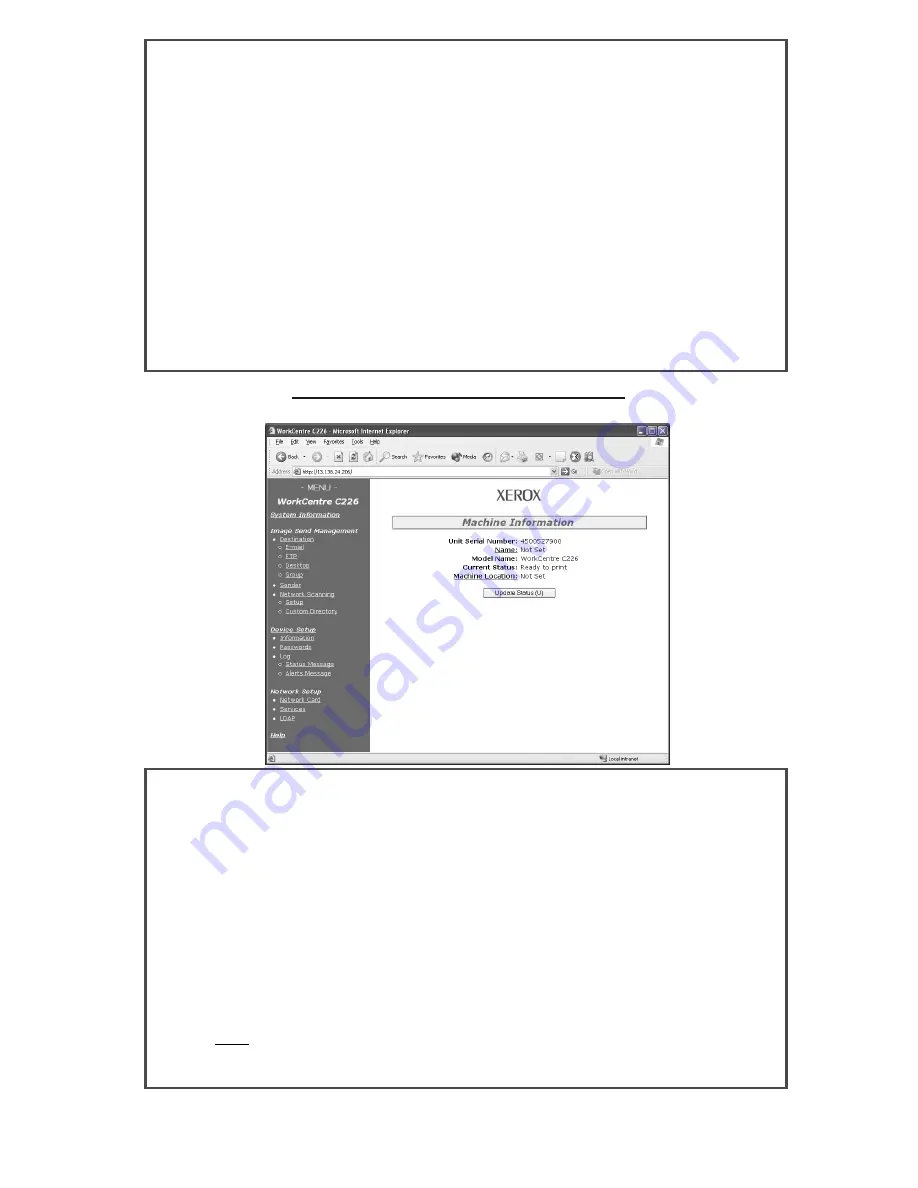
Type the TCP/IP address assigned to the printer into the URL window. (Refer to the 
Network Interface Card Page for the TCP/IP address.) 

4. 

Make necessary changes by selecting one of the options on the let side pane in the 
window. 

5. 

To save changes or edit the default login information is: 

a. Username: “admin” 
b. Password: “Xerox” 

6. 

Save changes and reboot the printer. 

7. 

Print out a new Network Interface Card Page to review new settings.  

8. 

(Please refer to Step 4  for additional information.) 


Sample WorkCentre C226 Web Page 


Step 6: 

Load Windows Print Drivers 

1. Run 

Setup.exe 

2. Select 

Language 

3. 

License Agreement will appear, select Yes 

4. 

Read the Welcome Screen and click “Next” 

5. 

Select Print Driver button followed by Next when window appears 

6. 

Select “Standard” or “Custom Installation” (Default: Standard) 

7. 

Select printer to be installed 

8. 

Select if you wish to have Windows Programs use this as default printer then Next 

9. 

Enter Printer Name to used, click Next 

10.  Install Display Font window appears, make selection then click Next 
11.  Select Next, driver will be installed along with printer 
12.  Printer is now installed, select OK then Close again and restart if prompted 

Note: This install procedure is for all Windows Clients supported for the WorkCentre 
C226. Please refer to the documentation for installing printers using the “Add Printer 
Wizard”. For USB & Parallel port instructions please refer to the documentation.  

Содержание WorkCentre C226

Страница 1: ...tinue with Steps 2 6 and make changes to the printer port network as required for your network infrastructure Step 1 Default Printer Settings Default Port Settings Parallel Port Enabled Netware Enable...

Страница 2: ...ion Resolution 600 DPI Language English British Hardware Specs Base Memory 128 MB Optional Memory 512 MB Total Memory 640 MB HDD 40 GB FW Version PCU Ver x xx ICU Ver x xx Boot Ver x xx PRT xxx Instal...

Страница 3: ...er to Step 4 for additional information Sample WorkCentre C226 Web Page Step 6 Load Windows Print Drivers 1 Run Setup exe 2 Select Language 3 License Agreement will appear select Yes 4 Read the Welcom...

Страница 4: ...nd set the options for your printer Mac OS X 1 Insert the PS3 Expansion Kit CD Rom into machine 2 Double click the CDROM 3 Double click the Mac OS Folder 4 Double click the OS version 5 Double Click t...

Страница 5: ...por defecto Para obtener m s informaci n sobre los ajustes de impresi n y configuraci n de Novell consulte la documentaci n del cliente Procedimiento WorkCentre C226 ha sido dise ada para conectarse a...

Страница 6: ...interruptor de alimentaci n en el lado izquierdo de la m quina 10 Si no es necesario realizar m s cambios contin e con el paso 4 de esta gu a Paso 3 Habilitaci n del protocolo Realice el siguiente pro...

Страница 7: ...es salida papel Encuadernador Tarjeta de servidor de impresi n Instalado Ajustes predeterminados Copias 1 juego Orientaci n Vertical Tama o de papel predeterminado A4 Tipo de papel predeterminado Norm...

Страница 8: ...cales 3 Introduzca la direcci n TCP IP asignada a la impresora en la pantalla de la URL Consulte la p gina NIC para obtener la direcci n TCP IP 4 Realice los cambios necesarios seleccionando una de la...

Страница 9: ...que se va a instalar 6 Seleccione el controlador WorkCentre C226 PCL5c 7 Seleccione Siguiente imprima P gina de prueba La impresora ya est instalada Nota Este procedimiento de instalaci n es para tod...

Страница 10: ...las opciones de su impresora Mac OS X 1 Inserte el CD ROM de controladores PostSript de WorkCentre C226 incluido en el kit PS en la m quina 2 Haga doble clic en el CD ROM 3 Haga doble clic en la carpe...

Страница 11: ...porta rede da impressora de acordo com a infra estrutura da sua rede Passo 1 Pr defini es da Impressora Pr defini es da Porta Porta Paralela Activado Netware Activado Porta 9100 Activado FTP Activado...

Страница 12: ...sinalar Prima OK Prima Sim para reiniciar depois de ter feito as altera es Reinicie a impressora utilizando o interruptor on off no lado esquerdo do equipamento Se n o for necess rio efectuar mais alt...

Страница 13: ...0 MB HDD 40 GB Vers o FW Ver PCU x xx Ver ICU x xx Ver Boot x xx PRT xxx Dispositivos instalados Sistema 2 Faces M dulo 2 faces Op de Ali de Papel Unid de 2 band Ali de Alta Cap Instalado Op de Sa da...

Страница 14: ...tion por defeito Standard 5 Seleccione a impressora que vai instalar 6 Seleccione o driver WorkCentre C226 PCL5c 7 Seleccione Pr ximo imprima a P gina de Teste A impressora est instalada Nota Esta ins...

Страница 15: ...ROM WorkCentre C226 PostScript Driver localizado no PS Kit 2 D dois cliques em CD ROM 3 D dois cliques na pasta Mac OS 4 D dois cliques na vers o OS 5 D dois cliques no cone Installer e depois em Con...

Страница 16: ......

Страница 17: ...appearing in this manual are the trademarks of their respective owners Espa ol Informaci n de marcas comerciales El sistema operativo Microsoft Windows es una marca registrada o marca comercial de Mi...

Страница 18: ...adas ou marcas comerciais da Microsoft Corporation nos EUA e noutros pa ses Netscape Navigator uma marca comercial da Netscape Communications Corporation Adobe Reader Copyright 1987 2005 Adobe Systems...

Отзывы: