background image

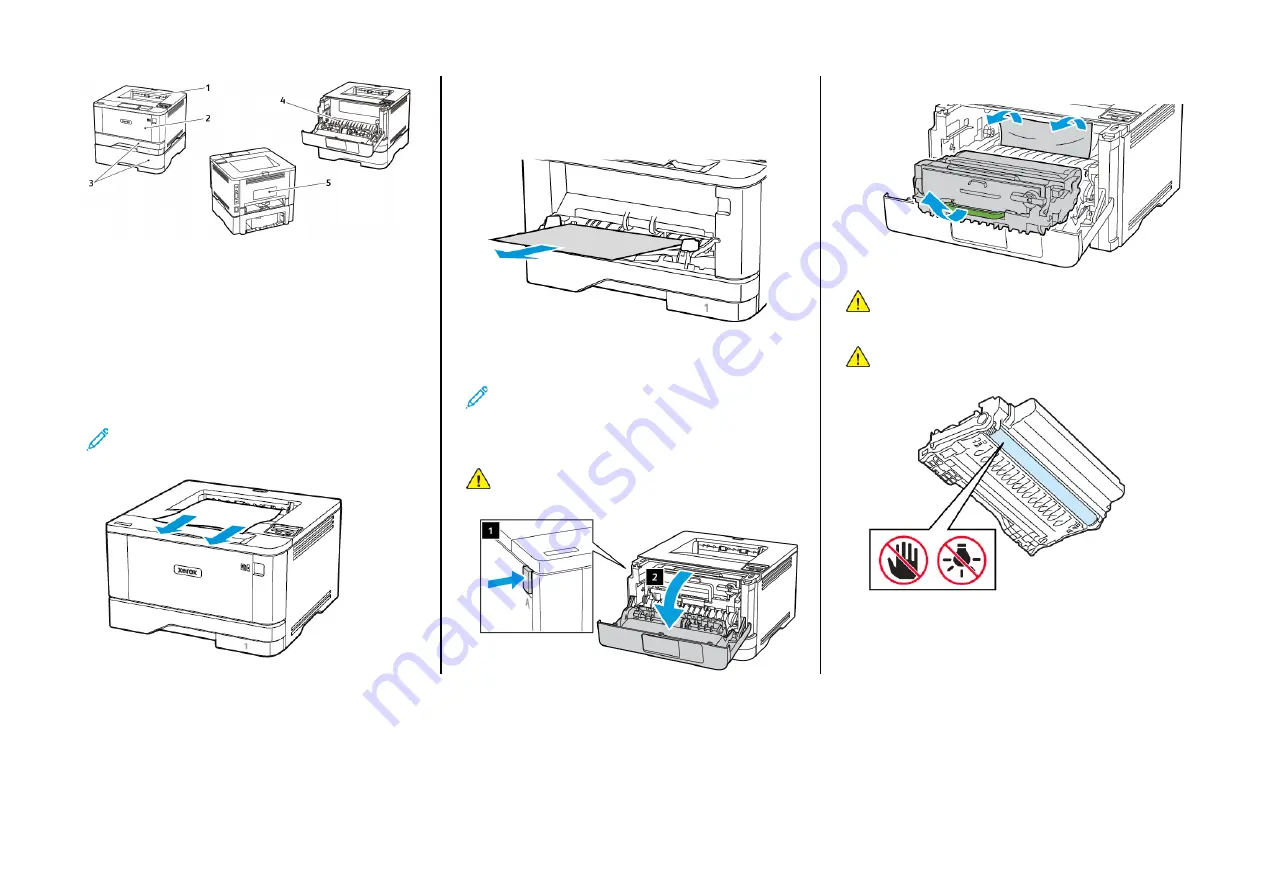
1. Standard output tray

2. Multipurpose feeder

3. Trays

4. Duplex unit

5. Rear door

PPaappeerr JJaam

m iinn tthhee SSttaannddaarrdd O

Ouuttppuutt TTrraayy

Remove the jammed paper.

Note:

Make sure that all paper fragments are removed.

PPaappeerr JJaam

m iinn tthhee M

Muullttiippuurrppoossee FFeeeeddeerr

1.

Remove paper from the multipurpose feeder.

2.

Remove the jammed paper.

Note:

Make sure that all paper fragments are removed.

3.

Close the multipurpose feeder.

4.

Open the front door.

Warning:

To prevent damage from electrostatic discharge,

touch any exposed metal frame of the printer before

accessing or touching interior areas of the printer.

5.

Remove the imaging unit.

Warning:

Do not expose the imaging unit to direct light for

more than 10 minutes. Extended exposure to light may cause

print quality problems.

Warning:

Do not touch the photoconductor drum. Doing so

may affect the quality of future print jobs.

5

Содержание B310

Страница 1: ...irectly from Apple devices to an AirPrint certified printer Make sure that the Apple device and the printer are connected to the same network If the network has multiple wireless hubs then make sure t...

Страница 2: ...o may affect the quality of future print jobs 4 Unpack the new toner cartridge 5 Shake the toner cartridge to redistribute the toner 6 Insert the new toner cartridge into the imaging unit until it cli...

Страница 3: ...h he e P Pa ap pe er r S Siiz ze e a an nd d T Ty yp pe e 1 From the control panel navigate to Settings OK Paper OK Tray Configuration OK Paper Size Type OK then select a paper source 2 Set the paper...

Страница 4: ...set to Auto From the control panel navigate to Settings OK Network Ports OK Network Overview OK Active Adapter OK Auto OK The Ethernet cable is not connected to the printer 1 From the control panel n...

Страница 5: ...ultipurpose feeder 2 Remove the jammed paper Note Make sure that all paper fragments are removed 3 Close the multipurpose feeder 4 Open the front door Warning To prevent damage from electrostatic disc...

Страница 6: ...agments are removed 7 Insert the imaging unit 8 Close the door 9 Open the multipurpose feeder 10 Flex fan and align the paper edges before loading 11 Reload paper P Pa ap pe er r J Ja am m iin n T Tr...

Страница 7: ...the printer might be hot To reduce the risk of injury from a hot component allow the surface to cool before touching it Note Make sure that all paper fragments are removed 5 Insert the imaging unit 6...

Страница 8: ...rning To prevent damage from electrostatic discharge touch any exposed metal frame of the printer before accessing or touching interior areas of the printer 2 Remove the imaging unit Warning Do not ex...

Страница 9: ...Close the door 6 Remove the tray 7 Push the duplex unit latch to open the duplex unit 8 Remove the jammed paper Note Make sure that all paper fragments are removed 9 Close the duplex unit 10 Insert t...

Страница 10: ...oconductor drum Doing so may affect the quality of future print jobs 3 Open the rear door CAUTION HOT SURFACE The inside of the printer might be hot To reduce the risk of injury from a hot component a...

Страница 11: ...11...

Страница 12: ...Cloud Print web printing service Gmail webmail service and Android mobile technology platform are trademarks of Google Inc Microsoft Windows Vista Windows Windows Server and OneDrive are registered t...

Отзывы: