background image

____________________________________________

 Options  9-19

f.

Gently push the SIMM toward the left and up to a 90˚
angle (fig. 9.14) with the controller board until the two
bank latches snap in place in front. You may have to
hold the two latches out while pushing the SIMM into
place, and then release them. If you do not have another
SIMM to install, skip to step 10.

g.

If you have another SIMM to install repeat steps a
through f.

11.

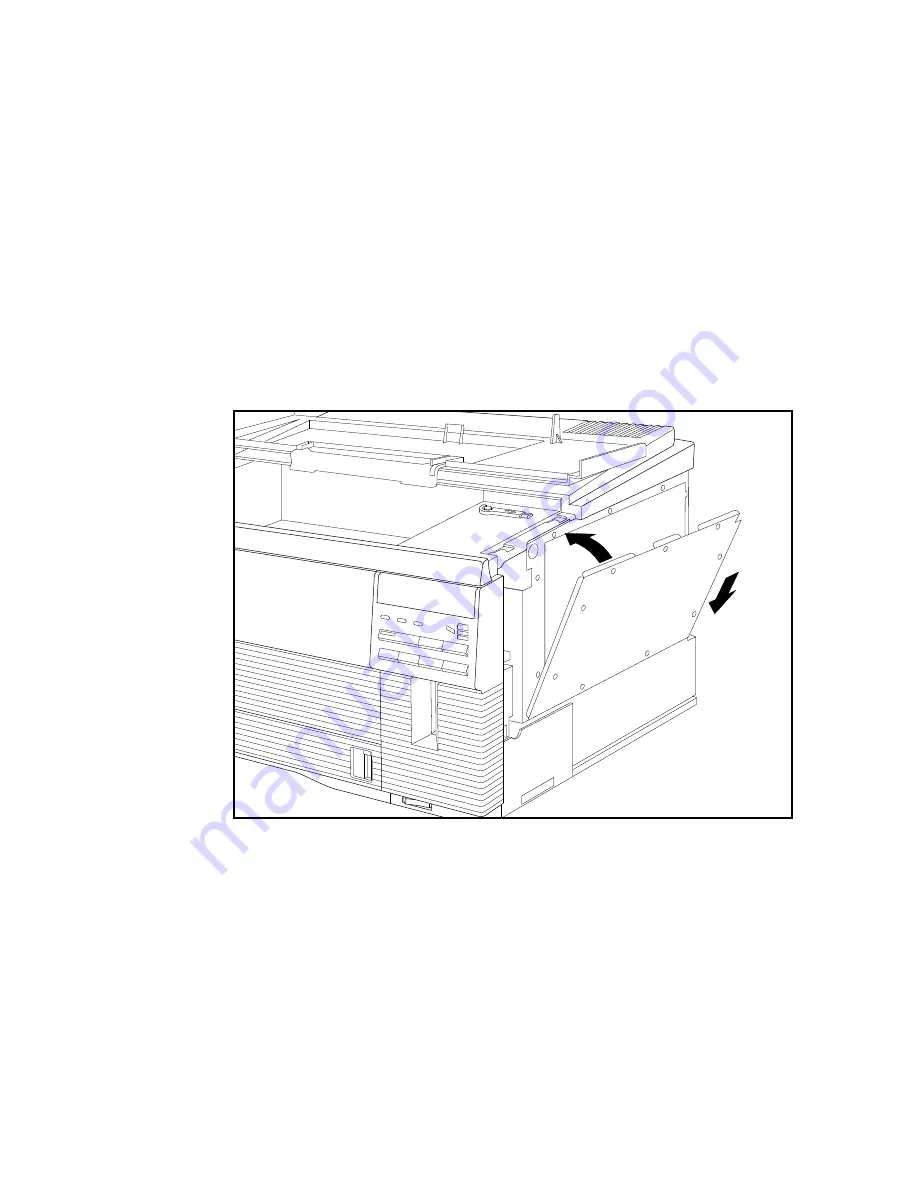
Replace the EMI shield by placing the tabs on the bottom into
the slots on the printer and tilting it up into position (fig. 9.15).

Fig. 9.15  Replace the EMI Shield

Содержание Accel-a-Writer 812

Страница 1: ..._________ Options 9 1 Chapter 9 Options Chapter Overview Paper Handling Options Optional Replacement Cassettes Optional 500 Sheet Cassette and Feeder RAM Upgrades Installing RAM Upgrades Ethernet Upgr...

Страница 2: ...9 2 Optionsbb ___________________________________________ Notes...

Страница 3: ...The standard printer comes with a 250 sheet cassette letter or A4 size as well as the built in fold down tray that will handle up to 100 sheets of standard or custom size media This not only gives yo...

Страница 4: ...dust and debris from getting into the cassette and building up in the printer where it can reduce print quality See Feeding Media to the Printer in chapter 6 for installation details The next section...

Страница 5: ...going to use skip to step 3 If not use the following procedure to reposition the guides a If the length guide is not positioned for the desired size slide it to the right lift it up and out If the wi...

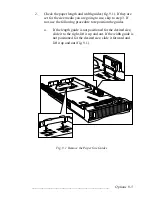
Страница 6: ...placing it in the slots for the desired width and sliding it back until it locks in place fig 9 2 Note If you are using legal size media store the paper length guide in the slot at the front of the ca...

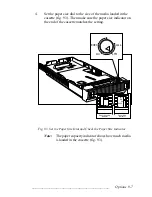
Страница 7: ...Then make sure the paper size indicator on the end of the cassette matches the setting LGL LTR A4 EXEC LTR LGL A4 EXEC LGL LTR A4 EXEC Paper Capacity Indicator Paper Size Indicator Fig 9 3 Set the Pa...

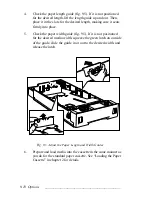
Страница 8: ...nd 500 sheets of executive paper in the second one used with the feeder Plus you still have the fold down tray where you can load a third size of paper For more details on the feeder see Using the Opt...

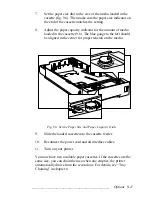
Страница 9: ...lbs 19 4 kg with the toner and a cassette loaded Have someone help you lift it 3 With the help of someone else align the printer over the feeder and gently lower it onto the feeder fig 9 4 ONLINE FOR...

Страница 10: ...firmly into place 5 Check the paper width guide fig 9 5 If it is not positioned for the desired media width squeeze the green latch on outside of the guide slide the guide in or out to the desired wid...

Страница 11: ...The blue gauge to the left should be aligned in the center for proper tension on the media LGL LTR A4 EXEC EC A4 LTR LGL Fig 9 6 Set the Paper Size and Paper Capacity Dials 9 Slide the loaded cassett...

Страница 12: ...ingle In line Memory Module The 4 MB upgrades are 72 pin SIMMs arranged as a 1 MBit by 32 bit width The 16 MB upgrades are arranged as a 4 MBit by 32 bit width The 32 MB upgrades are arranged as an 8...

Страница 13: ...and following the directions on the package 2 Turn off your printer and disconnect the power cord and all interface cables 3 Open the top cover by pressing in on the raised finger grips on each side a...

Страница 14: ...ate and remove the side cover securing screw located on the back of the printer just below and to the left of the interface plate fig 9 8 5 Slide the side cover toward the back of the printer fig 9 8...

Страница 15: ...cover by lowering it and gently lifting the bottom edge up and out of the slots on the printer Then set the cover aside for now fig 9 9 Fig 9 9 Remove the Side Cover 7 Remove the 9 screws securing th...

Страница 16: ...bb ___________________________________________ 8 Tilt the EMI shield down and lift the tabs at the bottom out of the slots on the printer fig 9 11 Then set the shield aside for now Fig 9 11 Remove the...

Страница 17: ...e RAM upgrade using the following procedure Note RAM banks must be filled in order Bank 1 and then Bank 2 If you mix SIMM RAM sizes the larger size SIMM goes into Bank 1 and the smaller in Bank 2 a If...

Страница 18: ...bag e Align the new SIMM with the notched corner down and the SIMM tilted to the right at a 45 angle to the controller board over the appropriate bank fig 9 14 Then insert the SIMM into the bank s con...

Страница 19: ...e in front You may have to hold the two latches out while pushing the SIMM into place and then release them If you do not have another SIMM to install skip to step 10 g If you have another SIMM to ins...

Страница 20: ...9 20 Optionsbb ___________________________________________ 12 Replace the 9 screws securing the EMI shield fig 9 16 Fig 9 16 Replace the EMI Shield Screws...

Страница 21: ...________________________________ Options 9 21 13 Replace the side cover by slipping the tabs on the bottom edge into the slots on the printer and raising the cover back up fig 9 17 Fig 9 17 Replace th...

Страница 22: ...ver 17 Reattach the interface cables and power cord 18 Turn on your printer Note If you want to confirm the memory upgrade check the start up page To print a test start up page take the printer off li...

Отзывы: