background image

2020-

8

-2

4


V

ersion

8

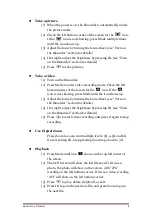
Take a picture

(1) When the power is on, the binocular is automatically under

the picture mode.

(2) Check the left bottom corner of the screen for the

icon.

If the

icon is not showing, press Mode multiple times

until the icon shows up.

(3) Adjust the focus by turning the focus wheel. (see “Turn on

the Binocular” section for details)

(4) If at night, adjust the brightness by pressing IR. (see “Turn

on the Binocular” section for details)

(5) Press

to take pictures.

Take a video

(1) Turn on the Binocular.
(2) Press Mode to enter video-recording mode. Check the left

bottom corner of the screen for the

icon. If the

icon is not showing, press Mode until the icon shows up.

(3) Adjust the focus by turning the focus wheel. (see “Turn on

the Binocular” section for details)

(4) If at night, adjust the brightness by pressing IR. (see “Turn

on the Binocular” section for details)

(5) Press

to start video recording, and press it again to stop

recording.

Use Digital Zoom

Press Zoom to zoom in at multiple levels: 3X, 4.5X and 6X.
Once reaching 6X, keep pressing Zoom to go back to 3X.

Playback

(1) Press Mode until icon

shows on the top left corner of

the screen.

(2) The LCD Screen will show the last file saved. If it was a

photo, the photo will show on the screen, with “JPG”
wording on the left bottom corner. If it was a video, wording
“AVI” will show on the left bottom corner.

(3) Press

to play, delete, delete all, or exit.

(4) Press IR to go to the previous file, and press Zoom to go to

the next file.

Содержание XANB50

Страница 1: ...HANDS FREE DELUXE NIGHT VISION BINOCULAR XANB50 USER MANUAL X Vision Optics 5140 Moundview Dr Red Wing MN 55066 Edition 2020 8 24...

Страница 2: ...ion Binocular Capturing Photos or Videos Using the Digital Zoom Playback of Captured Photo or Video 4 Display Information 5 Head Piece Assembly 6 Menu Settings 7 Trouble Shooting 8 Appendix Specificat...

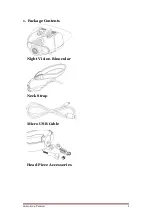
Страница 3: ...2020 8 24 Version 2 1 Package Contents Night Vision Binocular Neck Strap Micro USB Cable Head Piece Accessories...

Страница 4: ...o Video Playback Menu in a loop When the power is on the default mode is Photo Press Mode to change to the next mode Zoom Under Photo and Video Mode Press zoom to zoom in at multiple levels 3X 4 5X an...

Страница 5: ...ayback mode Press IR to playback to the previous file Under Menu mode Press IR to go down Under Photo mode Press to take photos Under Video mode Press to start video recording and press one more time...

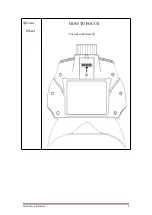
Страница 6: ...2020 8 24 Version 5 Focus Wheel HOW TO FOCUS Turn Focus Wheel...

Страница 7: ...A plug to charge The charging time is approximately 3 hours using 5V 1A Note Do not turn on the power while charging Insert a Micro SD card for photo and video taking not included 1 Insert the card in...

Страница 8: ...de for preview 2 Adjust the focus by turning the focus wheel at the front bottom See below arrow for focus wheel 3 For daytime use make sure the IR is off For night use turn on the IR by pressing the...

Страница 9: ...press Mode until the icon shows up 3 Adjust the focus by turning the focus wheel see Turn on the Binocular section for details 4 If at night adjust the brightness by pressing IR see Turn on the Binoc...

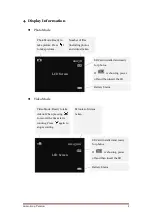
Страница 10: ...showing power off and then insert the SD card Battery Status Photo Mode Ready to take picture Press to take pictures 00 45 00 LCD Screen Video Mode Ready to take videos When pressing to record the tim...

Страница 11: ...Status Battery Status 38 38 LCD Screen This means the file shown is a video Press to view To go to the previous file press IR 37 38 LCD Screen This means current file is the 37th among 38 taken includ...

Страница 12: ...2020 8 24 Version 11 5 Head Piece Assembly There are 4pcs accessories of head pieces Slide A into the top of the binocular Screw B into the slot Combine A to D Screw C into the slot...

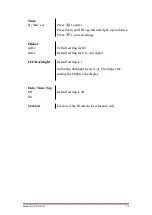
Страница 13: ...date To set up the time Flicker 50Hz Default setting for EU 60Hz Default setting for U S and Japan LCD Backlight To select the brightness level of the LCD screen Date Time Tag To show date and time o...

Страница 14: ...ss to saved settings Flicker 50Hz Default setting for EU 60Hz Default setting for U S and Japan LCD Backlight Default setting is 1 Indicating backlight levels 1 3 The higher the setting the brighter t...

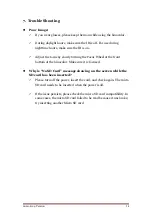
Страница 15: ...he Focus Wheel at the front bottom of the binocular Make sure it is focused Why is No SD Card message showing on the screen while the SD card has been inserted Please turn off the power insert the car...

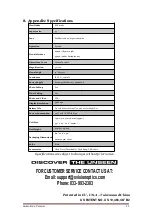
Страница 16: ...es Photo and Video VGA Display Resolution 320 x 240 Battery Life Up to 8 hours for Day Use 5 hours for Night Use Power consumption 2 5W with IR LED fully on Unit Size 14 0cm x 16 5cm x 6 6cm approx 5...

Отзывы: