


Radio Remote Control FFB2000-Pro
Page 6 of 9
X-Floc Dämmtechnik-Maschinen GmbH
Rosine-Starz-Straße 12 · 71272 Renningen · Germany
Phone +49-7159-80470-30 · Fax -40 | [email protected] · www.x-floc.com
Basic Settings
Button combination
Function
Explanation
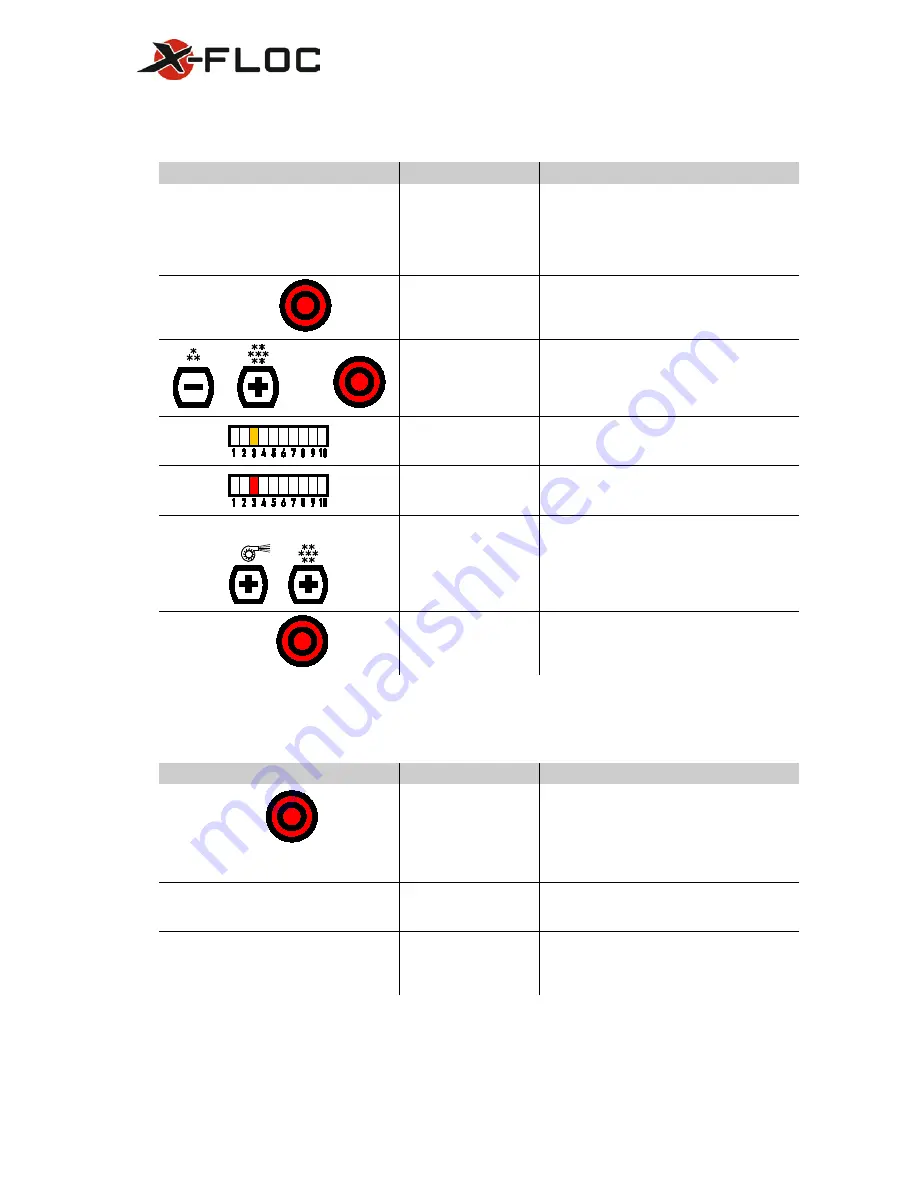
The receiver and the transmitter must
both be switched on. Press the blue
"learn" button on the receiver.
Tune transmitter to
receiver.
After the "learn" button is pressed, the receiv-
er goes in to learn mode for 30 seconds. The
LED above the "learn" button flashes four
times and the controls make a beep noise to
confirm successful tuning. Controls automati-
cally switch out of learn mode.
>
10
Sec
.
Firmware version 1.0:
Switch to parameter
mode.
The air and material LED flashes on and off.
The parameter is displayed on the air volume
scale. The parameter value is displayed on the
material volume scale.
+
and
1×
Firmware version 1.4:
Switch to parameter
mode.
The air and material LED flashes on and off.
The parameter is displayed on the air volume
scale. The parameter value is displayed on the
material volume scale.
Parameter selection.
The parameter value is displayed on the 1-10
air volume scale. For parameter descriptions,
see Parameter assignment.
Parameter setting.
The parameter value is displayed on the 1-10
material volume scale. For value ranges and
descriptions, see Parameter assignment.
>
5
Sec.
+
Reset all parameters to
factory settings.
Please note, all parameter settings are reset to
factory settings, see Parameter assignment.
>
5
Sec
.
Switch back to operat-
ing mode.
Further Information
Button combination
Function
Explanation
2×
Plug in the charging device and connect
to the hand held controls
Charging the hand
held controls.
Switch off the hand held controls - power off.
(Charging only possible when device is
switched off). Active charging is indicated
with the yellow LED (air start) and a running
light on the LED material volume scale. Charg-
ing time, approx. 180 minutes.
Green LED on.
Hand held controls
fully charged.
Green overpressure display LED lights up. No
other LEDs light up. Charging device can be
disconnected.
Connect the connection cable to the
auxiliary connection on the hand held
controls and the receiver.
Operation in cable
mode (if you have a
connection cable).
If radio contact is not possible, or if the batter-
ies are flat you can continue to work with a
cable connection. Active cable connection is
confirmed with a short beep.


