background image

7

Operation


en

GB

F

I

E

P

NL

DK

S

N

FIN

J

CN

ROK

PL

HR

H

RUS

CZ

GR

LT

LV

EST

SLO

SK

M

TR

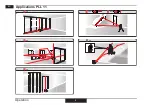
How to use the wall mount bracket: 

Содержание PLL 11

Страница 1: ...b 11 Transport 11 Garantie 11 Technische Daten 12 Sicherheitshinweise 13 Inbetriebnahme Batterien einsetzen ersetzen Verriegelungsknopf nach vorne schieben um das Batte riefach zu entriegeln Batteriefachdeckel öffnen und die Batterien polrichtig einsetzen Dann den Batterie fachdeckel zurück drücken bis er einrastet Das Batteriesymbol 5 leuchtet wenn die Batteriespan nung zu niedrig ist Die Batteri...

Страница 2: ...edienelemente 1 Taste on set 2 Taste pulse 3 Lockschalter Anzeige 4 Locked 5 Batteriespannung zu niedrig 6 Puls Energiesparmodus EIN 7 Laserlinie horizontal 8 Laserlinie vertikal 9 Lotpunkt AT Lot und Kreuzungspunkte on set pulse on set pulse on set CLL 11 CLG 15 PLL 11 6 6 7 8 2 7 8 9 AT 2 5 5 4 4 1 1 5 4 1 7 8 3 ...

Страница 3: ... 3 betätigt werden Im gelockten Zustand ist das Pendel festgesetzt und die Selbst nivellierfunktion ist außer Kraft gesetzt Puls Um die Laserlinien auch noch in weiteren Entfernungen 15 m oder in ungünstigen Lichtverhältnissen wahrnehmen zu können kann ein Laserempfänger eingesetzt werden Der Laserstrahl im Pulsmodus wird vom Empfänger auch noch in grosser Entfernung wahr genommen Aktion PLL 11 CL...

Страница 4: ...4 Bedienung de GB F I E P NL DK S N FIN J CN ROK PL HR H RUS CZ GR LT LV EST SLO SK M TR Anwendungen PLL 11 on set 1x on set 2x on set 3x on set on set 1x 2x pulse 1x ...

Страница 5: ...5 Bedienung de GB F I E P NL DK S N FIN J CN ROK PL HR H RUS CZ GR LT LV EST SLO SK M TR Anwendungen CLL 11 on set 1x on set 2x on set 3x on set on set 1x 2x pulse 1x ...

Страница 6: ...6 Bedienung de GB F I E P NL DK S N FIN J CN ROK PL HR H RUS CZ GR LT LV EST SLO SK M TR Anwendungen CLG 15 on set 1x on set 2x on set 3x on set on set 1x 2x ...

Страница 7: ...7 Bedienung de GB F I E P NL DK S N FIN J CN ROK PL HR H RUS CZ GR LT LV EST SLO SK M TR Zum Gebrauch der Wandhalterung ...

Страница 8: ...inie oder Laserpunkt akti vieren und Lage der Linie oder des Punktes auf der Wand A A1 markieren Instrument um 180 drehen und die horizontale Laser linie oder den Laserpunkt genau so auf der Wand B B1 markieren Anschliessend Instrument auf gleicher Höhe möglichst nahe zur Wand A platzieren und erneut die horizontale Laserlinie oder den Laserpunkt auf Wand A A2 markieren Instrument wieder um 180 dr...

Страница 9: ...Abweichung 3 mm nicht überschreitet befindet sich der CLL 11 PLL 11 CLG 15 innerhalb der Toleranz Überprüfung der Genauigkeit der vertikalen Linie Lockschalter 3 auf die Stellung Unlocked position stellen Als Referenz ein Schnurlot verwenden und möglichst nahe an einer ca 3 m hohen Wand befestigen Instrument im Abstand von ca 1 5 m von der Wand in einer Höhe von ca 1 5 m platzieren Instrument auf ...

Страница 10: ...zur Richtung 1 zeigt Dabei das Inst rument so anpassen dass der Punkt A1 vom Laserstrahl exakt getroffen wird Wenn der Punkt B2 nicht weiter als 2 mm vom Punkt B1 entfernt liegt befindet sich der PLL 11 innerhalb der Toleranz Befindet sich Ihr CLL 11 PLL 11 CLG 15 ausser halb der angegebenen Toleranzen wenden Sie sich bitte an einen authorisierten Kundendienststelle für Würth Anzeigehinweise Unter...

Страница 11: ...eit des Gerätes regelmässig über prüfen Transport Zum sicheren Transport des Instrumentes den Lock schalter 3 auf Locked stellen Garantie Für den CLL 11 PLL 11 CLG 15 bieten wir eine Gewähr leistung entsprechend den gesetzlichen länderspezifi schen Bestimmungen ab Kaufdatum Nachweis durch Rechnung oder Lieferschein Entstandene Schäden werden durch Ersatzlieferung oder Reparatur beseitigt Schäden d...

Страница 12: ...Genauigkeit der horizontalen Linie 5 m 1 5 mm 1 16 Vertikale Genauigkeit 3 m 10 ft Linienlänge 0 75 mm 1 32 1 5 mm 1 16 Strahldivergenz 180 Anzahl Laserpunkte 4 Anzahl Laserlinien 2 Strahlenrichtung vertikal horizontal oben unten rechts links vertikal horizontal vertikal horizontal Lasertyp 635 nm Laserklasse II 515 520 nm Laserklasse II Batterien Typ AA 4 x 1 5 V Schutzkl spritzwasser staubgeschü...

Страница 13: ...tes ohne Instruktion Verwendung ausserhalb der Einsatzgrenzen Unwirksammachen von Sicherheitseinrichtungen und Entfernen von Hinweis und Warnschildern Öffnen des Produktes mit Werkzeugen Schrauben zieher etc Durchführung von Umbauten oder Veränderungen am Produkt Absichtliche Blendung Dritter auch bei Dunkelheit Ungenügende Absicherung des Einsatzortes Einsatzgrenzen Siehe Kapitel Technische Daten...

Страница 14: ...en Sie diese zur umweltgerechten Entsorgung bei entsprechenden Sammelstellen gemäss nationaler oder lokaler Bestimmungen ab Das Produkt darf nicht im Hausmüll entsorgt werden Entsorgen Sie das Produkt sachgemäss Befolgen Sie die nationalen länderspezifi schen Entsorgungsvorschriften Schützen Sie das Produkt jederzeit vor dem Zugriff unberechtigter Personen m WARNUNG Bei der Verwendung von Ladegerä...

Страница 15: ... auf andere Personen Der Schutz des Auges wird üblicherweise durch Abwendungsreaktionen einschliesslich des Lidschlussreflexes bewirkt m WARNUNG Direkter Blick in den Laserstrahl mit optischen Hilfsmitteln wie z B Ferngläser Fernrohre kann gefährlich sein m VORSICHT Der Blick in den Laserstrahl kann für das Auge gefährlich sein CLL 11 PLL 11 CLG 15 CLL 11 PLL 11 CLG 15 Wellenlänge 635 nm 515 nm Ma...

Страница 16: ...16 Sicherheitshinweise de GB F I E P NL DK S N FIN J CN ROK PL HR H RUS CZ GR LT LV EST SLO SK M TR Labelling CLG 15 CLG 15 Art 5709 300 040 CLL 11 Art 5709 300 020 PLL 11 Art 5709 300 220 ...

Страница 17: ... 11 Technical data 12 Safety instructions 13 Start up Inserting replacing batteries Slide the locking button forwards to unlock the battery compartment Open the battery compartment cover and insert the batteries observing the correct polarity Then press the battery compartment cover back down until it engages The battery symbol 5 lights up when the battery voltage is too low Replace the batteries ...

Страница 18: ...ements 1 On Set key 2 Pulse key 3 Lock switch Display 4 Locked 5 Battery voltage too low 6 Pulse Power save mode ON 7 Horizontal laser line 8 Vertical laser line 9 Plumbing point AT Plumbing and crossline intersection point on set pulse on set pulse on set CLL 11 CLG 15 PLL 11 6 6 7 8 2 7 8 9 AT 2 5 5 4 4 1 1 5 4 1 7 8 3 ...

Страница 19: ...beyond the self levelling range When locked the pendulum is fixed and the self levelling func tion is deactivated Pulse CLL 11 PLL 11 To be able to detect the laser lines over long distances 15 m or in unfavourable lighting conditions a laser detector can be used The detector is able to locate the laser beam in Pulse mode even over long distances Action PLL 11 CLL 11 CLG 15 not in Lock mode in Loc...

Страница 20: ...4 Operation en GB F I E P NL DK S N FIN J CN ROK PL HR H RUS CZ GR LT LV EST SLO SK M TR Applications PLL 11 on set 1x on set 2x on set 3x on set on set 1x 2x pulse 1x ...

Страница 21: ...5 Operation en GB F I E P NL DK S N FIN J CN ROK PL HR H RUS CZ GR LT LV EST SLO SK M TR Applications CLL 11 on set 1x on set 2x on set 3x on set on set 1x 2x pulse 1x ...

Страница 22: ...6 Operation en GB F I E P NL DK S N FIN J CN ROK PL HR H RUS CZ GR LT LV EST SLO SK M TR Applications CLG 15 on set 1x on set 2x on set 3x on set on set 1x 2x ...

Страница 23: ...7 Operation en GB F I E P NL DK S N FIN J CN ROK PL HR H RUS CZ GR LT LV EST SLO SK M TR How to use the wall mount bracket ...

Страница 24: ...izontal laser line or laser dot and mark the position of the line or the dot on wall A A1 Rotate the instrument by 180 and mark the horizontal laser line or the laser dot in exactly the same way on wall B B1 Then place the instrument at the same elevation as close as possible to wall A and again mark the horizontal laser line or the laser dot on wall A A2 Rotate the instrument by 180 again and mar...

Страница 25: ... difference does not exceed 3 mm then the CLL 11 PLL 11 CLG 15 is within tolerance Checking the accuracy of the vertical line Place the Lock switch 3 in the Unlocked position As reference use a plumb bob and attach it as close as possible to an approx 3 m high wall Position the instrument at a distance of approx 1 5 m from the wall at an elevation of approx 1 5 m Direct the instrument at the wall ...

Страница 26: ...hat it points in the opposite direction 2 to direction 1 Adjust the instrument so that the laser beam hits point A1 exactly If point B2 is no further than 2 mm away from point B1 then the PLL 11 is within tolerance Should your CLL 11 PLL 11 CLG 15 be outside of the specified tolerance please contact an authorised dealership of Würth Display notices Falling below or exceeding the permissible temper...

Страница 27: ...eck the levelling accuracy of the instrument regularly Transport To safely transport the instrument set the Lock switch 3 to Locked Warranty For this Würth tool we provide a warranty in accordance with statutory country specific regulations from the date of purchase proof of purchase by invoice or delivery note Damage that has occurred will be corrected by replacement or repair Damage caused by no...

Страница 28: ...orizontal line 5 m 1 5 mm 1 16 Vertical accuracy 3 m 10 ft line length 0 75 mm 1 32 1 5 mm 1 16 Beam divergence 180 Number of laser dots 4 Number of laser lines 2 Beam direction vertical horizontal up down right left vertical horizontal vertical horizontal Laser type 635 nm laser class II 515 520 nm laser class II Batteries Type Typ AA 4 x 1 5 V Protection class spray water dust IP 54 Operating te...

Страница 29: ...izontal and vertical laser lines and laser dots Prohibited use Using the product without instruction Using outside the stated limits Deactivation of safety systems and removal of explanatory and hazard labels Opening of the equipment by using tools screwdri vers etc as far as not specifically permitted for certain cases Carrying out modification or conversion of the product Deliberate dazzling of ...

Страница 30: ... Refer to section Checking the accuracy m WARNING Flat batteries must not be disposed of with household waste Care for the environment and take them to the collection points provided in accordance with national or local regulations The product must not be disposed of with the household waste Dispose of the product appropriately in accordance with the national regulations in force in your country A...

Страница 31: ...mmunications However there is no guarantee that interference will not occur in a particular installation If this equipment does cause harmful interference to radio or television reception which can be determined by turning the equipment off and on the user is encour aged to try to correct the interference by one or more of the following measures Reorient or relocate the receiving antenna Increase ...

Страница 32: ...ct it towards other people unnecessarily Eye protection is normally afforded by aversion responses including the blink reflex m WARNING Looking directly into the beam with optical aids e g binoculars telescopes can be hazardous m CAUTION Looking into the laser beam may be hazardous to the eyes CLL 11 PLL 11 CLG 15 CLL 11 PLL 11 CLG 15 Wavelength 635 nm 515 nm Maximum radiant output power for class...

Страница 33: ...17 Safety instructions en GB F I E P NL DK S N FIN J CN ROK PL HR H RUS CZ GR LT LV EST SLO SK M TR Labelling CLG 15 CLG 15 Art 5709 300 040 CLL 11 Art 5709 300 020 PLL 11 Art 5709 300 220 ...

Отзывы: