8
Setting the Square Drive for Operation:
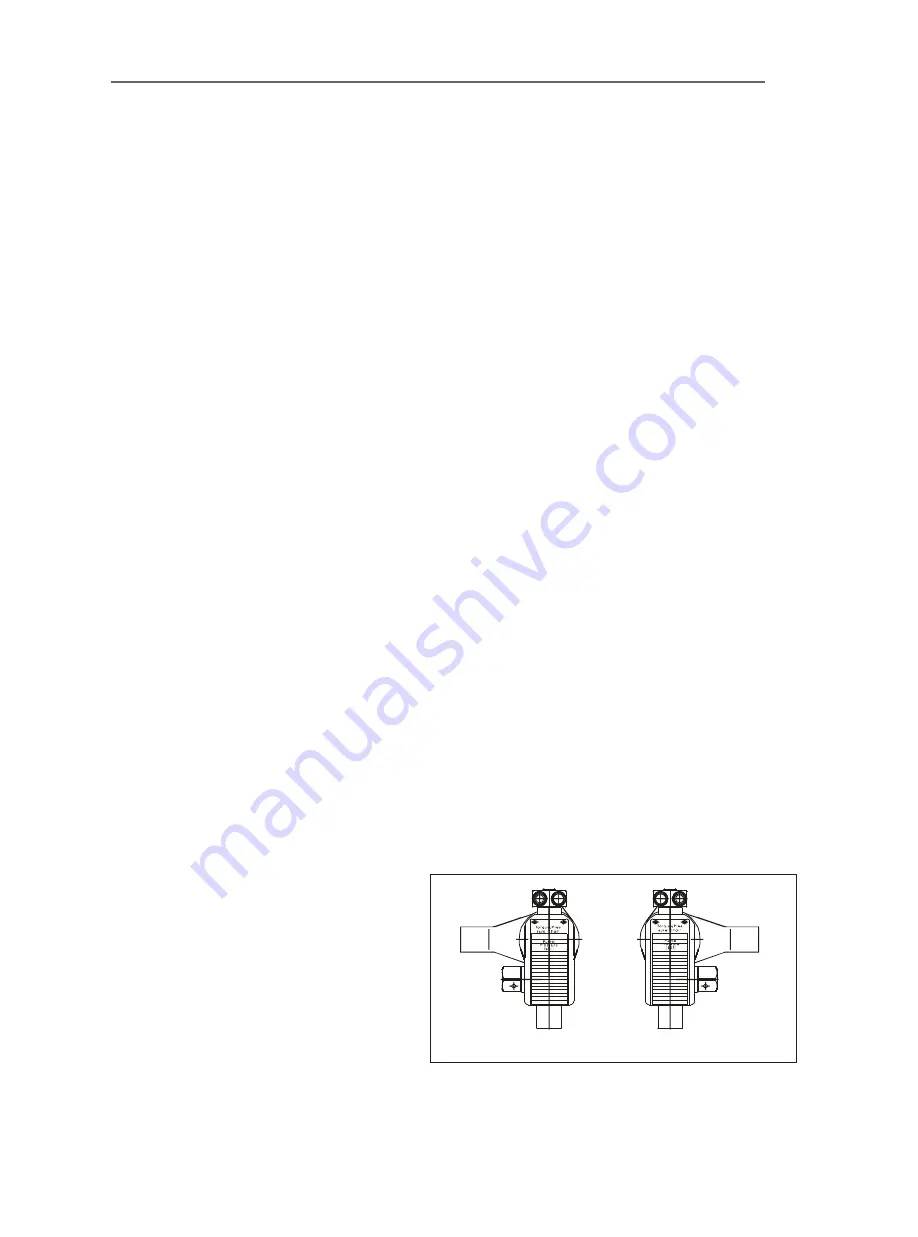
The position of the square drive when looking at the shroud will determine if the
hydraulic torque wrench is set to loosen or tighten
.
▲ When the square drive extends
to the LEFT when looking at the
shroud, the hydraulic torque
wrench is set to loosen.
▲ When the square drive extends
to the RIGHT, the hydraulic
torque wrench is set to tighten.
LEFT IS LOOSE.
RIGHT IS TIGHT.
.
Figure 4
Operating For ATWS Series
Before every operating, always read and follow the operation instructions.
Applying the Hydraulic Torque Wrench
ATWS
Series
Hydraulic Torque Wrench
loosening
tightening
1. Place the socke t on the nut .
2. Ensure it is the correct size and fully enga.g e d
3. Remove sock et from n ut.
4. Atta ch the socke t to the square driv e and place it on the nut.
5. Cycle the hydraulic torque wrenc h.
6. Position the reaction surface against an adjacent nut, flange or solid system
component.
7. Make certain that there is clearance for the hydraulic hos e assembly, swivels and
couplings.
8. Do not allow the tool to react against the hydraulic hos e asse
mbly, swivels or
couplings .
9. Depress the remote control advance button to turn the square drive.
10.Check to make sure all body parts are safely out of harm’s way before applying
pressure to the hydraulic wrench .
a. The tool is very powerful and can cause physical h a rm so be careful.
11.The nut will begin to tur n when you apply hydraulic pressure to the hydraulic
torque wrench and the reaction surface moves against the reactio n point.
12.Once the piston reaches the end of its stroke, release the remote control button
and the tool will automatically retract the pisto n.
13.The operator will hear an audible “clic k”.
a. Each “advance and retract” is considered one cy cle.
14.Continue cycling the hydraulic torque wrench until it “stalls” and the preset
PSI/ Torque has been attain. ed.
15.Cycle the tool one last time to ensure the correct torque is applied.


