For Internal Use: FI.WR.INS.036_WKIN00126_MULTI_1000_2Dr_WALL_ShallowBASE_Rev4.indd
WALL/SHALLOW
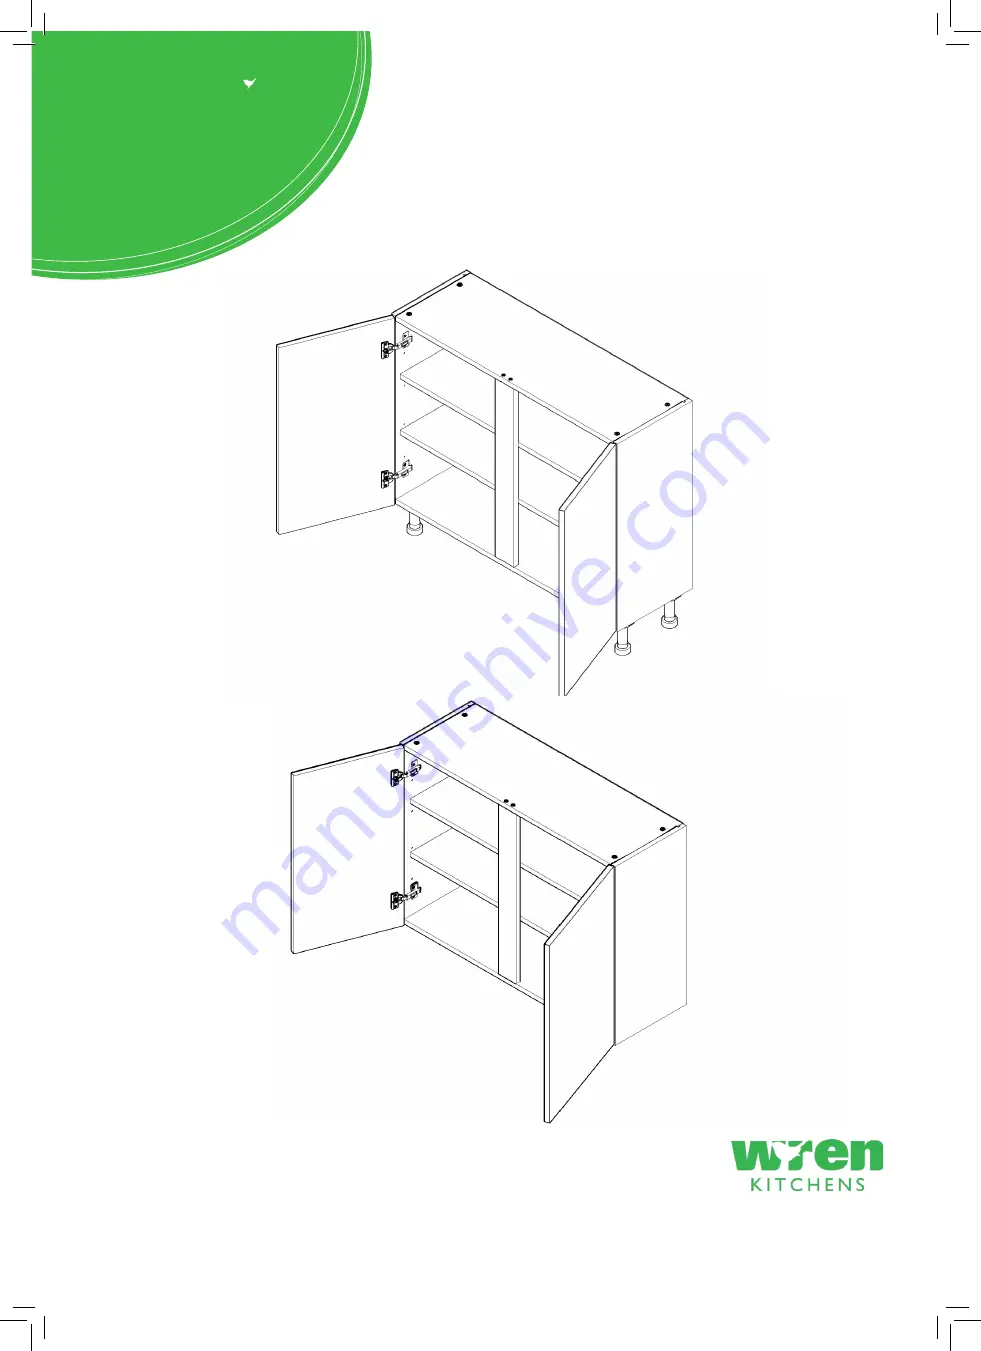
BASE UNIT
1000WALL/SHALLOW BASE
Assembly Guide
1000 Wall
1000 BaseShallow
Страница 1: ...For Internal Use FI WR INS 036_WKIN00126_MULTI_1000_2Dr_WALL_ShallowBASE_Rev4 indd WALL SHALLOW BASE UNIT 1000 WALL SHALLOW BASE Assembly Guide 1000 Wall 1000 Base Shallow...
Страница 2: ...t x2 Inc Screws F x8 Wooden Dowel REQUIRED TOOLS NOT to be used with CAM DOWEL CAM LOCK G x8 Cam Dowel Expanding H x8 Cam Lock K x4 30mm Screw P x4 45mm Screw L x8 15mm Screw S x4 20mm Screw M x4 Cove...
Страница 3: ...4 Slide panel A into the groove of panels B and x 2 C Step 5 Insert cam lock H Hand tighten all cam locks H this will expand the cam dowels G and tighten the unit together NB All Cam Locks H are to b...
Страница 4: ...sure panel A is seated into the groove of panel B Step 9 Insert cam lock H Hand tighten all cam locks H this will expand the cam dowels G and tighten the unit together NB All Cam Locks H are to be pos...
Страница 5: ...panels B in locations shown using 4 x screws L Hinge side to be mounted in accordance to customer kitchen plan Step 11 Slide the back panel clips T into the groove of both panels B A The back panel c...
Страница 6: ...ep 14 Secure Corner Gussets to the bottom left and right hand side of the wall unit using 4 x 15mm screws L per plate L L L L Detail B Pilot hole M Detail B Step 15 Drill a small pilot hole through th...
Страница 7: ...iate fixings for wall construction are used Step 17 Hang the cabinet using the brackets to hook onto the plate as shown Step 18 Using points a b c adjust the Cabinet to suit Step 19 Screw into any sid...
Страница 8: ...hrough the centre of the Corner Gussets Use this hole at the end of the process to screw through and into the wall Cover the screw heads using the cover caps M provided Screws for fixing to walls are...
Страница 9: ...e rotated as shown so that part of it is supporting the end panels B Step 24 Push leg firmly down into leg base Adjust legs to 155mm before turning carcass upright Once in situ level accordingly B C L...
Страница 10: ...ithin the hinges Step 27 Attach the door to unit where required To attach door clip hinge onto hinge plate and click to secure Step 29 Fit cover caps to hinge Adjust Soft Close to suit Step 28 Adjust...
Страница 11: ......
Страница 12: ......