Assembly Steps
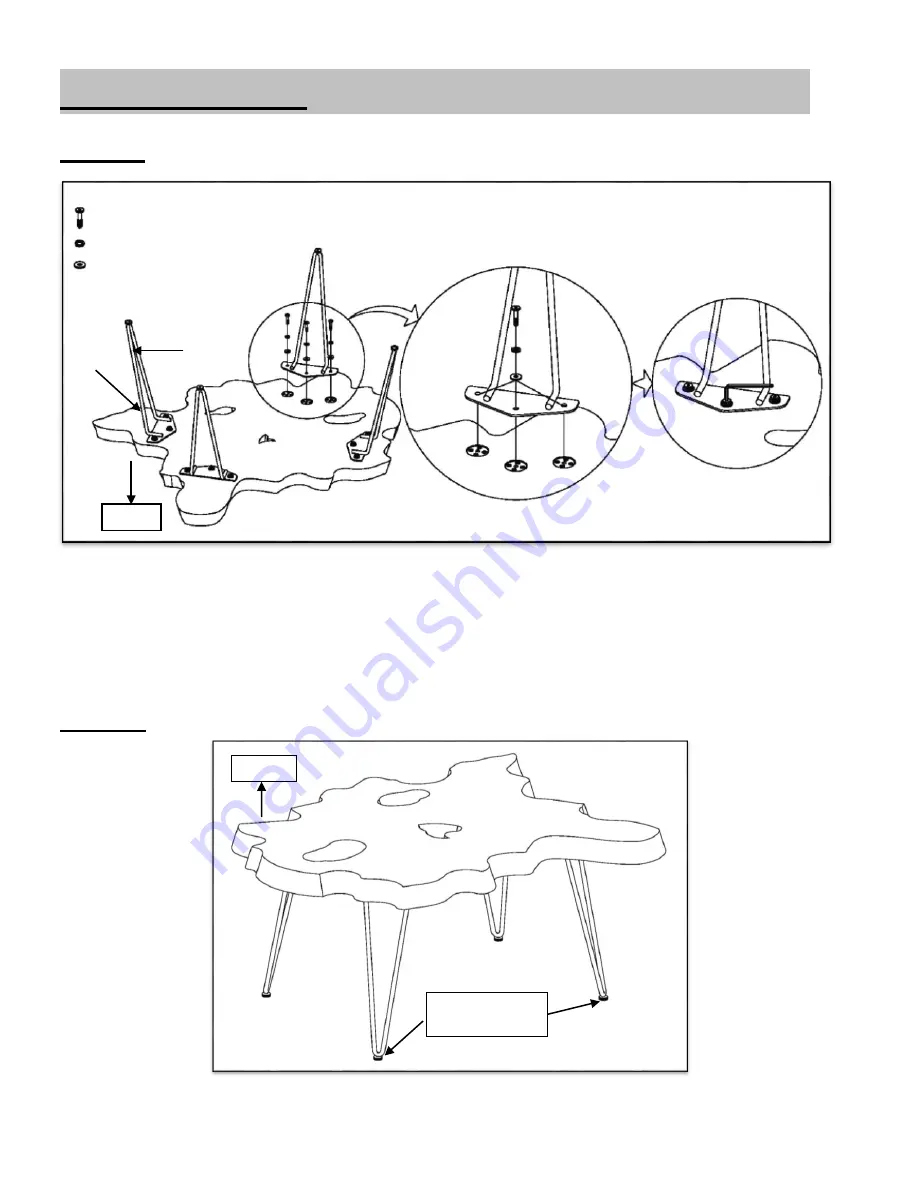
Step 1
hardware in the order as illustrated. Repeat the process for the other Leg (B).
-
Engage all bolts by hand first, then fully tighten all Allen Bolts (H-1) with the supplied Allen Key (T-1).
-
Using a second person to assist you, carefully turn the table assembly upright.
Step 2
-
Check that all bolts have been fully tightened. Assembly is now complete and the product is ready for use.
-
NOTE: Levelers on the bottom of Legs (B) can be used for additional adjustment if needed.
Page 4
TOP
ADJUSTABLE
LEVELERS
(H-1) Allen Bolt x 12
(H-3) Spring Washer x 12
(H-2) Flat Washer x 12
H1
H2
A
B
T1
H3
TOP
-
Lay the Table
Top
(A) upside down on a non-marring surface (packing foam).
-
Align holes in the
bracket
on Legs (B)
with corresponding holes on the bottom of Table Top (A).
-
Secure each Leg (B) using 3 Allen Bolts (H-1), Spring Washers (H-3) and Flat Washers (H-2), stacking the


