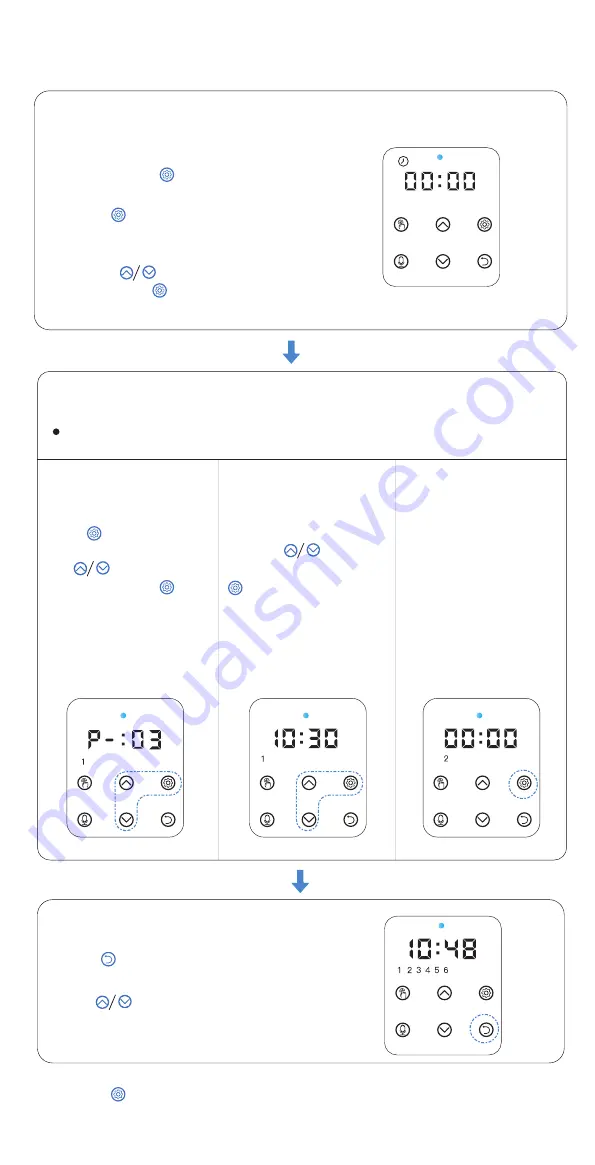
Press the to set
every single digit then press
button to save
2) Press button to set current time, the
Clock Icon flashes which indicates it enters
setting mode
3) Use the button to set the current
time, then press to save
PROGRAM SETTING:
STEP 1
—Current Time Setting
STEP 2
—Meals, Time & Portions Setting
STEP 2.1
STEP 2.2
Pay attention to the 24-hour format
1) Press and hold button for 3s to unlock
other buttons and screen (fig.01)
NOTES:
Enter meals setting automatically after finish the clock setting
Press button to start
setting the first meal,press
the button to set
portion, then press button
to save
Notes:
Icon 1 flashes
STEP 3
— Ready
Press button back to interface showing
current time and meals number.
Press button to check the meal plan then
press icon for 3s to change if needed
TIP:
Press setting button to save after every step setup and jump to next step
STEP 2.3
Move to the second meal
setting after the first finished
Repeat the step 2.1& 2.2
to set the meals, portions
and time of other meals if
needed.
The feeder supports up to
6 scheduled meals per
day
4
fig.(01)
Move to Time setting after
meal setting finished


