


8
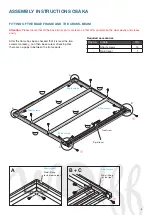
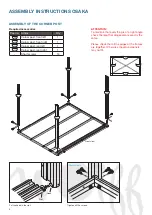
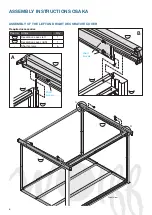
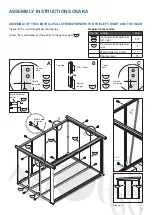
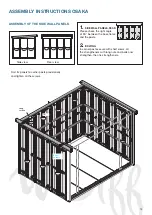
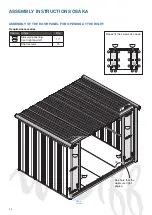
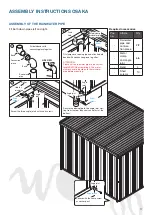
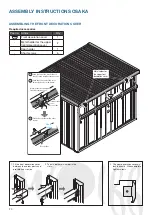
Assembly instructions osAKA
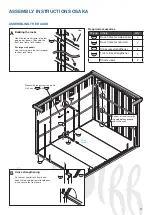
Assembly oF tHe centrAl WAll strenGtHeners in Front
required accessories
Pce no. Article
Qty
Central wall strengthener,
front
2
-
Long screws
2
-
Short screws
2
-
Nut
2
10
Short
screws
Long
screws
Nut
Long
screws
Nut
Nut
Long
screws
A
upper Attachement
Short
screws
b
lower Attachement
The base of the strengthener is pressed and
secured into the third hole of the corner post.
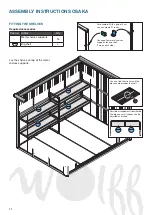
please watch the
hook direction!
left
right
Counting from corner post use third hole.
threaded hole for door panel
threaded hole for the central wall
strengthener in front
19
10
10
10
10
Attention!
Don‘t forget to
secure the top of the
strengthener.
For a door opening left: The strengthener is
turned over and is secured on the baseframe
in the third hole from left.
01


