background image

Setting up the WMS 100 Image 

Installing the Software 

Before you begin, make sure the hardware is correctly set up and the WLAN card has 

established the connection to the WMS 100 Receiver device. Follow the steps here. 

1.  Insert the disc into the disc drive. The installation program will automatically open 

and guide you through the process. 

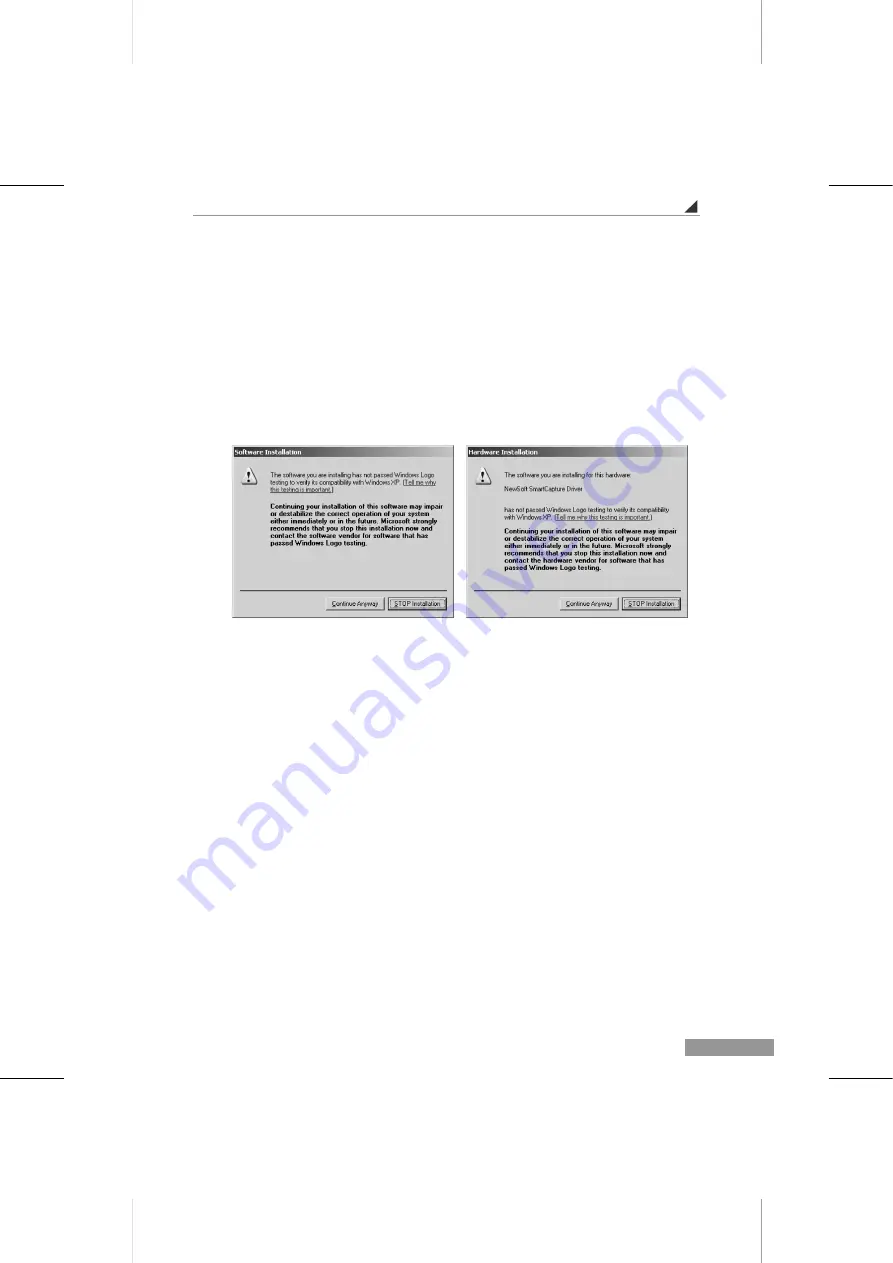
2.  You may see a dialog box like the ones shown below. Click 

Continue Anyway

 to 

proceed. 


3. Click 

Finish

 to complete the installation. 

Presto! WMS is now ready to use. 


E-7

Содержание 100 Image

Страница 1: ...W WM MS S 1 10 00 0 I Im ma ag ge e W Wi ir re el le es ss s M Mu ul lt ti im me ed di ia a S Sy ys st te em m Q Qu ui ic ck k R Re ef fe er re en nc ce e ...

Страница 2: ...North America http www newsoftinc com licensing wms English UK http uk newsoft eu com licensing wms French http fr newsoft eu com licensing wms German http de newsoft eu com licensing wms Italian http it newsoft eu com licensing wms Traditional Chinese http www newsoft com tw licensing wms Simplified Chinese http www newsoft com cn licensing wms 509200 02 07 W E 123005 02 USA www newsoftinc com Ta...

Страница 3: ...king the Packing List 2 Setting up the WMS 100 Image 3 Connecting the Device 3 Installing the Software 7 Starting a WMS Presentation 8 Setting up and Updating the Firmware 9 Connecting to the Firmware 9 Adjusting the Settings on the Firmware 10 Downloading the Installation Program 12 iii ...

Страница 4: ...C Caution To assure continued compliance any changes or modifications not expressly approved by the party responsible for compliance could void the user s authority to operate this equipment Example use only shielded interface cables when connecting to computer or peripheral devices FCC Radiation Exposure Statement This equipment complies with FCC RF radiation exposure limits set forth for an unco...

Страница 5: ...00 Receiver device with the proper current and voltage range System Requirements Here is a list of requirements and suggested capabilities you should have in order to make the best use of Presto WMS For Presto WMS software Intel Pentium 4 processor 800 MHz or faster Windows 2000 or XP with DirectX 8 1 or later A minimum of 128 MB RAM 1MB of available hard disk space required for installation A dis...

Страница 6: ...WMS 100 Image Checking the Packing List When you open your WMS 100 Image product package you should find the following items WMS 100 Receiver device Power adaptor Software CD Quick guide E 2 ...

Страница 7: ...the WMS 100 Image Now that all the equipment is accounted for we can plug it all in and get it working for you Connecting the Device Make sure you have not opened the WMS program before you connect your device For a Wireless Presentation E 3 ...

Страница 8: ...2 Plug the power adaptor into the DC IN port It will be powered immediately To switch it off click the power button 3 Start Presto WMS click Settings and select the WLAN card If you want to reset the WMS 100 Receiver device to the default settings close the Presto WMS program and depress the reset button for five seconds E 4 ...

Страница 9: ...Setting up the WMS 100 Image For a LAN Presentation E 5 ...

Страница 10: ...tor and then plug the other end into the projector or a monitor 3 Plug the power adaptor into the DC IN port It will be powered immediately To switch it off click the power button 4 Start Presto WMS click Settings and select the LAN card If you want to reset the WMS 100 Receiver device to the default settings close the Presto WMS program and depress the reset button for five seconds E 6 ...

Страница 11: ...e connection to the WMS 100 Receiver device Follow the steps here 1 Insert the disc into the disc drive The installation program will automatically open and guide you through the process 2 You may see a dialog box like the ones shown below Click Continue Anyway to proceed 3 Click Finish to complete the installation Presto WMS is now ready to use E 7 ...

Страница 12: ...l will open when the program is started Here are the controls and an explanation of the available buttons Click the Setup button to select the network interface card Click the play button to broadcast the desktop image Click the Stop button to end the transmission Click the Link button to connect to the NewSoft website For more details of the Presto WMS please refer to the user guide E 8 ...

Страница 13: ...MS 100 Receiver Connecting to the Firmware 1 Insert an Ethernet cable into the network connector of the WMS 100 Receiver device and then plug the other end into the computer 2 From the Windows Start menu point to Settings and click Control Panel 3 Double click Network and Dial up Connector 4 Point to Local Area connection right click and select Properties 5 Select TCP IP and change the settings fo...

Страница 14: ...he WMS 100 Receiver device 7 The log in screen for the firmware will appear Type admin as the user name and 1234 as the password and then click OK Adjusting the Settings on the Firmware 1 The maintenance screen will open From this screen you can check the status or change the LAN WLAN User name and Password settings E 10 ...

Страница 15: ...e WLAN card standard by selecting 802 11A 802 11B or 802 11G Note that for this area you can select multiple options If you select more than one option the system will select the suitable WLAN card for your computer 3 To update the firmware select Maintenance and click Update Firmware E 11 ...

Страница 16: ...tallation program can be installed from the maintenance screen 1 Click Download WMS 2 Follow the instruction on the screen and save the files to your computer 3 Click setup exe to install the program For more details please refer the Installing the Software section E 12 ...

Отзывы: