Wizard Electronics ON-501HD Скачать руководство пользователя страница 8


One touch record

audio&video


4 types video record modes : 

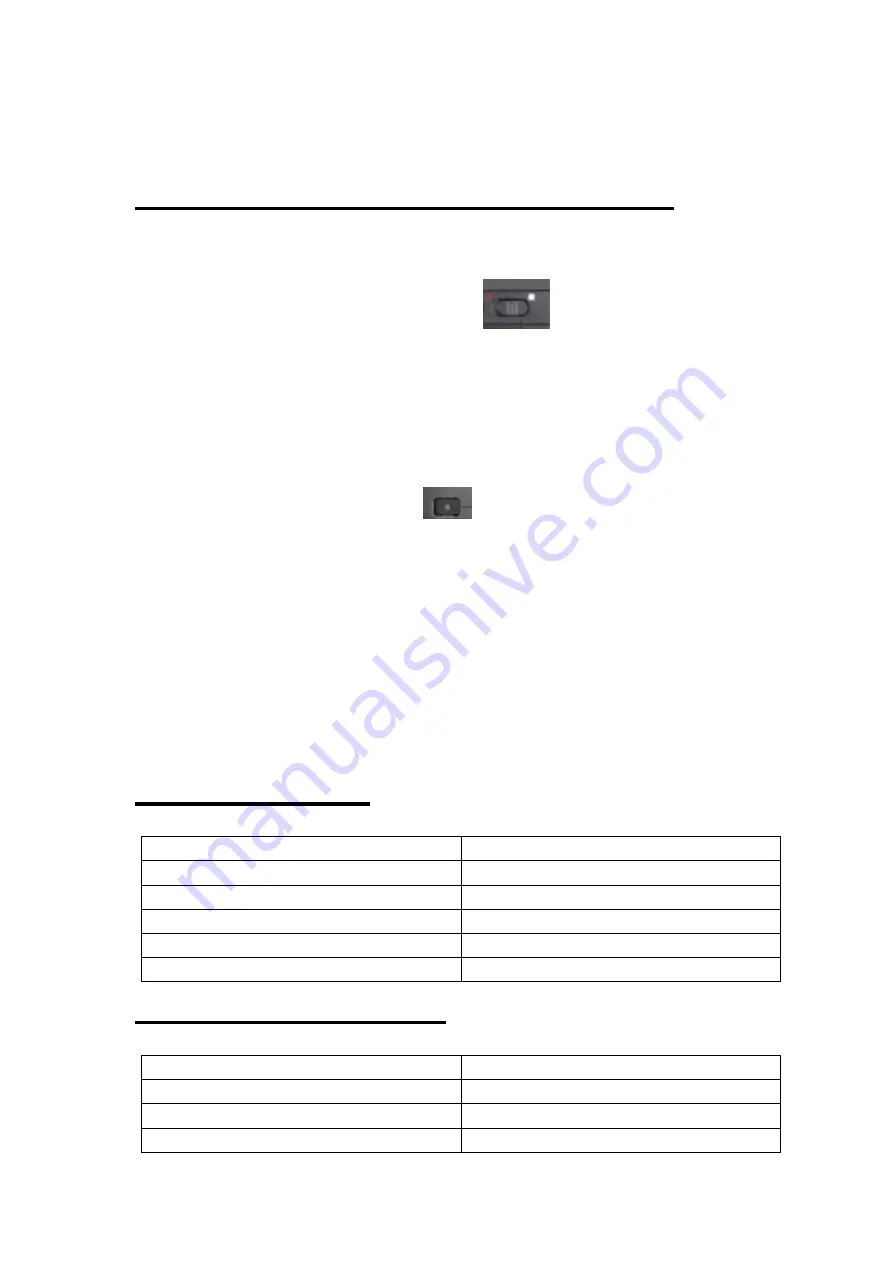
1.DVR power on and switch the 

  auto record key to 

left side , video record start . switch to right side, video stop 

recording and save ( when you switch to left side , when 

you power on , dvr will auto video record ) 

2.DVR power on and click 

  Rec. Button, video record 

start , click again , video stop recording and save .

do not 

work when the DVR lock ) 

3.DVR power on and click remote record button , video 

start record, click again , video stop and save .   

4.Use the camera record button   

LED indicator : 

Vibration indicator : 

Mode 

Led indicator 

Recording video   

Red-flashing 

Photo tacking   

Red-flashing one time 

Full charged 

Indicator light off 

No signal   

Blue-off   


Mode 

Vibration indicator 

DVR power on / off 

Vibration 2 s 

Video record start   

Vibration 1 time 

Video record stop 

Vibration 3 times 

Содержание ON-501HD

Страница 1: ...1 OPERATION MANUAL Mini Digital Video Recorder and Mini IR CCD Camera ROHS CE FCC Operating Instructions Before operating the unit Please read this manual thoroughly and retain it for future reference...

Страница 2: ...ire or shock hazard do not expose the unit to rain or moisture To avoid the potential risk of data loss always copy data to a disk Do not detach or rebuild and repair by yourself Do not knock the prod...

Страница 3: ...M 5M 3M 6 Motion Detection Video Recording Loop Recording Tacking Photo Continuous Shooting Pre Recording 5s 7 Power saving automatic sleep 8 2 4g wireless remote control 1 5 meters 9 Built in in 128...

Страница 4: ...4 Camera 1 Button mini hidden camera 2 Sensor 1 3 Inch 3Mpixels image sensor 3 WDR Picture and Video quality 4 3 7MM 65 degree viewing 5 0 1Lux Low Illumination...

Страница 5: ...ying the part of the mini DVR 1 USB Data 2 Earphone AV Out 3 Screen Unlock 4 Quick Record 5 DC 6 SD Card Slot 7 Rec 8 Picture 9 Up 10 Enter Replay 11 Down 12 Power on off Menu 13 HDMI Video in 14 Batt...

Страница 6: ...6 1 Connect 2 Up 3 Picture 4 Rec 5 Replay Stop Ok 6 Menu 7 Down...

Страница 7: ...7 Identifying the part of the camera 1 Power on 2 Power Off 3 Mic 4 Rec 5 Take Photo...

Страница 8: ...rd start click again video stop recording and save do not work when the DVR lock 3 DVR power on and click remote record button video start record click again video stop and save 4 Use the camera recor...

Страница 9: ...e pre record 5s shows on the bottom left of the screen at the same time Note motion detection need set again when the dvr restart DVR setting menu 1 Photo resolution 16M 12M 5M 3M 2 Video resolution 1...

Страница 10: ...off 15Min 10Min 05Min OFF 11 Frequency 50Hz 60Hz 12 TV standard PAL NTSC LCD 13 2 4G Remoter Set Cancel 14 Default OK Cancel 15 Format OK Cancel 16 Date Time 2013 05 20 08 00 21 24 17 User number Set...

Страница 11: ...will be save Palying back moving images on TV screen When the dvr power on connect the dvr with TV screen via AV output cable Dvr power on open the Dvr menu select TV standard choose PAL NTSC Playing...

Страница 12: ...Accessories DVR Camera...

Страница 13: ...ower Power charging Camera Indicate light off Machine line control camera Connect loose Do connect the line and interface before power on again Vibration unit continuous vibrating Lack Power EMS Memor...

Отзывы: