4
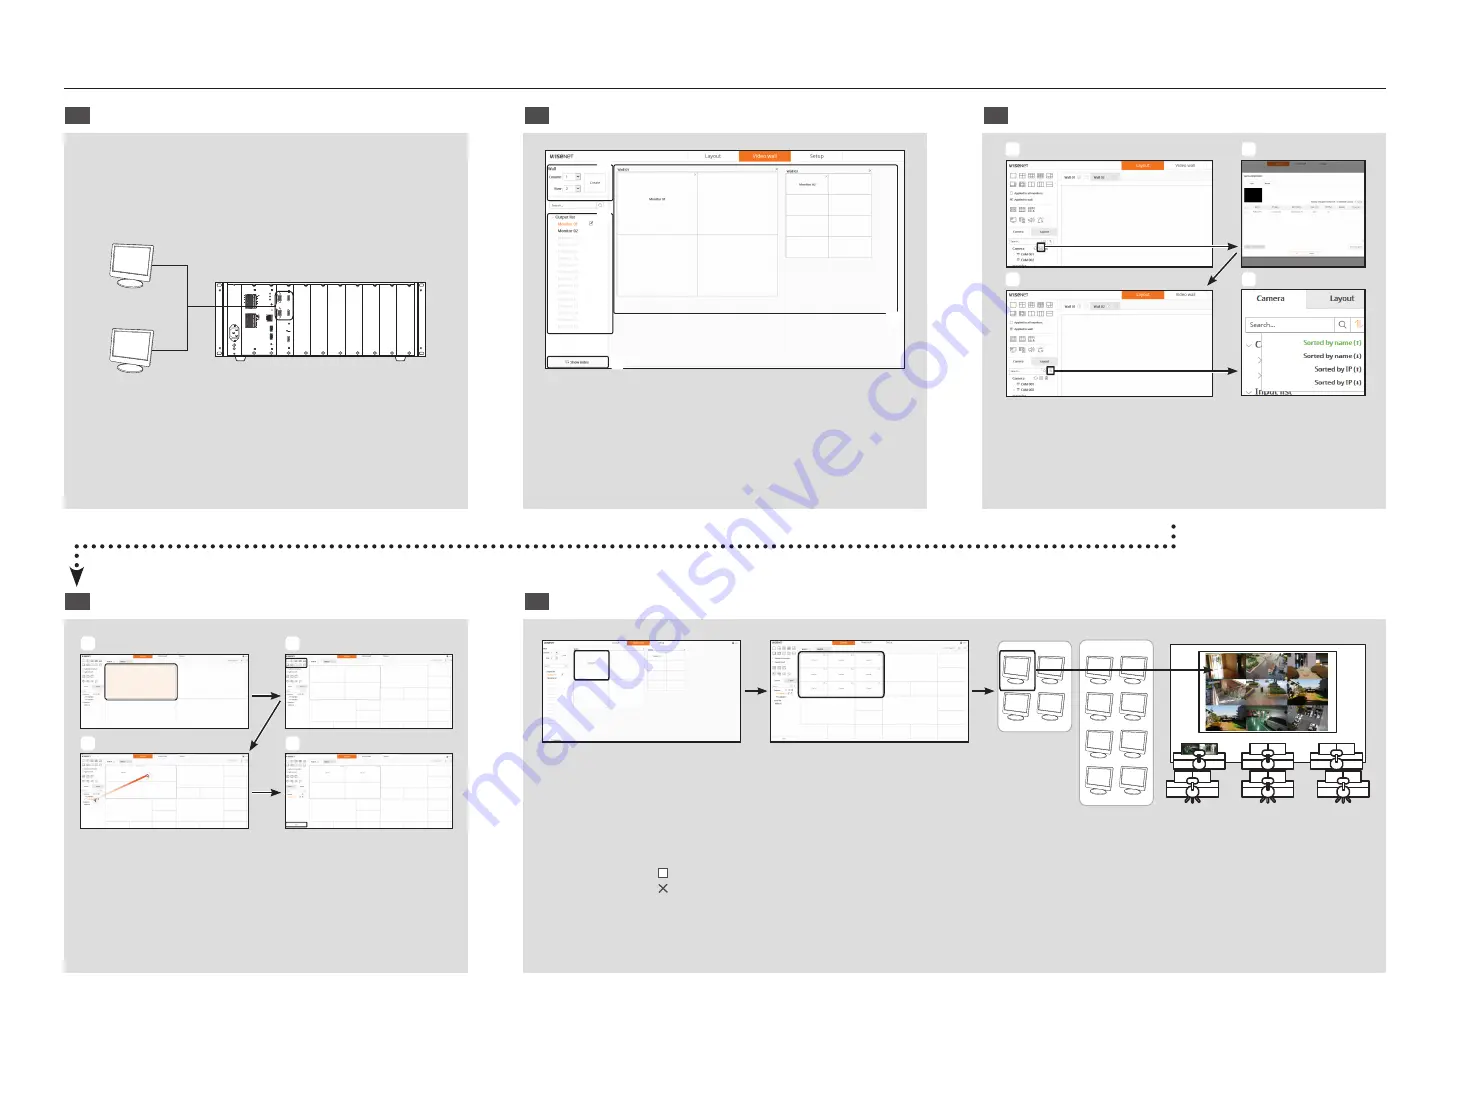
Video wall configuration guide
1
Monitor output for each decoder after the set boots
2
Configure the video walls and allocate monitors.
3
Registering camera
G
RS485
G
1
2
3
4
5
6
7
8
9
10
11
12
13
14
15
16
NO
NO
NO
NO
COM
NO
COM
NO
COM
NO
COM
NO
COM
RESET
COM
COM
COM
NC
G
G
NA
TW
ORK
NE
TWORK
RUN
POWE
R
USB 1
USB 2
AUD
IO
CONSOLE
RESET
CONSOLE
RUN
HDMI 2
HDMI IN
HDMI 1
VGA 2
VGA 1
VIDEO OUT
(VGA/HDMI)
VIDEO OUT
(VGA/HDMI)
a
c
d
b
a
Create video walls.
b
Add video walls (Wall 01 2x2, Wall 02 2x4)
c
Assign monitors
d
Check the actual connected monitor index
(Show index : monitor number check, Hide index : video mode)
a
c
b
d
a
Add a camera
b
Add cameras with automatic/manual registration
c
Select the camera list sort function
d
Sort by name(
)/IP or ascending(
)descending.
4
Setting Video Wall Layout
5
Monitoring by video wall
a
c
b
d
a
Specify the monitor of the corresponding video wall to be
applied by clicking it
b
Select and apply a split mode to the selected monitor (Can
be applied to each monitor)
c
Assign it to the corresponding tile with the mouse in the camera list
d
After saving the layout, add a new layout and repeat steps 1 - 4
Monitor 1
Wall 1
Wall 2
Monitor 2
Monitor 1
Monitor 2
a
Monitor 1 assigned to Wall 01 (2x2)
b
Assign cameras to 3x3 split mode in layout settings
`
When this is [ ] clicked, the video wall is enlarged to full screen.
When this is [ ] clicked, the video wall zoom changes to the original size.
c
3x3 video output on the actual monitor #1


