10_
installation
installation
Please take note of the followings before using this product.
~
Do not use the product outdoor.
~
Do not spill water or liquid in the connection part of the product.
~
Do not impose the system to excessive shock or force.
~
Do not pull out the power plug forcefully.
~
Do not disassemble the product on your own.
~
Do not exceed the rated input/output range.
~
Use a certified power cord only.
~
For the product with an input ground, use a grounded power plug.
BEFORE INSTALLING THE PRODUCT
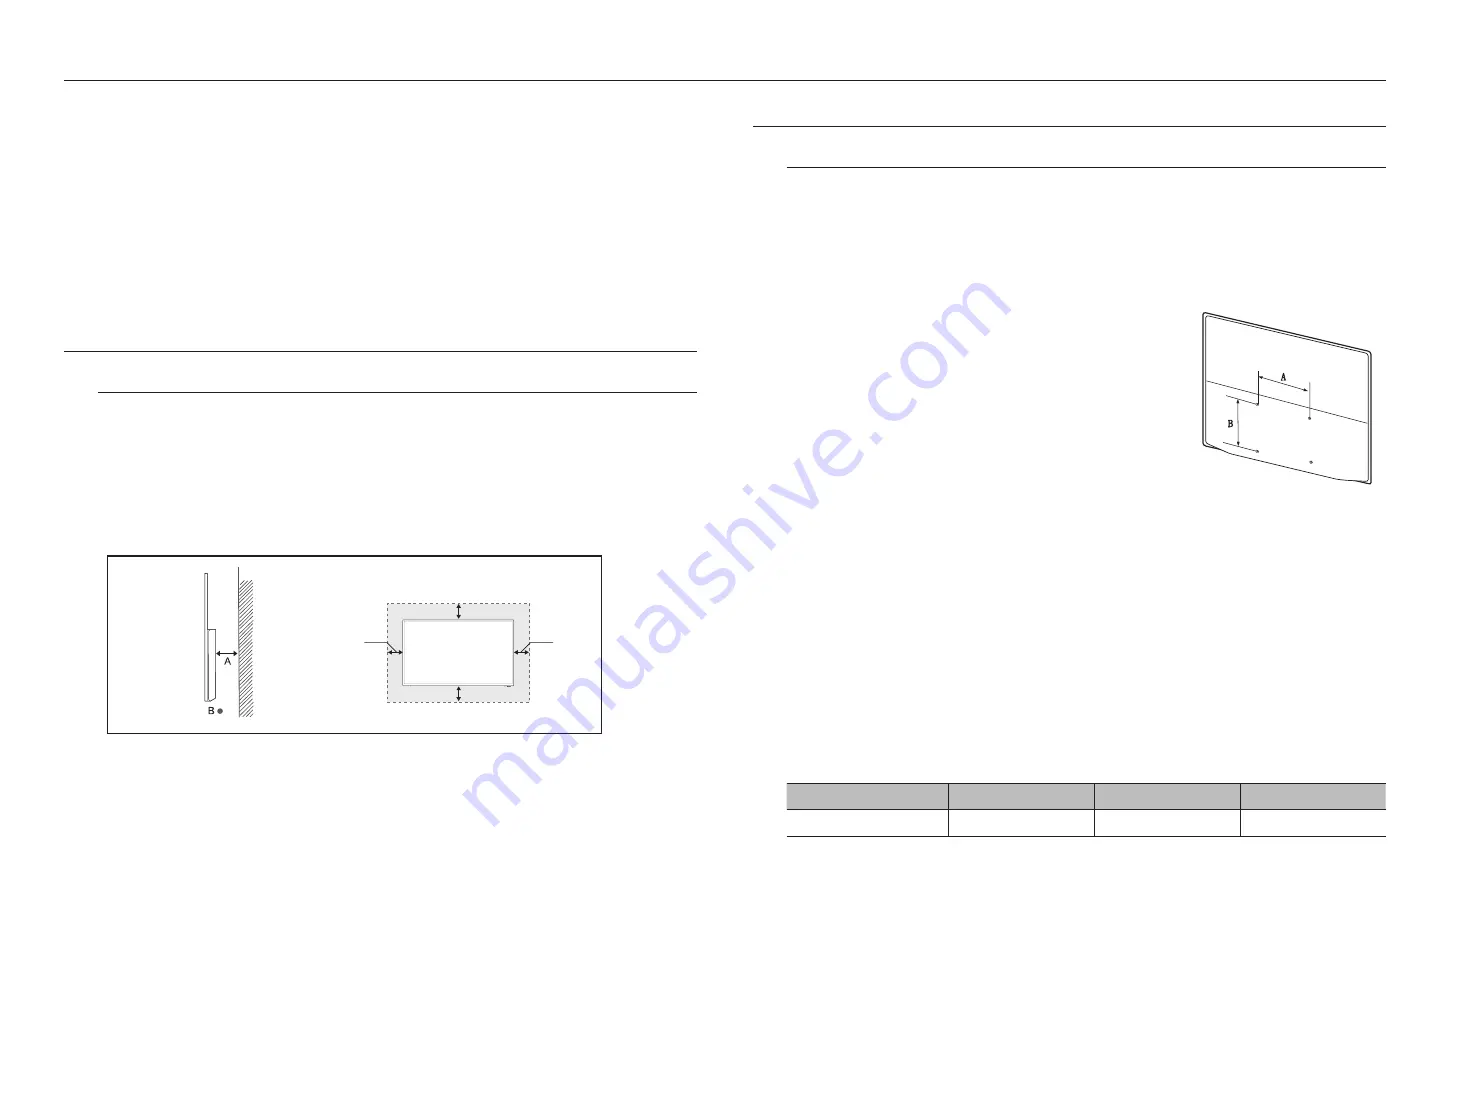
Ventilation requirement
Installing the product in an environment where the air does not circulate well could cause product damage due
to increased temperature. Make sure to secure enough space around the product for proper air ventilation.
Vertical wall mount condition
A.
Minimum 40 mm
B.
Ambient temperature Measuring point <35°C
INSTALLING WALL MOUNT PARTS
Installing Wall Mount Kits
The wall mount kit (sold separately) allows you to hang the product on a wall.
For more information on wall mounting, refer to the owner's manual supplied with the wall mount parts. When
installing the wall mount, seek the help of a technician.
Hanwha Techwin is not responsible for any damage to the product or injury to the user or others caused by any
accident due to a user's attempt to install the product.
Wall Mount Kit Specifications (VESA)
J
`
Install the wall mount kit on a solid wall perpendicular to the floor.
`
Please refer to the nearest store when installing on other materials.
`
Installing on an inclined wall may cause the product to fall, which can
result in serious injury.
`
When using a VESA mount, select a product that can hold 4 times the
weight of the monitor.
~
When you purchase our wall mount kit, you will find a detailed installation guide and all parts required for
assembly.
~
Do not use screws that are longer than the standard dimensions or that do not conform to the VESA
standard screw specifications. Using screws that are too long may damage the inside of the product.
~
For wall mount parts that do not conform to the VESA standard screw specifications, the screw length may
vary depending on the wall mount specifications.
~
Do not over-tighten the screws. The product may be damaged, or may fall, resulting in injury.
Hanwha Techwin is not responsible for any damage to the product or injury to the user or others caused by
any accident due to a user's attempt to install the product.
~
Hanwha Techwin is not responsible for damage to the product or injury to the user caused by using non-
compliant or non-VESA wall mount parts, or by the customer not following the product installation
instructions.
~
When hanging on a wall, two people should always lift the product.
~
The standard dimensions of the wall mount kit are shown in the table below. [Unit: mm]
Model name
VESA dimensions (A * B)
Standard screws
Quantity
SMT-4343
100 x 100 / 400 x 200
M4/L12
4
J
`
Do not install the wall mount kit with the product turned on. This may lead to injury due to electric shock.
10cm
10cm
10cm
10cm
Содержание SMT-4343
Страница 1: ...SMT 4343 SECURITY LED MONITOR User Manual ...
Страница 15: ...English _15 APPENDIX appendix PRODUCT OVERVIEW Unit mm 966 6 560 4 73 5 400 200 100 100 ...
Страница 18: ......


