background image

English ·

 5

Pairing Camera and Monitor   

The units already come paired for your convenience.
The pair button is used to pair additional cameras. Users can assign 

numbers to the cameras. Up to 4 cameras may be paired.
If you have additional camera, pair your camera as follow: 

1. 

Power on the wireless monitor and new camera. 

2. 

Press the "OK" button to make the settings icon appear on the screen.

3. 

Select [          ] icon.

4. 

Select the camera number in the pair/unpair channel list. 

The monitor will search for the new camera when set to pairing mode.  

A countdown clock will appear in the middle of the screen and will start 

counting from 30 to 0.

5. 

Press the [

PAIR

] button located on the rear of the camera.

6. 

If the monitor successfully pairs with the camera within the 30 second 

countdown period, the monitor will automatically switch to display the 

view of the newly paired camera. 

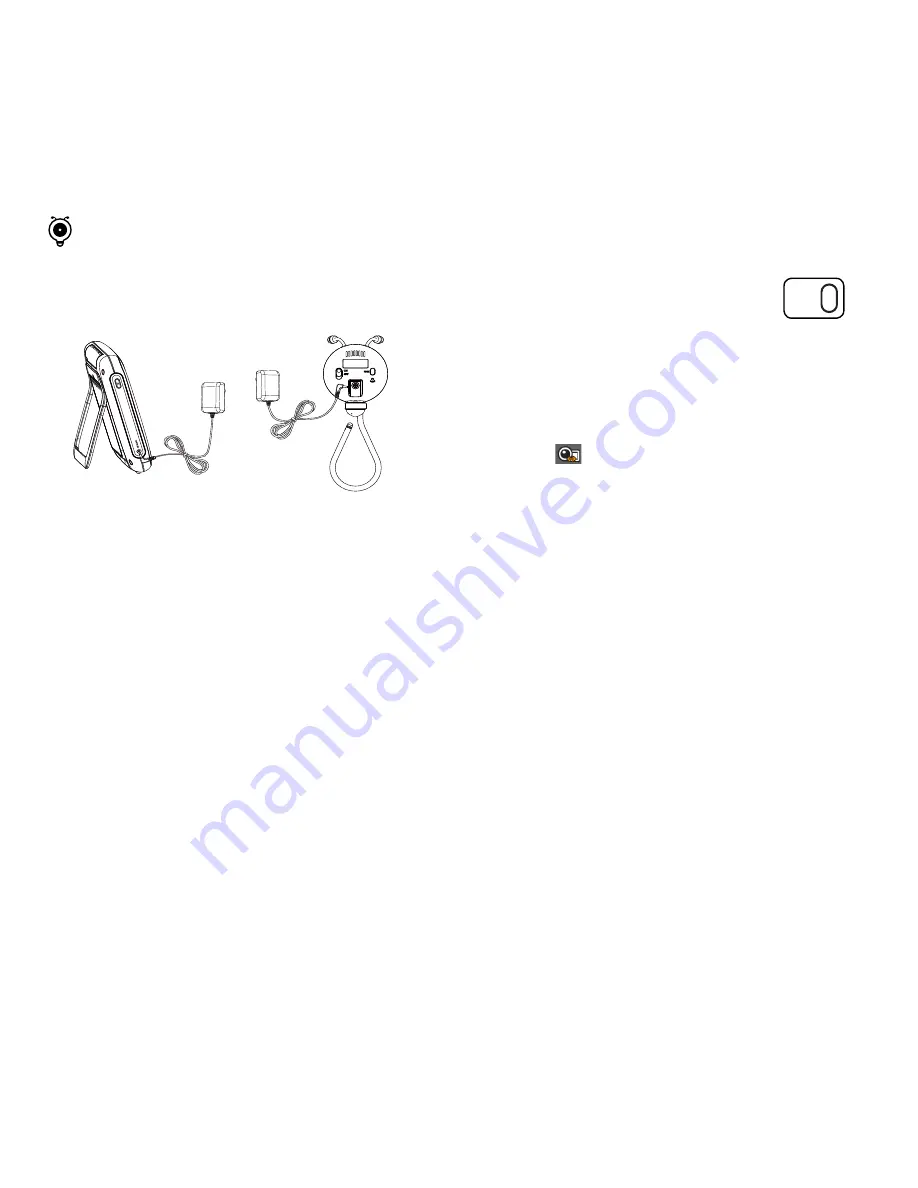
1. 

Fully charge the system before use. Connect the camera to the power 

adapter. Plug the adaptor into an outlet. Camera must be plugged in at 

all times. 

2. 

Push the power button for about 2-3 seconds to turn on the monitor.

3. 

Turn the power switch to "On" to turn on the camera. A red LED 

indicator will illuminate if it is turned on.

Powering Your System

Monitor

Camera

PAIR


n


`

You can use the monitor while it is charging.


`

Full Charging Time for Monitor: 5 - 6 hours.

Fully charge the monitor's battery before initial use and recharge the monitor 

as needed.

Getting Started

Содержание BabyView EcoFlex SEB-102CRW

Страница 1: ......

Страница 2: ...tered The name of this product and other trademarks mentioned in this manual are the registered trademark of their respective company Restriction Copyright of this document is reserved Under no circumstances this document shall be reproduced distributed or changed partially or wholly without formal authorization Disclaimer Hanwha Techwin makes the best to verify the integrity and correctness of th...

Страница 3: ...era or cords within 3 feet of crib or playpen Never use extension cords with AC Adapters Only use the AC Adapters provided Some adult assembly or installation required This product contains small parts that may cause choking Keep small parts away from children This product is NOT intended to replace proper supervision of children You MUST check your child s activity regularly as this product will ...

Страница 4: ...y 1 Antenna 2 Power On Off 3 Sound Indicator LED 4 Lullaby Button 5 DC 5V Power Input 16 Battery 17 Temperature Sensor 18 Low Light Sensor 19 Lens 20 IR LEDs 21 Microphone Camera 22 Speaker 23 Power Slide Switch 24 DC 5V Power Input 25 Pair Button 26 Reset Button 27 Flexible Stand 6 Talk Button 7 Status LED 8 ECO LED 9 Mode Button 10 Microphone Monitor 11 Color TFT4 3 LCD 12 Direction Button 13 Me...

Страница 5: ... from 30 to 0 5 Press the PAIR button located on the rear of the camera 6 If the monitor successfully pairs with the camera within the 30 second countdown period the monitor will automatically switch to display the view of the newly paired camera 1 Fully charge the system before use Connect the camera to the power adapter Plug the adaptor into an outlet Camera must be plugged in at all times 2 Pus...

Страница 6: ... Mode Indicates when the camera is in Eco Mode Video Mode Indicates when Video Mode is On Audio Mode Indicates when Audio Mode is On g Night Vision Indicates when Night Vision is On h Zoom Mode Indicates Zoom Mode is on Zoom Level x1 x2 The camera s will zoom in and out sequentially when you press and hold the OK button i Audio Muted Indicates the monitor s speaker is muted j Battery Power Level F...

Страница 7: ... to display the camera s view in full screen Monitor Mode button Press to change between modes VOX ECO VIDEO AUDIO Mode Selection select the desired mode then the monitor will switch to the chosen mode Power button 1 Press and hold down for 2 3 seconds to turn ON OFF the monitor 2 When in On Screen Display OSD mode press the power button briefly to return to the previous interface Lullaby button S...

Страница 8: ...the same location position where it will be permanently installed and the monitor is placed in the location where it will be used most of the time Installation Warnings Aim the camera s to best optimize the viewing area Select a location for the camera that provides a clear view of the area you want to monitor which is free from dust and is not in line of sight to a strong light source or direct s...

Страница 9: ...by monitor displays the Out of Range message move the monitor closer to the camera n n Low battery will cause the supply current to become unstable and will affect the quality of the video audio Please charge the battery fully for superior video Trouble Shooting Product Specifications Item Details System General Operating Frequency Range 2400 MHz 2483 5 MHz Type of Spread Spectrum TX FHSS Type of ...

Страница 10: ...electronic accessories should not be mixed with other commercial wastes for disposal Correct disposal of batteries in this product Applicable in the European Union and other European countries with separate battery return systems This marking on the battery manual or packaging indicates that the batteries in this product should not be disposed of with other household waste at the end of their work...

Страница 11: ...English 11 MEMO ...

Страница 12: ......

Отзывы: