15
© 2014 Wirepath Surveillance
WPS-750-DOM-IPH Installation Manual
8.2.
IP Installer-Configuring Camera IP Settings
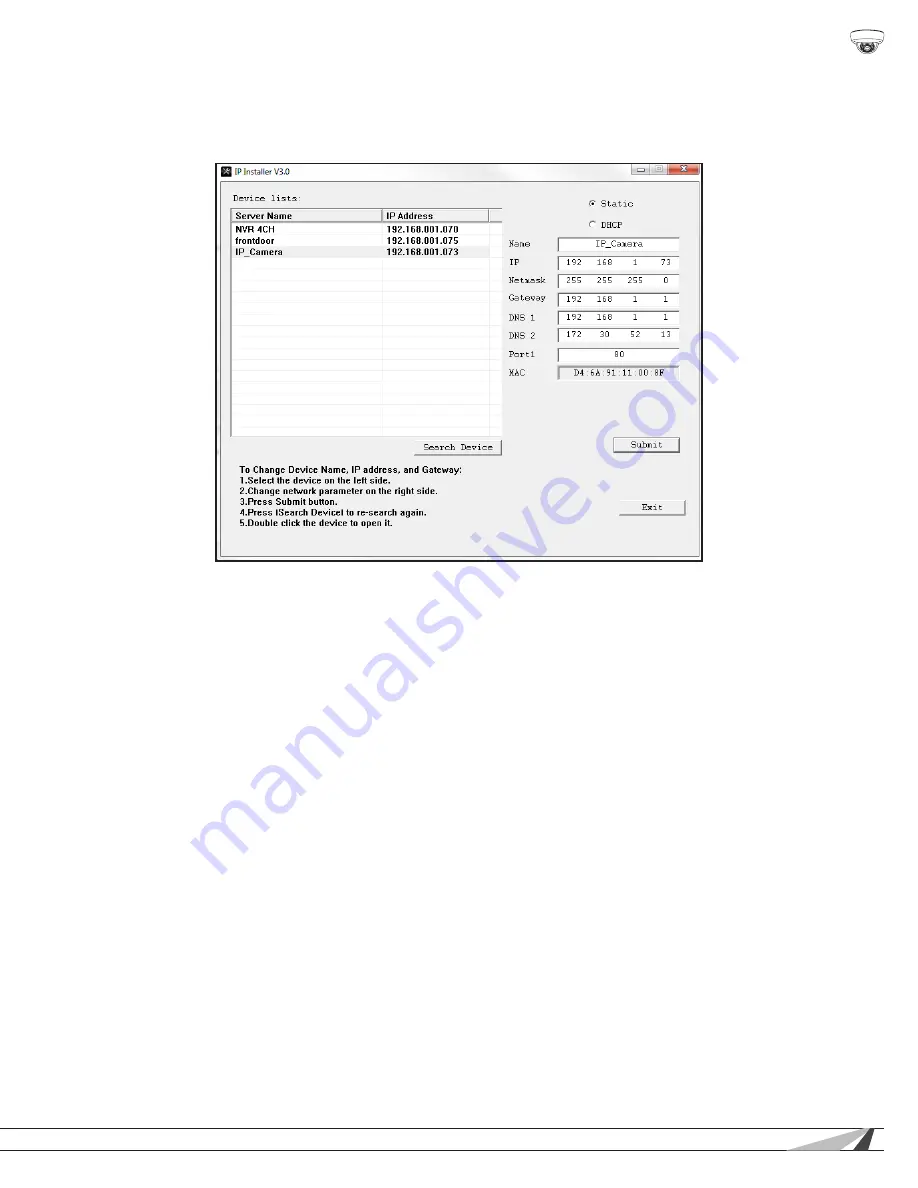
By default, the camera will receive a DHCP IP address. This should be changed to a reserved or static IP address so that the
camera remains accessible after setup. Obtain the settings below from the network administrator before installation.
Consult with the router manufacturer for instructions to correctly set up a reserved or static IP address.
A. Open the IP Installer and single-click on a camera in the Device List. Its current settings will appear in the right column fields.
B. Select
“Static”
at the top of the right column. Network settings may now be modified.
C. Assign a name to the camera based on the scene or location (limited to 31 characters) Examples: FrontDoor1, SideDoor...
D. Enter the reserved static IP address for the camera.
E. Enter the Net Mask (usually 255.255.255.0).
F. Enter the default Gateway (found in the router).
G. Enter the DNS 1 address (found in the router).
H. Enter the DNS 2 address (found in the router).
Set DNS 2 “0.0.0.0” if no DNS 2 is set in the router.
I. Enter a unique port number to enable remote Internet access to the camera. Use port numbering that is consistent and easy to
remember. We recommend using 4 digits, “8” followed by the last three numbers of the camera’s IP address.
Examples:
Camera
IP Address
Port
Patio
192.168.1.050
8050
Front Door
192.168.1.100
8051
8.3. Verify Access through the Main Camera Interface
Once the IP address has been set, the camera can be accessed through the web browser. Note that on initial access to each
camera, Active X controls will need to be installed on each PC that is used to access the camera. Continue to the next section for
web browser access and setup.


