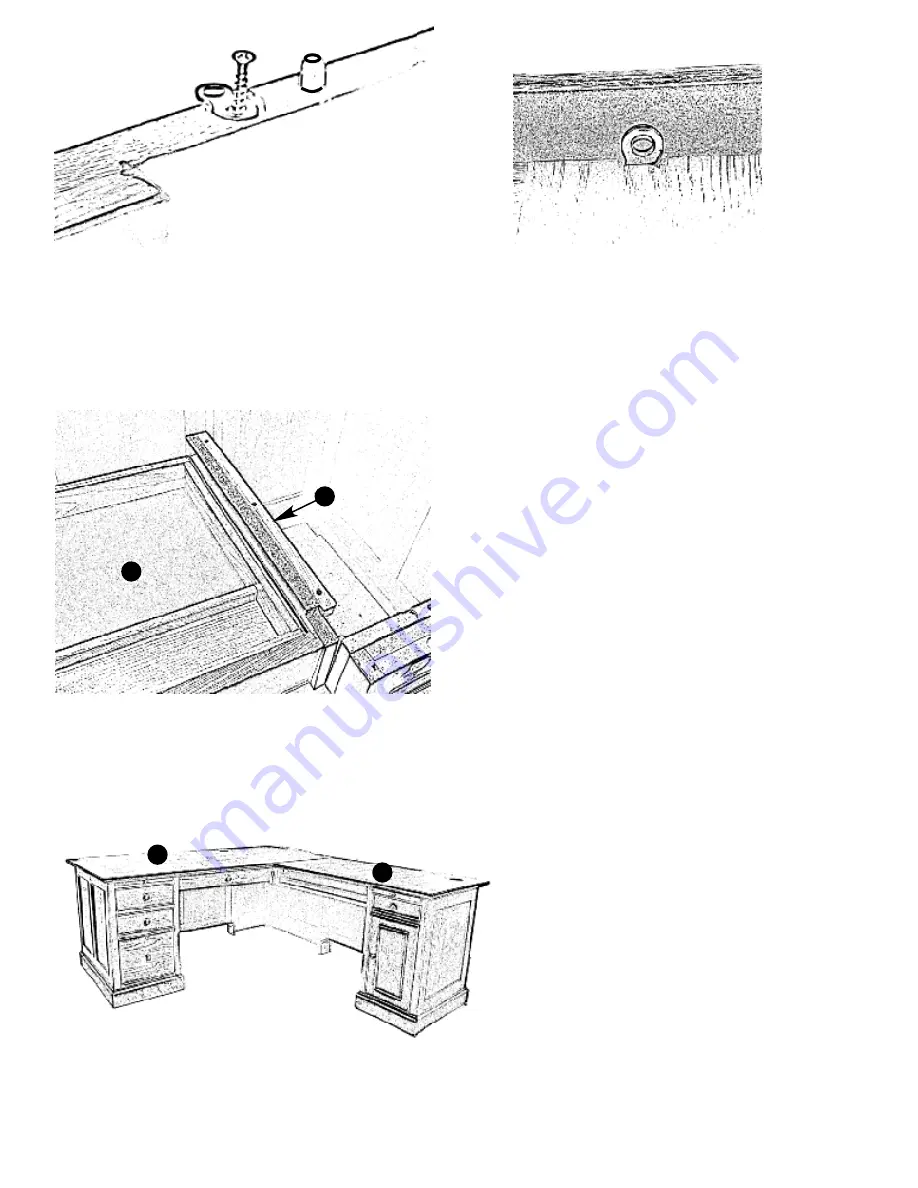
Put 1 [Long (1¼“) Flat Head Wood Screws] (2) through
the larger hole of each [Figure-8 Iron] (1). Fasten each
[Figure-8 Iron] to one of the 24 round depressions on the
top edge of desk. Insert and tap in [Wood Dowels] (4)
into each of six 5/6" holes. The main desk has 15 round
depressions and 4 dowel holes; the return has 9 round
depressions and 2 dowel holes.
Take note of the position of the extra wood connector on
the top of [Main RHF Glide Assembly] (F). You will need
it in later steps.
Look under the overhang of the desk, including kneehole.
There should be 24 half-exposed [Figure-8 Irons] (1).
Use [Short (¾”) Flat Head Wood Screws] (3) to secure
the bases to the tops. Do not use anything longer than
the short wood screws provided. Longer screws may
penetrate the tops and cause irreparable damages.
In addition, use the remaining 3 [Machine Screws] (5) to
fasten [Main Desktop] (I) through the extra wood connec-
tor (found on the top of (F) and noted earlier).
Similarly, use 3 [Long (1¼“) Flat Head Wood Screws] (2)
to fasten top (I) through the extra wood connector found
on top of (D).
The desk is now fully assembled. When moving the
desk, please remove the 4 [Machine Screws] (7) and (5)
holding (E) & (L) so that the desk can be handled as 2
parts.
F
H
I
O
Place [Main Top] (I) and [Return Top] (O) on their respec-
tive bases. Take care to align pre-drilled holes on the
underside of tops and the wood dowels inserted earlier.


